Gọi Weather API với Retrofit2 và Coroutines - Phần 2: MVVM và Couroutines
Bài đăng này đã không được cập nhật trong 2 năm
Hi các bạn, hôm nay mình sẽ tiếp tục series Weather App phần này mình sẽ sử dụng mô hình MVVM và Croutines để gọi api, phần 1 các bạn có thể xem ở link này nhé
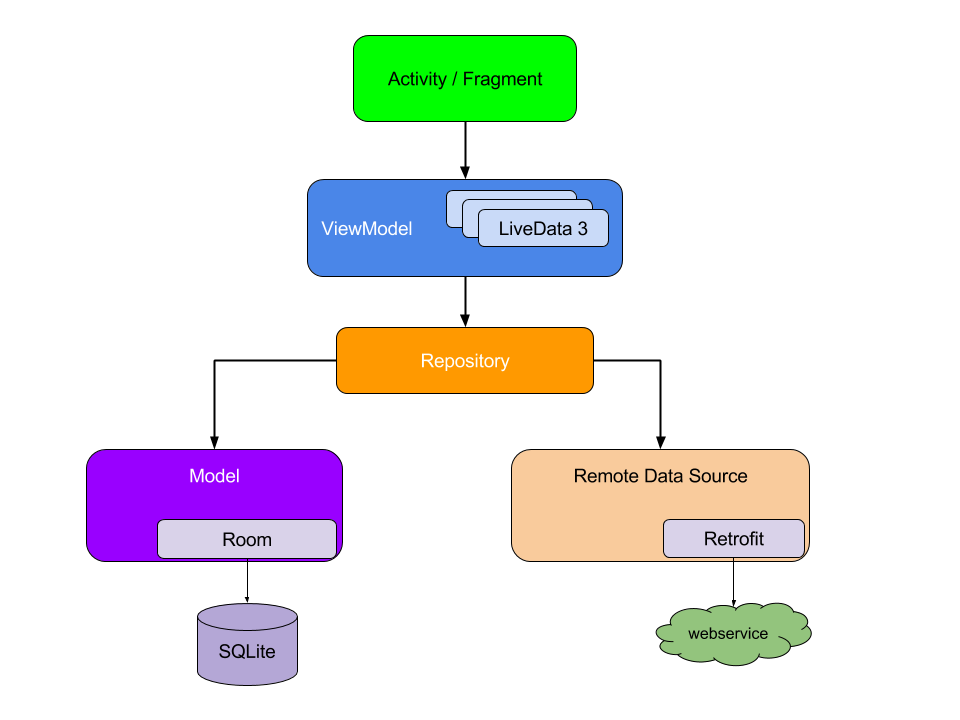
1. Mô Hình MVVM
Đầu tiên thì mô hình MVVM là viết tắt của Model - View - ViewModel, ở đó view (tức giao diện người dùng) sẽ được cập nhật bởi ViewModel và việc xử lý Logic hoặc trình bày dữ liệu sẽ do Model đảm nhận. cơ bản là mô hfinh MVVM sẽ tách biệt code xử lý logic và UI của bạn ra để cho dễ quản lý. Và đây là hình ảnh về mô hình MVVM được lấy trên trang chủ của Android.
2. Coroutines
A coroutine is a concurrency design pattern that you can use on Android to simplify code that executes asynchronously. Coroutines were added to Kotlin in version 1.3 and are based on established concepts from other languages.

On Android, coroutines help to manage long-running tasks that might otherwise block the main thread and cause your app to become unresponsive. Over 50% of professional developers who use coroutines have reported seeing increased productivity. This topic describes how you can use Kotlin coroutines to address these problems, enabling you to write cleaner and more concise app code.
Hiểu đơn giản thì Croutines là một design pattern được tạo ra để xử lý code bất đồng bộ một cách đơn giản hơn và được thêm vào ở Kotlin phiên bản 1.3, và ở Android thì thường dùng cho các task mà bạn cần thời gian để hoàn thành và các task đó sẽ block main thread lại dẫn đến bị ANR, trước cái Coroutines này thì mọi người thường dùng AsyncTask để làm việc này.
3. Bắt đầu code thui
Trước tiên là bạn tạo thư mục như hình nhé. thư mục view để các bạn chứa mọi thứ liên quan tới UI như activity, fragment ..., trong đây không chứa code liên quan tới xử lý logic như là gọi api nhé vì những code đó sẽ nằm bên ViewModel  .
.
implementation một vài thư viện để chạy coroutines
    implementation 'androidx.activity:activity-ktx:1.2.3'
    implementation 'androidx.lifecycle:lifecycle-extensions:2.2.0'
    //noinspection LifecycleAnnotationProcessorWithJava8
    kapt 'androidx.lifecycle:lifecycle-compiler:2.3.1'
ok bước kế tiếp là mình tạo 1 repository như hình phía trên và bỏ phần code gọi api từ MainActivity vào Repository.
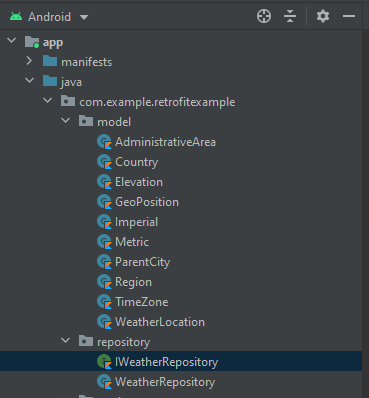
Bạn hãy tạo hai file trong thư mục một interface và một class implement interface đó.
IWeatherRepository.kt
interface IWeatherRepository {

    suspend fun getLocation(
        location: String,
        onSuccess: (location: WeatherLocation) -> Unit,
        onFailed: (message: String) -> Unit
    )

}
Và class WeatherRepository.kt
class WeatherRepository : IWeatherRepository {
    private val weatherService: WeatherService = RetrofitClient.createService()

    override suspend fun getLocation(
        location: String,
        onSuccess: (location: WeatherLocation) -> Unit,
        onFailed: (message: String) -> Unit
    ) = withContext(Dispatchers.IO) {

        weatherService.getLocation(BuildConfig.API_KEY, location)
            .enqueue(object : Callback<ArrayList<WeatherLocation>> {
                override fun onResponse(
                    call: Call<ArrayList<WeatherLocation>>,
                    response: Response<ArrayList<WeatherLocation>>
                ) {
                    val locations = response.body()
                    if (locations != null && locations.isNotEmpty()) {
                        onSuccess(locations.first())
                    }
                }

                override fun onFailure(call: Call<ArrayList<WeatherLocation>>, t: Throwable) {
                    Log.e("RetrofitCallFailed", "${t.message}")
                    onFailed(t.message ?: "Get data fail please try again")
                }
            })
    }
}
khi nhìn vào thì chắc các bạn cũng thấy từ khóa suspend, đây chính là Coroutines á  , trong hàm getLocation withContext(Dispatchers.IO) dùng để báo cho Couroutines biết là mình sẽ chạy đoạn code bên trong bằng luồng IO
về chi tiết suspend là gì thì bạn có thể tham khảo thêm link này nhé
, trong hàm getLocation withContext(Dispatchers.IO) dùng để báo cho Couroutines biết là mình sẽ chạy đoạn code bên trong bằng luồng IO
về chi tiết suspend là gì thì bạn có thể tham khảo thêm link này nhé 
OK, Repository đã có roài bước kế tiếp là tạo ViewModel để sử dụng thui.
MainActivityViewModel.kt
class MainActivityViewModel : ViewModel() {
    private val weatherRepository: IWeatherRepository = WeatherRepository()

    private val _location = MutableLiveData<WeatherLocation>()
    val location: LiveData<WeatherLocation> get() = _location

    private val _requestFail = MutableLiveData<String>()
    val requestFail: LiveData<String> get() = _requestFail

    fun getLocationAPI(cityName: String) {
        viewModelScope.launch {
            weatherRepository.getLocation(cityName,
                onSuccess = {
                    _location.postValue(it)
                }, onFailed = {
                    _requestFail.postValue(it)
                })
        }
    }
}
viewModelScope.launch được tạo tự động ViewModel(), dùng để quản lý các couroutines khi mà viewModel được clear thì tất cả coroutines trong view model này sẽ được cancel toàn bộ để tránh bị leak memory. Bạn có thể dùng AndroidViewModel nếu như cần ApplicationContext trong viewmodel nhé, trong viewmodel chỉ nên xài context của Application không nên dùng của Activity.
Bây giờ thì đã có data, viewmodel cuối cùng là tới tần View . thay vì mình tạo Retrofit và gọi api ở MainActivity như phần 1 thì bây giờ bạn đã tách được phần xử lý gọi api sang viewmodel để nó xử lý và phần view hiện tại mình chỉ cần tập trung vào xử lý UI thui.
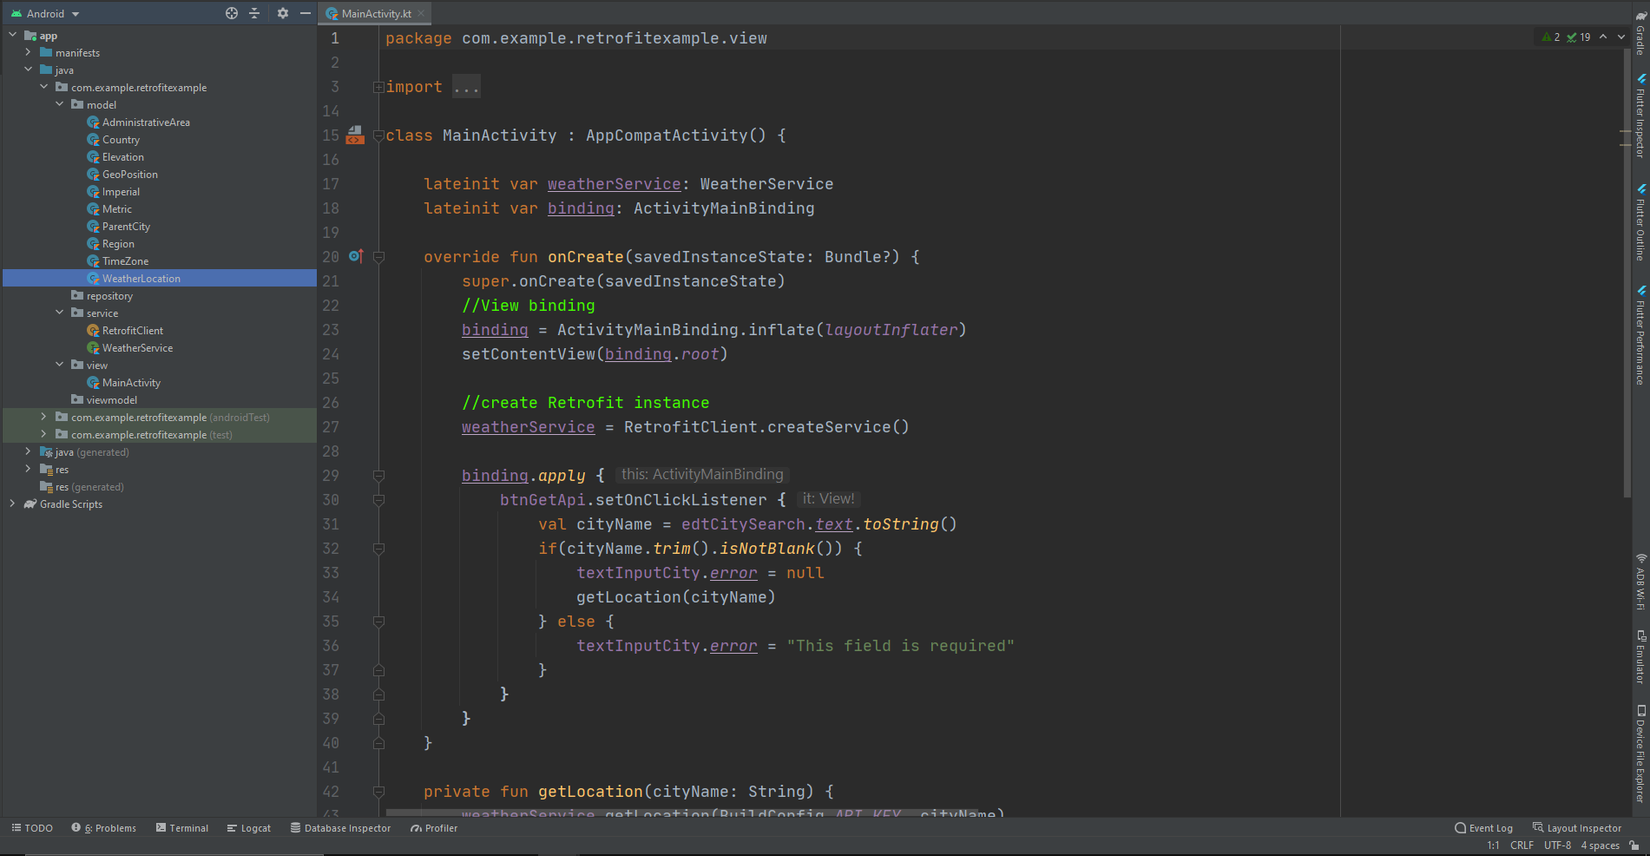
MainActivity.kt
class MainActivity : AppCompatActivity() {

    lateinit var binding: ActivityMainBinding

    private val viewModel: MainActivityViewModel by viewModels()

    override fun onCreate(savedInstanceState: Bundle?) {
        super.onCreate(savedInstanceState)
        //View binding
        binding = ActivityMainBinding.inflate(layoutInflater)
        setContentView(binding.root)

        initViewAction()
        setUpObserver()
    }

    private fun initViewAction() {
        binding.apply {
            btnGetApi.setOnClickListener {
                val cityName = edtCitySearch.text.toString()
                if (cityName.trim().isNotBlank()) {
                    textInputCity.error = null
                    viewModel.getLocationAPI(cityName)
                } else {
                    textInputCity.error = "This field is required"
                }
            }
        }
    }

    private fun setUpObserver() {
        viewModel.apply {
            isShowLoading.observe(this@MainActivity) { isShow ->
                when(isShow) {
                    true -> binding.includeProgress.frameProgress.visibility = View.VISIBLE
                    else -> binding.includeProgress.frameProgress.visibility = View.GONE
                }
            }

            location.observe(this@MainActivity) {
                binding.tvCity.text = it.EnglishName
                viewModel.hideLoading()
            }

            requestFail.observe(this@MainActivity) { ErrorMessage ->
                if(!ErrorMessage.isNullOrBlank()) {
                    viewModel.hideLoading()
                    Snackbar.make(binding.constraintContainer, ErrorMessage, Snackbar.LENGTH_SHORT)
                        .show()
                }
            }
        }
    }
}
Và đây là code UI  .
.
activity_main.xml
<?xml version="1.0" encoding="utf-8"?>
<androidx.constraintlayout.widget.ConstraintLayout xmlns:android="http://schemas.android.com/apk/res/android"
    xmlns:app="http://schemas.android.com/apk/res-auto"
    xmlns:tools="http://schemas.android.com/tools"
    android:layout_width="match_parent"
    android:layout_height="match_parent"
    android:id="@+id/constraint_container"
    tools:context=".view.MainActivity">

    <com.google.android.material.button.MaterialButton
        android:id="@+id/btnGetApi"
        android:layout_width="wrap_content"
        android:layout_height="wrap_content"
        android:layout_marginTop="16dp"
        android:text="Get API"
        android:textAllCaps="false"
        app:layout_constraintEnd_toEndOf="parent"
        app:layout_constraintHorizontal_bias="0.5"
        app:layout_constraintStart_toStartOf="parent"
        app:layout_constraintTop_toBottomOf="@+id/textInputCity" />

    <com.google.android.material.textfield.TextInputLayout
        android:id="@+id/textInputCity"
        style="@style/Widget.MaterialComponents.TextInputLayout.OutlinedBox"
        android:layout_width="0dp"
        android:layout_height="wrap_content"
        android:layout_marginStart="16dp"
        android:layout_marginTop="32dp"
        android:layout_marginEnd="16dp"
        android:hint="City Search"
        app:layout_constraintEnd_toEndOf="parent"
        app:layout_constraintStart_toStartOf="parent"
        app:layout_constraintTop_toTopOf="parent">

        <com.google.android.material.textfield.TextInputEditText
            android:id="@+id/edtCitySearch"
            android:layout_width="match_parent"
            android:layout_height="wrap_content"
            android:ems="15" />
    </com.google.android.material.textfield.TextInputLayout>

    <androidx.constraintlayout.widget.Guideline
        android:id="@+id/guideline"
        android:layout_width="wrap_content"
        android:layout_height="wrap_content"
        android:orientation="horizontal"
        android:layout_marginTop="16dp"
        app:layout_constraintTop_toBottomOf="@id/btnGetApi"/>

    <TextView
        android:id="@+id/tv_city"
        android:layout_width="wrap_content"
        android:layout_height="wrap_content"
        android:layout_marginStart="16dp"
        android:layout_marginTop="16dp"
        app:layout_constraintTop_toBottomOf="@id/guideline"
        app:layout_constraintStart_toStartOf="parent"
        tools:text="Ho Chi Minh" />

    <include
        android:id="@+id/include_progress"
        layout="@layout/progress_layout"/>

</androidx.constraintlayout.widget.ConstraintLayout>
progress_loading.xml
<?xml version="1.0" encoding="utf-8"?>
<FrameLayout xmlns:android="http://schemas.android.com/apk/res/android"
    android:layout_width="match_parent"
    android:layout_height="match_parent"
    android:id="@+id/frame_progress"
    android:background="#66000000"
    android:visibility="gone">

    <ProgressBar
        android:id="@+id/progress"
        android:layout_width="wrap_content"
        android:layout_height="wrap_content"
        android:layout_gravity="center"/>

</FrameLayout>
OK, tiếp theo thì chỉ cần build và chạy thôi, chúc các bạn thành công nhé  .
.
Tham Khảo
- MVVM:
- Coroutines:
- LifeCycle:
All rights reserved
