「Spring Boot #16」 Hướng dẫn sử dụng @ConfigurationProperties
Bài đăng này đã không được cập nhật trong 4 năm
Nguồn: loda.me
Giới thiệu
Tiếp nối Series, bắt đầu từ bài viết trước, bạn hoàn toàn đã có thể làm chủ Spring Boot cho nghiệp vụ của mình rồi. Trong các phần sắp tới sẽ là các kiến thức nâng cao hơn để giúp bạn tăng hiệu quả trong code.
Một trong những điểm tiện dụng của Spring Boot là nó cho phép chúng ta cấu hình ứng dụng từ bên ngoài và lấy các thông tin đó ra một cách dễ dàng.
Trong bài hôm nay chúng ta sẽ tìm hiểu annotation @ConfigurationProperties, một trong những cách khoa học nhất mà bạn nên sử dụng cho ứng dụng của mình.
Cài đặt
pom.xml
<?xml version="1.0" encoding="UTF-8"?>
<project xmlns="http://maven.apache.org/POM/4.0.0" xmlns:xsi="http://www.w3.org/2001/XMLSchema-instance"
         xsi:schemaLocation="http://maven.apache.org/POM/4.0.0 http://maven.apache.org/xsd/maven-4.0.0.xsd">
  <modelVersion>4.0.0</modelVersion>
  <packaging>pom</packaging>

  <parent>
    <groupId>org.springframework.boot</groupId>
    <artifactId>spring-boot-starter-parent</artifactId>
    <version>2.1.4.RELEASE</version>
    <relativePath /> <!-- lookup parent from repository -->
  </parent>
  <groupId>me.loda.spring</groupId>
  <artifactId>spring-boot-learning</artifactId>
  <version>0.0.1-SNAPSHOT</version>
  <name>spring-boot-learning</name>
  <description>Everything about Spring Boot</description>

  <properties>
    <java.version>1.8</java.version>
  </properties>

  <dependencies>
    <dependency>
      <groupId>org.springframework.boot</groupId>
      <artifactId>spring-boot-starter-web</artifactId>
    </dependency>

    <dependency>
      <groupId>org.projectlombok</groupId>
      <artifactId>lombok</artifactId>
      <optional>true</optional>
    </dependency>
  </dependencies>

  <build>
    <plugins>
      <plugin>
        <groupId>org.springframework.boot</groupId>
        <artifactId>spring-boot-maven-plugin</artifactId>
      </plugin>
    </plugins>
  </build>

</project>
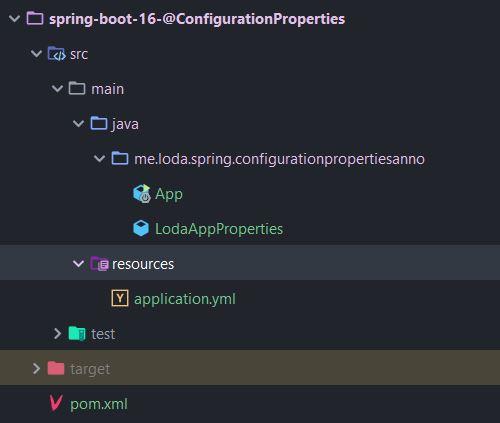
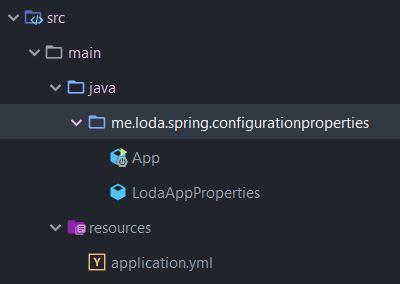
Cấu trúc thư mục:
Cấu hình đơn giản
Giả sử, ứng dụng của tôi sẽ yêu cầu có một số giá trị toàn cục, mà thay vì cấu hình ở trong code, tôi muốn lưu nó ở bên ngoài, để tiện thay đổi mỗi khi cần.
Thì tôi sẽ làm như sau, tạo ra một class chứa các thông tin:
@Data // Lombok, xem chi tiết tại bài viết
@Component // Là 1 spring bean
// @PropertySource("classpath:loda.yml") // Đánh dấu để lấy config từ trong file loda.yml
@ConfigurationProperties(prefix = "loda") // Chỉ lấy các config có tiền tố là "loda"
public class LodaAppProperties {
    private String email;
    private String googleAnalyticsId;

    // standard getters and setters
}
Chúng ta sử dụng @Component để Spring biết đây là một bean và khởi tạo nó.
Sử dụng @PropertySource để định nghĩa tên của file config. Nếu không có annotation này, Spring sẽ sử dụng file mặc định (classpath:application.yml trong thư mục resources)
Cuối cùng là @ConfigurationProperties, annotation này đánh dấu class bên dưới nó là properties, các thuộc tính sẽ được tự động nạp vào khi Spring khởi tạo.
Lưu ý: các thuộc tính này được xác định bởi prefix=loda. Cái này bạn xem file application.yml ở dưới sẽ hiểu.
Spring sẽ tự tìm các hàm setter để set giá trị cho các thuộc tính này, nên quan trọng là bạn phải tạo ra các setter method. (Ở đây tôi nhường việc đó cho lombok).
Ngoài ra, để chạy được tính năng này, bạn cần kích hoạt nó bằng cách gắn @EnableConfigurationProperties lên một configuration nào đó. Ở đây tôi gắn lên hàm main luôn.
@SpringBootApplication
@EnableConfigurationProperties
public class App {
    public static void main(String[] args) {
        SpringApplication.run(App.class, args);
    }
}
Vậy là xong, đơn giản phải không. Bây giờ, Spring sẽ tự động bind toàn bộ giá trị từ trong file application.yml vào bean LodaAppProperties cho chúng ta.
Tạo ra file application.yml tại thư mục resources:
Thêm các thông tin chúng ta cần:
loda:
  email: loda.namnh@gmail.com
  googleAnalyticsId: U-xxxxx
Chúng ta phải đặt các thuộc tính này sau prefix loda
Chạy thử
Teedeee, thế là xong, rất đơn giản, để kiểm nghiệm xem Spring đã nhận các thông số cấu hình này chưa. Chúng ta sẽ in ra:
@SpringBootApplication
@EnableConfigurationProperties
public class App implements CommandLineRunner {
    public static void main(String[] args) {
        SpringApplication.run(App.class, args);
    }

    @Autowired LodaAppProperties lodaAppProperties;

    @Override
    public void run(String... args) throws Exception {
        System.out.println("Global variable:");
        System.out.println("\t Email: "+lodaAppProperties.getEmail());
        System.out.println("\t GA ID: "+lodaAppProperties.getGoogleAnalyticsId());
    }
}
Kết quả:
Global variable:
	 Email: loda.namnh@gmail.com
	 GA ID: U-xxxxx
Bây giờ, ở bất kỳ đâu trong chương trình, khi cần lấy các thông tin config, tôi chỉ cần:
@Autowired LodaAppProperties lodaAppProperties;
là xong.
Nested Properties
Chúng ta có thể config các thuộc tính bên trong Class kể cả khi nó là Lists, Maps hay một class khác.
Bổ sung thêm thuộc tính:
@Data // Lombok, xem chi tiết tại bài viết
@Component // Là 1 spring bean
//@PropertySource("classpath:loda.yml") // Đánh dấu để lấy config từ trong file loda.yml
@ConfigurationProperties(prefix = "loda") // Chỉ lấy các config có tiền tố là "loda"
public class LodaAppProperties {
    private String email;
    private String googleAnalyticsId;

    private List<String> authors;

    private Map<String, String> exampleMap;

    // standard getters and setters
}
Sửa file application.yml:
loda:
  email: loda.namnh@gmail.com
  googleAnalyticsId: U-xxxxx
  authors:
    - loda
    - atom
  exampleMap:
    key1: hello
    key2: world
Chạy lại chương trình:
@Override
public void run(String... args) throws Exception {
    System.out.println("Global variable:");
    System.out.println("\t Email: " + lodaAppProperties.getEmail());
    System.out.println("\t GA ID: " + lodaAppProperties.getGoogleAnalyticsId());
    System.out.println("\t Authors: " + lodaAppProperties.getAuthors());
    System.out.println("\t Example Map: " + lodaAppProperties.getExampleMap());
}
Kết quả:
Global variable:
	 Email: loda.namnh@gmail.com
	 GA ID: U-xxxxx
	 Authors: [loda, atom]
	 Example Map: {key1=hello, key2=world}
Link Github
Chúng ta đã tìm hiểu cách sử dụng annotation @ConfigurationProperties và các ứng dụng của nó. Áp dụng cách config này sẽ giúp bạn kiểm soát tốt hơn và sử dụng dễ hơn.
Đây là một bài viết trong [Series làm chủ Spring Boot, từ zero to hero][link-series-spring-boot] [link-series-spring-boot]: https://loda.me/spring-boot-0-series-lam-chu-spring-boot-tu-zero-to-hero-loda1558963914472
Và như mọi khi, toàn bộ code đều được up lên Github. <i class="fab fa-github"></i>
All rights reserved
