「Spring Boot #14」 Restful API + @RestController + @PathVariable + @RequestBody
Bài đăng này đã không được cập nhật trong 4 năm
Nguồn: loda.me
Giới thiệu
Trong bài trước, chúng ta đã tìm hiểu cách làm Web với Spring boot và Thymeleaf. Mặc dù rất tốt rồi, nhưng đó chưa hẳn là điểm mạnh của Spring Boot.
Hiện tại xu hướng hiện nay là sẽ để các frontend framework take care nhiều việc hơn, còn phía server chỉ nên cung cấp API cho frontend framework là đủ.
Spring boot thì lại quá mạnh cho việc tạo Restful API :3
@RestController
Khác với @Controller là sẽ trả về một template.
@RestController trả về dữ liệu dưới dạng JSON.
@RestController
@RequestMapping("/api/v1")
public class RestApiController{

    @GetMapping("/todo")
    public List<Todo> getTodoList() {
        return todoList;
    }
}
Các đối tượng trả về dưới dạng Object sẽ được Spring Boot chuyển thành JSON.
Các đối tượng trả về rất đa dạng, bạn có thể trả về List, Map, v.v.. Spring Boot sẽ convert hết chúng thành JSON, mặc định sẽ dùng Jackson converter để làm điều đó.
Nếu bạn muốn API tùy biến được kiểu dữ liệu trả về, bạn có thể trả về đối tượng ResponseEntity của Spring cung cấp. Đây là đối tượng cha của mọi response và sẽ wrapper các object trả về. Cái này bạn xem tiếp phần dưới sẽ rõ.
@RequestBody
Vì bây giờ chúng ta xây dựng API, nên các thông tin từ phía Client gửi lên Server sẽ nằm trong Body, và cũng dưới dạng JSON luôn.
@RestController
@RequestMapping("/api/v1")
public class RestApiController {

    List<Todo> todoList = new CopyOnWriteArrayList<>();

    @PostMapping("/todo")
    public ResponseEntity addTodo(@RequestBody Todo todo) {
        todoList.add(todo);
        // Trả về response với STATUS CODE = 200 (OK)
        // Body sẽ chứa thông tin về đối tượng todo vừa được tạo.
        return ResponseEntity.ok().body(todo);
    }

}
Tất nhiên là Spring Boot sẽ làm giúp chúng ta các phần nặng nhọc, nó chuyển chuỗi JSON trong request thành một Object Java. bạn chỉ cần cho nó biết cần chuyển JSON thành Object nào bằng Annotation @RequestBody
@PathVariable
RESTful API là một tiêu chuẩn dùng trong việc thết kế các thiết kế API cho các ứng dụng web để quản lý các resource.
Và với cách thống nhất này, thì sẽ có một phần thông tin quan trọng sẽ nằm ngay trong chính URL của api.
Ví dụ:
- URL tạo To-do: https://loda.me/todo. Tương ứng với HTTP method là POST
- URL lấy thông tin To-do số 12: https://loda.me/todo/12. Tương ứng với HTTP method là GET
- URL sửa thông tin To-do số 12: https://loda.me/todo/12. Tương ứng với HTTP method là PUT
- URL xoá To-do số 12: https://loda.me/todo/12. Tương ứng với HTTP method là DELETE
Ngoài thông tin trong Body của request, thì cái chúng ta cần chính là cái con số 12 nằm trong URL. Phải lấy được con số đó thì mới biết được đối tượng To-do cần thao tác là gì.
@PathVariable tham chiến.
@RestController
@RequestMapping("/api/v1")
public class RestApiController {

    /*
    phần path URL bạn muốn lấy thông tin sẽ để trong ngoặc kép {}
     */
    @GetMapping("/todo/{todoId}")
    public Todo getTodo(@PathVariable(name = "todoId") Integer todoId){
        // @PathVariable lấy ra thông tin trong URL
        // dựa vào tên của thuộc tính đã định nghĩa trong ngoặc kép /todo/{todoId}
        return todoList.get(todoId);
    }
}
Demo
Chúng ta sẽ demo một server Rest API đơn giản với Spring Boot. Các API sẽ phục vụ việc thao tác với đối tượng To-do.
Giống bài #13 nhưng lần này là API chứ không phải website.
Cài đặt
pom.xml
<?xml version="1.0" encoding="UTF-8"?>
<project xmlns="http://maven.apache.org/POM/4.0.0" xmlns:xsi="http://www.w3.org/2001/XMLSchema-instance"
         xsi:schemaLocation="http://maven.apache.org/POM/4.0.0 http://maven.apache.org/xsd/maven-4.0.0.xsd">
    <modelVersion>4.0.0</modelVersion>
    <packaging>pom</packaging>
    <parent>
        <groupId>org.springframework.boot</groupId>
        <artifactId>spring-boot-starter-parent</artifactId>
        <version>2.0.5.RELEASE</version>
        <relativePath /> <!-- lookup parent from repository -->
    </parent>
    <groupId>me.loda.spring</groupId>
    <artifactId>spring-boot-learning</artifactId>
    <version>0.0.1-SNAPSHOT</version>
    <name>spring-boot-learning</name>
    <description>Everything about Spring Boot</description>

    <properties>
        <java.version>1.8</java.version>
    </properties>

    <dependencies>

        <!--spring mvc, rest-->
        <dependency>
            <groupId>org.springframework.boot</groupId>
            <artifactId>spring-boot-starter-web</artifactId>
        </dependency>
    </dependencies>

    <build>
        <plugins>
        <plugin>
            <groupId>org.springframework.boot</groupId>
            <artifactId>spring-boot-maven-plugin</artifactId>
        </plugin>
        </plugins>
    </build>

</project>
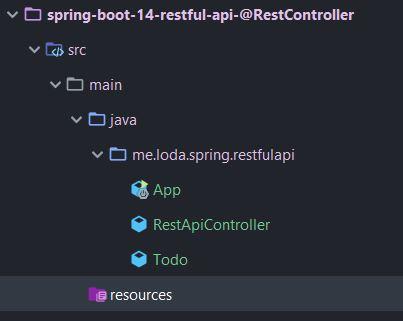
Cấu trúc thư mục:
Tạo model
Sử dụng Lombok cho tiện nha các bạn.
Todo.java
import lombok.Data;

@Data
public class Todo {
    private String title;
    private String detail;
}
Tạo RestController
Phần này rất dễ, thay @Controller thành RestController thôi  ) đùa đấy, bạn xem code ở dưới nhẻ.
Vì tôi chỉ muốn Demo cách tạo API cho các bạn, nên chúng ta tạm bỏ qua Database nhé 
Bạn để ý 2 đoạn @RequestMapping và @PostConstruct nhé!
import java.util.List;
import java.util.concurrent.CopyOnWriteArrayList;

import org.springframework.http.ResponseEntity;
import org.springframework.web.bind.annotation.DeleteMapping;
import org.springframework.web.bind.annotation.GetMapping;
import org.springframework.web.bind.annotation.PathVariable;
import org.springframework.web.bind.annotation.PostMapping;
import org.springframework.web.bind.annotation.PutMapping;
import org.springframework.web.bind.annotation.RequestBody;
import org.springframework.web.bind.annotation.RequestMapping;
import org.springframework.web.bind.annotation.RestController;

/**
 * Lưu ý, @RequestMapping ở class, sẽ tác động tới
 * tất cả các RequestMapping ở bên trong nó.
 *
 * Mọi Request ở trong method sẽ được gắn thêm prefix /api/v1
 */
@RestController
@RequestMapping("/api/v1")
public class RestApiController {

    private List<Todo> todoList = new CopyOnWriteArrayList<>();


    // bạn còn nhớ @PostConstruct dùng để làm gì chứ?
    // nếu không nhớ, hãy coi lại bài viết Spring Boot #3 nhé
    @PostConstruct
    public void init(){
        // Thêm null vào List để bỏ qua vị trí số 0;
        todoList.add(null);
    }

    @GetMapping("/todo")
    public List<Todo> getTodoList() {
        return todoList;
    }

    /*
    phần path URL bạn muốn lấy thông tin sẽ để trong ngoặc kép {}
     */
    @GetMapping("/todo/{todoId}")
    public Todo getTodo(@PathVariable(name = "todoId") Integer todoId){
        // @PathVariable lấy ra thông tin trong URL
        // dựa vào tên của thuộc tính đã định nghĩa trong ngoặc kép /todo/{todoId}
        return todoList.get(todoId);
    }


    /*
    @RequestBody nói với Spring Boot rằng hãy chuyển Json trong request body
    thành đối tượng Todo
     */
    @PutMapping("/todo/{todoId}")
    public Todo editTodo(@PathVariable(name = "todoId") Integer todoId,
                         @RequestBody Todo todo){
        todoList.set(todoId, todo);
        // Trả về đối tượng sau khi đã edit
        return todo;    }

    @DeleteMapping("/todo/{todoId}")
    public ResponseEntity deleteTodo(@PathVariable(name = "todoId") Integer todoId){
        todoList.remove(todoId.intValue());
        return ResponseEntity.ok().build();
    }

    @PostMapping("/todo")
    public ResponseEntity addTodo(@RequestBody Todo todo) {
        todoList.add(todo);
        // Trả về response với STATUS CODE = 200 (OK)
        // Body sẽ chứa thông tin về đối tượng todo vừa được tạo.
        return ResponseEntity.ok().body(todo);
    }
}
Chạy thử
App.java
@SpringBootApplication
public class App {
    public static void main(String[] args) {
        SpringApplication.run(App.class, args);
    }
}
Server sẽ on trên port 8080.
Bây giờ chỉ cần Test thôi!
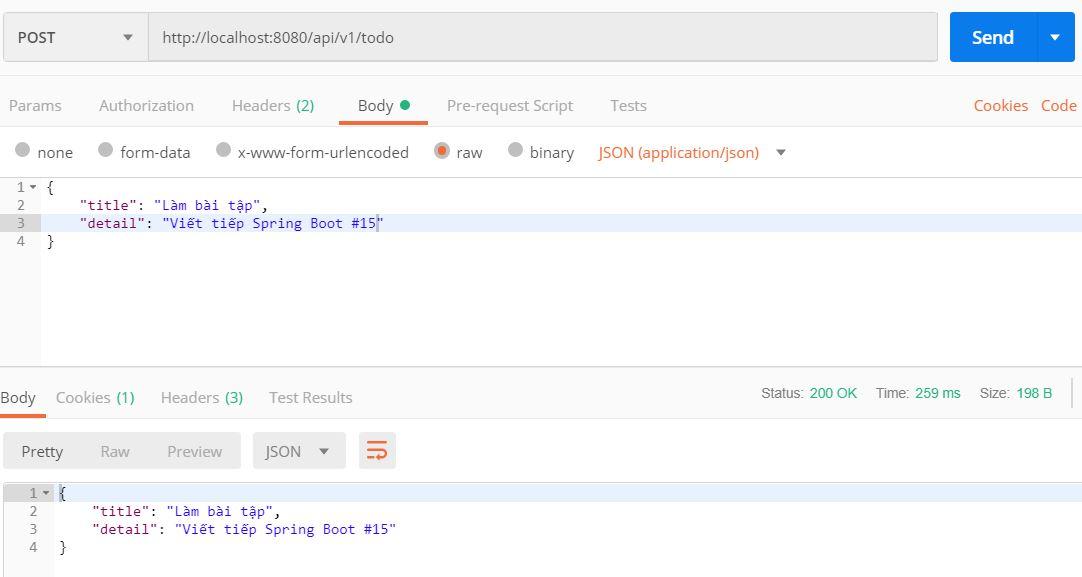
Tạo ra một đối tượng To-do
POST http://localhost:8080/api/v1/todo
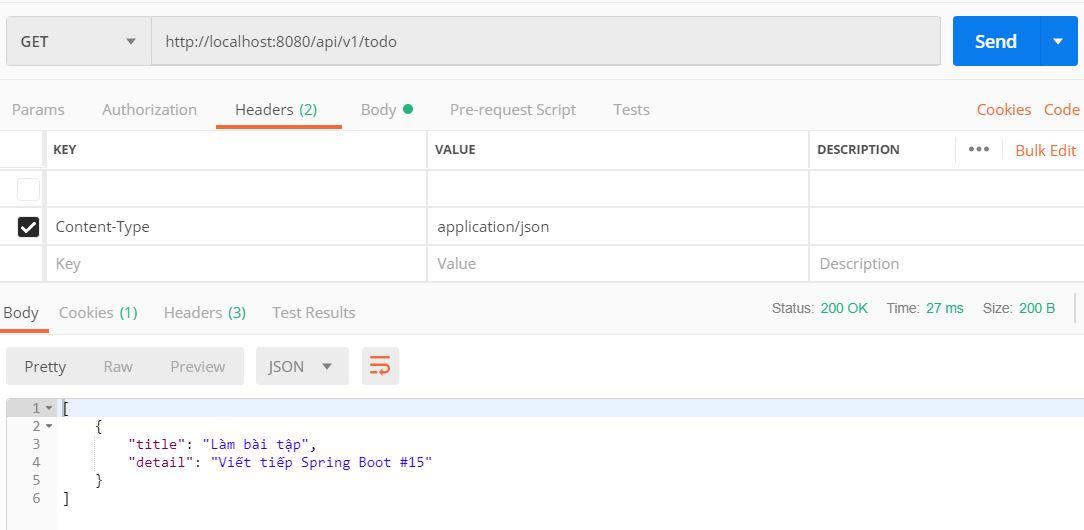
Xem danh sách To-do
GET http://localhost:8080/api/v1/todo
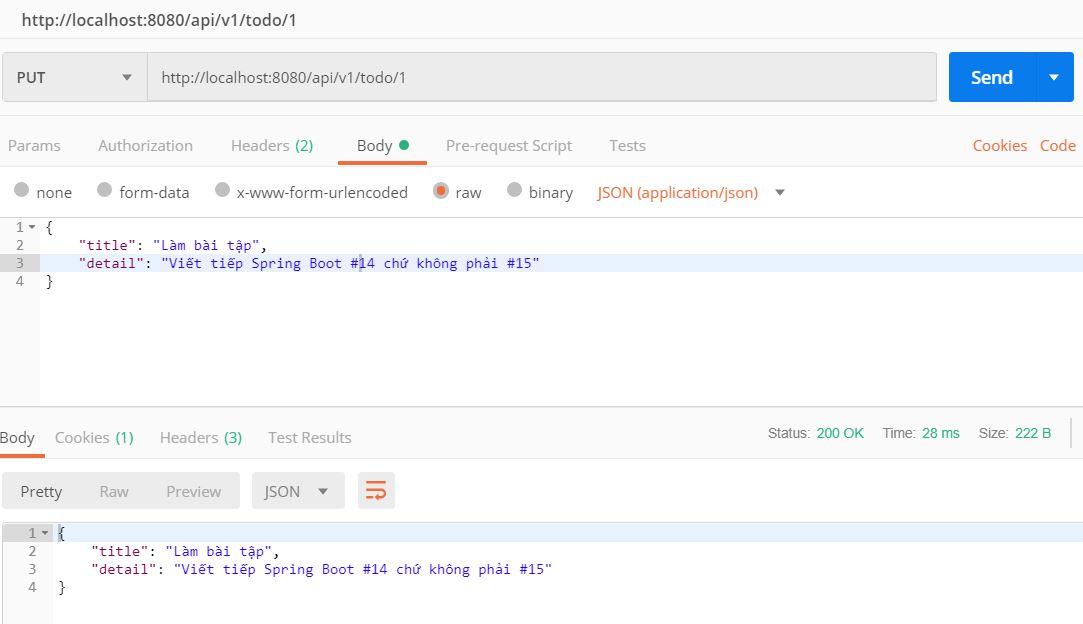
Sửa To-do
PUT http://localhost:8080/api/v1/todo/1
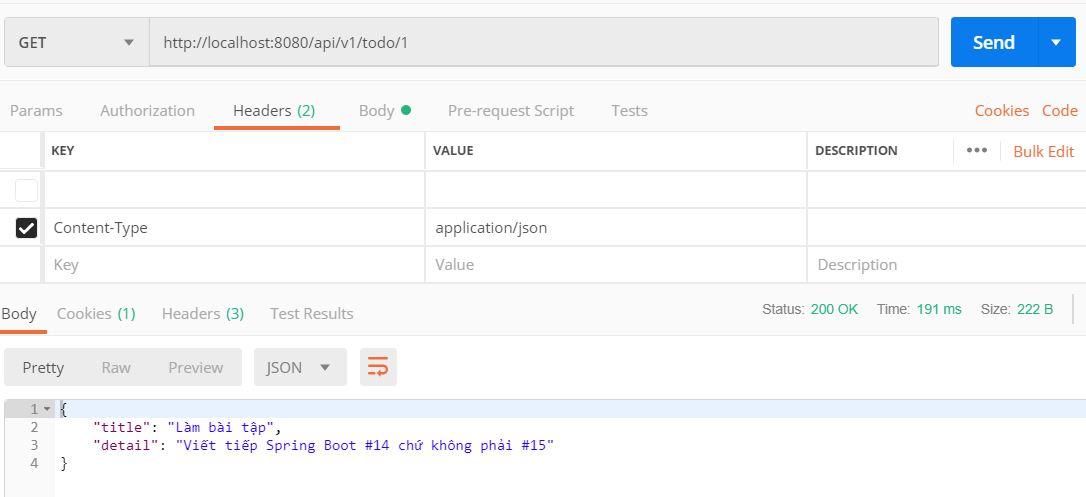
Lấy thông tin To-do
GET http://localhost:8080/api/v1/todo/1
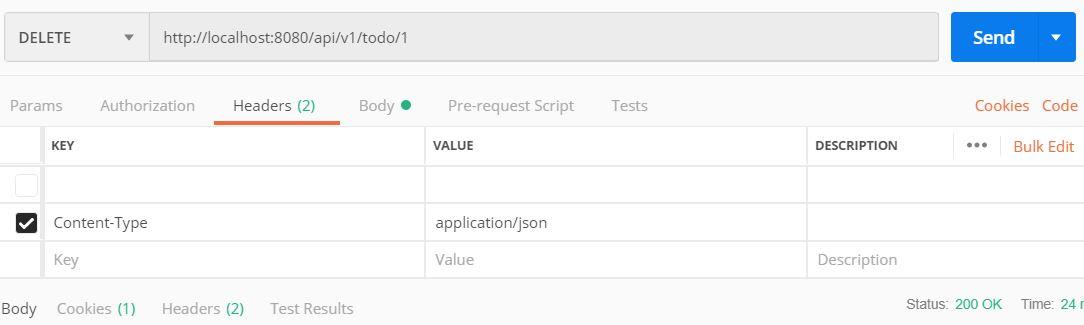
Xóa To-do
DELETE http://localhost:8080/api/v1/todo/1
Kết
Đây là một bài viết trong [Series làm chủ Spring Boot, từ zero to hero][link-series-spring-boot] [link-series-spring-boot]: https://loda.me/spring-boot-0-series-lam-chu-spring-boot-tu-zero-to-hero-loda1558963914472
Như mọi khi, toàn bộ code tham khảo tại Github <i class="fab fa-github"></i>
All rights reserved
