Securing Spring Boot with JWT
Bài đăng này đã không được cập nhật trong 2 năm
Trong bài viết này, mình sẽ không đi sâu vào việc giải thích cũng như phân tích cơ chế hoạt động của JWT mà sẽ tập trung hướng dẫn các bạn làm sao để tạo một ứng dụng web với Spring Boot và làm sao sử dụng JWT trong ứng dụng Spring Web của các bạn Mục tiêu trong bài viết này bao gồm:
- Giới thiệu về JWT, ứng dụng của JWT trong bảo mật
- Xây dựng REST service với Spring, kết hợp JWT cho mục đích bảo mật.
1. JWT
Trong bài này, mình sẽ sẽ giới thiệu cho các bạn những kiến thức cơ bản của JWT, rằng JWT là gì? tại sao lại sử dụng JWT và nó đc sử dụng như thế nào Các bạn có thể tham khảo tại một số pagge mà mình thấy khá dễ hiểu như Tại TechMaster Blog hoặc Một page tiếng Anh khá hay
Để giúp các bạn hiểu được về các JWT hoạt động, mình sẽ sử dụng sơ đồ dưới đây
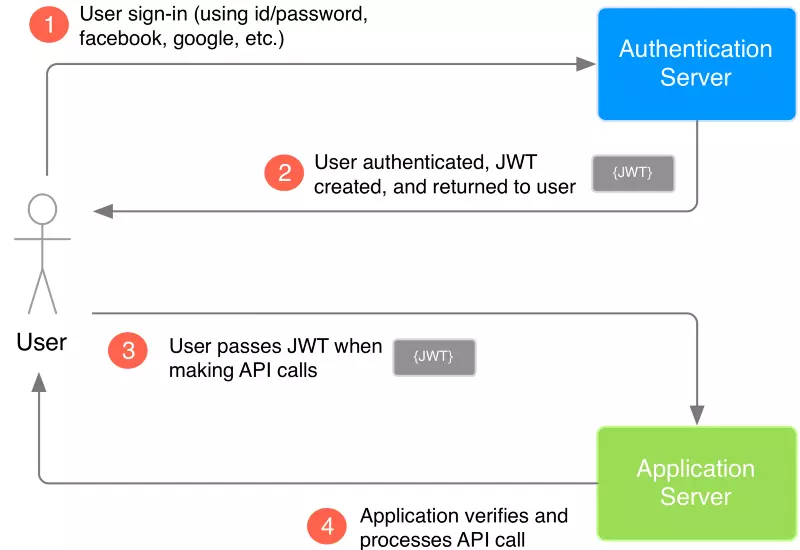 Nhìn vào sơ đồ, ta có thể thấy luồng đi như sau
- User thực hiện login bằng cách gửi id/password hay sử dụng các tài khoản mạng xã hội lên phía Authentication Server.
- Authentication Server tiếp nhận các dữ liệu mà User gửi lên để phục vụ cho việc xác thực người dùng. Trong trường hợp thành công, Authentication Server sẽ tạo một JWT và trả về cho người dùng thông qua response.
- Người dùng nhận được JWT do Authentication Server vừa mới trả về làm "chìa khóa" để thực hiện các "lệnh" tiếp theo đối với Application Server.
- Application Server trước khi thực hiện lệnh được gọi từ phía User, sẽ verify JWT gửi lên. Nếu OK, tiếp tục thực hiện lệnh được gọi.
Thế thôi nhỉ. Mình sẽ minh họa cho các bạn dễ hiểu hơn bằng một ví dụ thực tế hơn trong cuộc sống nhé.
Bạn là một học sinh của 1 trường THPT A. Hôm nay bạn đến sớm hơn mọi hôm và muốn vào được lớp thì cửa lớp phải được mở. Nhưng trường bạn khác với những trường khác là cửa của các lớp luôn khóa khi hết giờ và bảo vệ thì chẳng có nhiệm vụ phải đi mở cửa từng lớp. Thay vào đó, mỗi lớp sẽ phải cử ra người để đi lấy chìa khóa tại phòng bảo vệ để mở cửa cho lớp mình. Như thế, bạn có thể hình dung
- Bạn là User trong sơ đồ ở trên
- Phòng Bảo Vệ là Authentication Server
- Lớp bạn là Application Server
- Chìa khóa là JWT Đầu tiên, bạn phải tới phòng bảo vệ, để bác bảo vệ xác định bạn có đúng là học sinh của trường ko, học lớp nào và giao chìa khóa (Tuơng ứng với việc user gửi thông tin về username/password để Authenticaion Server xác thực và trả về cho người dùng 1 mã JWT). Bạn nhận được chìa khóa, lấy chìa khóa để mở cửa trước khi có thể vào bên trong lớp (Tuơng ứng với việc người dùng sử dụng JWT kèm theo để Application Verify trước khi thực hiện các lệnh mà User yêu cầu)
OK. rất dễ hình dung đúng k nào? Phần giới thiệu về tư tưởng mà người ta sử dụng JWT để phục vụ cho viện authentication mình chỉ nói qua vậy thôi. Các bạn có thể tham khảo ở rất nhiều nguồn để có cái nhìn rõ hơn nhé.
2. Tích hợp JWT trong Spring Framework
Ở trong bài viết này, mình sử dụng Spring Boot cho dễ nhé. Để các bạn giảm đc effort cho việc configuration.
2.1. Tạo ứng dụng Spring Boot với IntelliJ
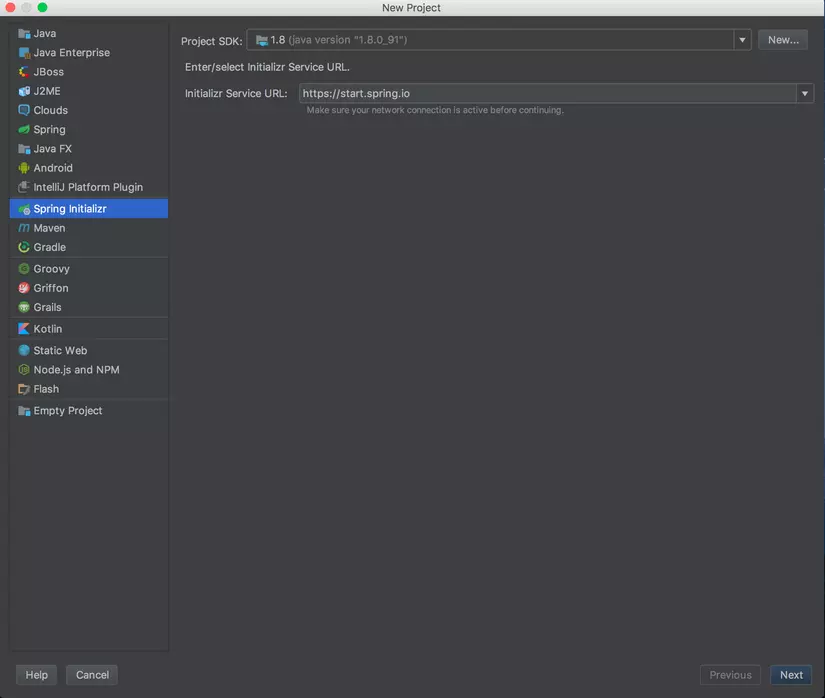
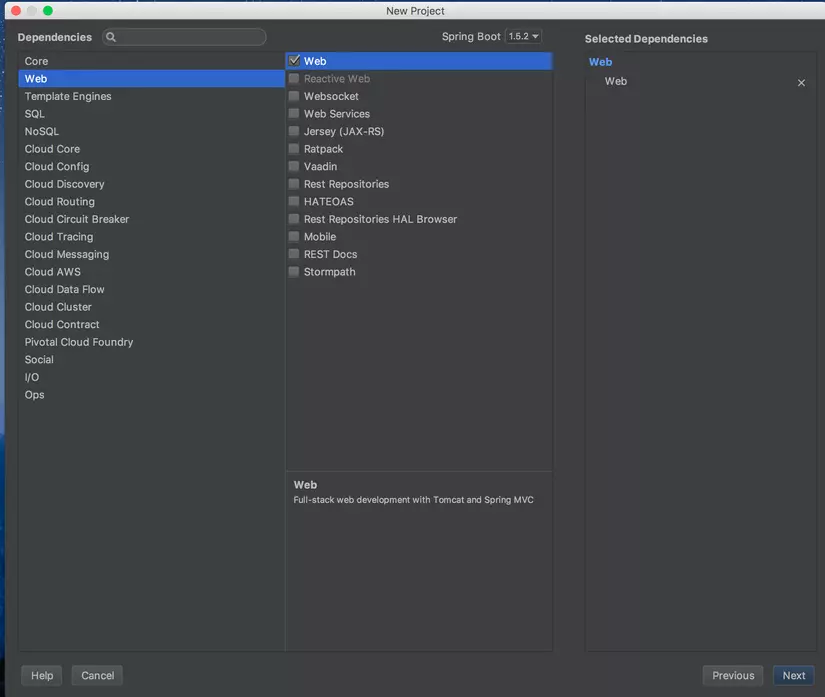
Mình sẽ chọn IDE IntelliJ hướng dẫn các bạn tạo project Spring Boot nhé. Mình cũng khuyến khích các bạn sử dụng IntelliJ vì nó tích hợp rất nhiều plugin hay ho. Tuy nhiên vì vấn đề bản quyền nên nhiều công ty trong tin tuyển dụng thường ghi yêu cầu là thành thạo Eclipse  Các bạn tham khảo các screenshoot sau nhé
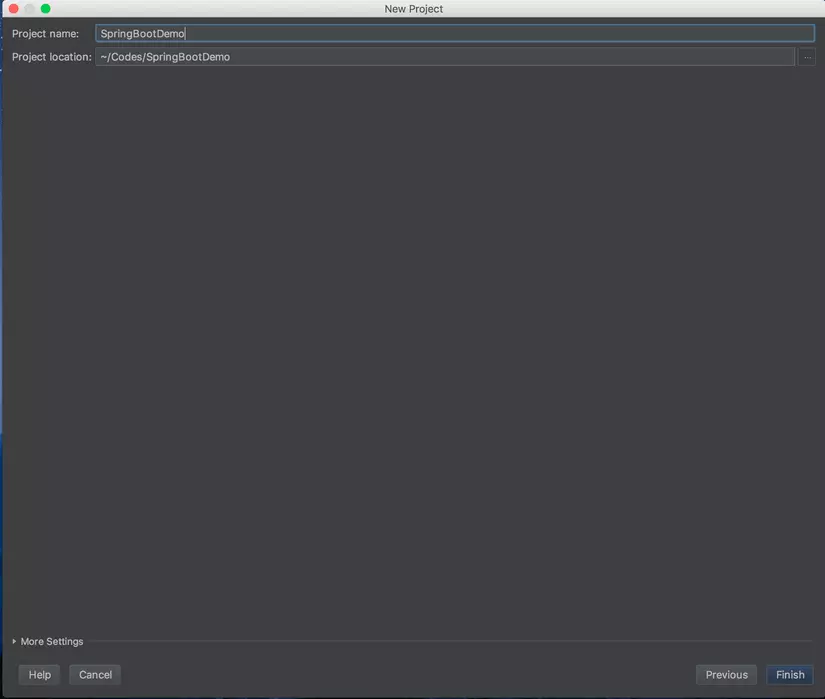 Ok. Vậy là xong.
2.1. Rest Service với Spring
Trong ví dụ này, mình sẽ ko sử dụng DB để các bạn clone repository trên github này về có thể chạy ngay để hiểu cách sử dụng mà ko cần phải tạo DB nhé.
Controller mà mình sẽ sử dụng ở đây là NewsController. Controller này sẽ làm nhiệm vụ điều phối các request liên quan tới Tin Tức
Đầu tiên, mình sẽ tạo 1 Class News đơn giản gồm 3 thuộc tính tiêu đề, nội dung và tác giả nhé
package com.nhs3108.models;

/**
 * Created by nhs3108 on 4/2/17.
 */
public class News {
    public String title;
    public String content;
    public String author;

    public String getTitle() {
        return title;
    }

    public void setTitle(String title) {
        this.title = title;
    }

    public String getContent() {
        return content;
    }

    public void setContent(String content) {
        this.content = content;
    }

    public String getAuthor() {
        return author;
    }

    public void setAuthor(String author) {
        this.author = author;
    }
}
Người dùng thực hiện request GET /news để lấy thông tin toàn bộ danh sách các tin tức. Tại NewsController ta định nghĩa như sau
@RestController
@RequestMapping(value = "/news")
public class NewsController {
    @RequestMapping(method = RequestMethod.GET)
    public List<News> news() {
        // Tham khảo FakeUtils mình có viết trong package Utils để fake dữ liệu nhé
        return FakeUtils.getAllNews();
    }
}
Ok. Chạy App và sử dụng thử request dạng GET để xem ta nhận được gì nhé.
[
  {
    "title": "Title 1",
    "content": "Framgia - From asian to the world",
    "author": "Hong Son"
  },
  {
    "title": "Title 2",
    "content": "Framgia - We make it awesome",
    "author": "Son Nguyen"
  },
  {
    "title": "Title 3",
    "content": "Framgia - 2012 to 2017",
    "author": "Mr Son"
  }
]
Phần này mình cũng sẽ không nói nhiều. Cách viết Spring Rest API chắc chắn đã có rất nhiều bài hướng dẫn rồi. Mình chỉ tạo 1 demo nho nhỏ để đi vào vấn đề chính thôi. Giờ chúng ta sẽ thực sự bắt đầu
2.2. Tích hợp JWT
Trong file pom.xml, các bạn thêm các dependency cần thiết để phục vụ cho demo của chúng ta nhé
<dependencies>
		<dependency>
			<groupId>org.springframework.boot</groupId>
			<artifactId>spring-boot-starter-web</artifactId>
		</dependency>

		<dependency>
			<groupId>org.springframework.boot</groupId>
			<artifactId>spring-boot-starter-test</artifactId>
			<scope>test</scope>
		</dependency>
		<dependency>
			<groupId>org.springframework.boot</groupId>
			<artifactId>spring-boot-starter-security</artifactId>
		</dependency>

		<dependency>
			<groupId>io.jsonwebtoken</groupId>
			<artifactId>jjwt</artifactId>
			<version>0.7.0</version>
		</dependency>

		<dependency>
			<groupId>com.auth0</groupId>
			<artifactId>auth0</artifactId>
			<version>1.0.0</version>
		</dependency>

		<dependency>
			<groupId>com.auth0</groupId>
			<artifactId>auth0-spring-security-api</artifactId>
			<version>1.0.0-rc.2</version>
		</dependency>
	</dependencies>
Để khai báo với Spring Framework rằng chúng ta enable WebSecurity, chúng ta sẽ tạo WebSecurityConfig.java, kế thừa thằng WebSecurityConfigurerAdapter để config sao cho phù hợp với yêu cầu của hệ thống ta đang làm.
package com.nhs3108.configs;

import com.nhs3108.filtes.JWTAuthenticationFilter;
import com.nhs3108.filtes.JWTLoginFilter;
import org.springframework.context.annotation.Configuration;
import org.springframework.http.HttpMethod;
import org.springframework.security.config.annotation.authentication.builders.AuthenticationManagerBuilder;
import org.springframework.security.config.annotation.web.builders.HttpSecurity;
import org.springframework.security.config.annotation.web.configuration.EnableWebSecurity;
import org.springframework.security.config.annotation.web.configuration.WebSecurityConfigurerAdapter;
import org.springframework.security.web.authentication.UsernamePasswordAuthenticationFilter;

/**
* Created by nhs3108 on 29/03/2017.
*/
@Configuration
@EnableWebSecurity
public class WebSecurityConfig extends WebSecurityConfigurerAdapter {
   @Override
   protected void configure(HttpSecurity http) throws Exception {
       http.csrf().disable().authorizeRequests()
               .antMatchers("/").permitAll() // Có nghĩa là request "/" ko cần phải đc xác thực
               .antMatchers(HttpMethod.POST, "/login").permitAll() // Request dạng POST tới "/login" luôn được phép truy cập dù là đã authenticated hay chưa
               .anyRequest().authenticated() // Các request còn lại đều cần được authenticated
               .and()
               // Add các filter vào ứng dụng của chúng ta, thứ mà sẽ hứng các request để xử lý trước khi tới các xử lý trong controllers.
               // Về thứ tự của các filter, các bạn tham khảo thêm tại http://docs.spring.io/spring-security/site/docs/3.0.x/reference/security-filter-chain.html mục 7.3 Filter Ordering
               .addFilterBefore(new JWTLoginFilter("/login", authenticationManager()), UsernamePasswordAuthenticationFilter.class)
               .addFilterBefore(new JWTAuthenticationFilter(), UsernamePasswordAuthenticationFilter.class);
   }

   @Override
   protected void configure(AuthenticationManagerBuilder auth) throws Exception {
       auth.inMemoryAuthentication().withUser("admin").password("password").roles("ADMIN");
       /*
       // Mình comment phần dưới này vì chúng ta ko sử dụng DB nhé. Nếu các bạn sử dụng, bỏ comment và config query sao cho phù hợp. Các bạn có thể GG để tìm hiểu thêm
       auth.jdbcAuthentication().dataSource(dataSource)
               .usersByUsernameQuery("select username,password, enabled from users where username=?")
               .authoritiesByUsernameQuery("select username, role from user_roles where username=?");
       */
   }
}
Như bạn có thể thấy phía trên, mình có thêm 2 Custom Filter là JWTLoginFilter để phục vụ cho việc login (sinh JWT và trả về cho phía User) và authentication(Nhận JWT gửi lên phục vụ cho việc xác thực) Mình cài đặt chúng như sau
package com.nhs3108.filtes;

import com.nhs3108.models.AccountCredentials;
import com.nhs3108.services.TokenAuthenticationService;
import org.springframework.security.authentication.AuthenticationManager;
import org.springframework.security.authentication.UsernamePasswordAuthenticationToken;
import org.springframework.security.core.Authentication;
import org.springframework.security.core.AuthenticationException;
import org.springframework.security.web.authentication.AbstractAuthenticationProcessingFilter;
import org.springframework.security.web.util.matcher.AntPathRequestMatcher;
import org.springframework.security.web.util.matcher.RequestMatcher;

import javax.servlet.FilterChain;
import javax.servlet.ServletException;
import javax.servlet.http.HttpServletRequest;
import javax.servlet.http.HttpServletResponse;
import java.io.IOException;
import java.util.Collections;

/**
 * Created by nhs3108 on 29/03/2017.
 */
public class JWTLoginFilter extends AbstractAuthenticationProcessingFilter {
    public JWTLoginFilter(String url, AuthenticationManager authManager) {
        super(new AntPathRequestMatcher(url));
        setAuthenticationManager(authManager);
    }

    @Override
    public Authentication attemptAuthentication(HttpServletRequest request, HttpServletResponse response) throws AuthenticationException, IOException, ServletException {
        AccountCredentials credentials = new AccountCredentials(request.getParameter("username"), request.getParameter("password"));
        return getAuthenticationManager().authenticate(
                new UsernamePasswordAuthenticationToken(
                        credentials.getUsername(),
                        credentials.getPassword(),
                        Collections.emptyList()
                )
        );
    }

    @Override
    protected void successfulAuthentication(HttpServletRequest request, HttpServletResponse response, FilterChain chain, Authentication authResult) throws IOException, ServletException {
        TokenAuthenticationService.addAuthentication(response, authResult.getName());
    }
}
Các bạn để ý contructor phía trên, url mà ta truyền vào chính là url để thực hiện cho việc login đó.  Trong WebSecurityConfig hiện tại mình có truyền là "/login", bạn có thể thay đổi tùy bạn.
Khi request tới việc login, với việc add thêm filter như ta đã làm ở WebSecurityConfig, Spring sẽ gọi tới JWTLoginFilter#attemptAuthentication để thực hiện việc kiểm tra các data cần thiết mà phía người dùng gửi lên và trả về một đối tượng Authentication. Lát nữa minh sẽ nói trả về đối tượng này và làm gì tiếp nhé.
Tại JWTLoginFilter#attemptAuthentication, mình nhận data từ phía user gửi lên, trích xuất user-password và được sử dụng để AuthenticationManager sử dụng để authenticate. Ở đây nó sẽ so sánh với thông tin mà ta đã viết ở WebSecurityConfig#configure phía trên ấy
Trong WebSecurityConfig hiện tại mình có truyền là "/login", bạn có thể thay đổi tùy bạn.
Khi request tới việc login, với việc add thêm filter như ta đã làm ở WebSecurityConfig, Spring sẽ gọi tới JWTLoginFilter#attemptAuthentication để thực hiện việc kiểm tra các data cần thiết mà phía người dùng gửi lên và trả về một đối tượng Authentication. Lát nữa minh sẽ nói trả về đối tượng này và làm gì tiếp nhé.
Tại JWTLoginFilter#attemptAuthentication, mình nhận data từ phía user gửi lên, trích xuất user-password và được sử dụng để AuthenticationManager sử dụng để authenticate. Ở đây nó sẽ so sánh với thông tin mà ta đã viết ở WebSecurityConfig#configure phía trên ấy
auth.inMemoryAuthentication().withUser("admin").password("password").roles("ADMIN");
Nghĩa là nếu user gửi lên username là "admin", password là "password" (mình sẽ k đề cập tới việc encrypt ở đây nhé) thì AuthenticationManager sẽ authen thành công.
Hãy thử ngó qua AbstractAuthenticationProcessingFilter#doFilter nhé ( org.springframework.security.web.authentication.AbstractAuthenticationProcessingFilter), bạn sẽ thấy nhiều điều hay ho đấy
public void doFilter(ServletRequest req, ServletResponse res, FilterChain chain) throws IOException, ServletException {
        HttpServletRequest request = (HttpServletRequest)req;
        HttpServletResponse response = (HttpServletResponse)res;
        if(!this.requiresAuthentication(request, response)) {
            chain.doFilter(request, response);
        } else {
            if(this.logger.isDebugEnabled()) {
                this.logger.debug("Request is to process authentication");
            }

            Authentication authResult;
            try {
                authResult = this.attemptAuthentication(request, response);
                if(authResult == null) {
                    return;
                }

                this.sessionStrategy.onAuthentication(authResult, request, response);
            } catch (InternalAuthenticationServiceException var8) {
                this.logger.error("An internal error occurred while trying to authenticate the user.", var8);
                this.unsuccessfulAuthentication(request, response, var8);
                return;
            } catch (AuthenticationException var9) {
                this.unsuccessfulAuthentication(request, response, var9);
                return;
            }

            if(this.continueChainBeforeSuccessfulAuthentication) {
                chain.doFilter(request, response);
            }

            this.successfulAuthentication(request, response, chain, authResult);
        }
    }
    ```

    Bạn có thấy gì k? Nếu phuơng thức attemptAuthentication thực hiện có lỗi, phuơng thức unsuccessfulAuthentication lập tức được gọi. Các bạn có thể custom nó, nhưng hiện tại unsuccessfulAuthentication sẽ thực hiện
    - Clear context, đồng nghĩa với clear authentication
    - Clear remberme token
    - LoginFailureHandler sẽ thực thi
như dưới đây

```java
protected void unsuccessfulAuthentication(HttpServletRequest request, HttpServletResponse response, AuthenticationException failed) throws IOException, ServletException {
        SecurityContextHolder.clearContext();
        if(this.logger.isDebugEnabled()) {
            this.logger.debug("Authentication request failed: " + failed.toString(), failed);
            this.logger.debug("Updated SecurityContextHolder to contain null Authentication");
            this.logger.debug("Delegating to authentication failure handler " + this.failureHandler);
        }

        this.rememberMeServices.loginFail(request, response);
        this.failureHandler.onAuthenticationFailure(request, response, failed);
    }
Ok. Vậy nếu attemptAuthentication thực hiện thành công thì sao nhỉ? Thì phương thức successfulAuthentication sẽ được gọi. và như ở trên, khi thành công, ta thực hiện
@Override
    protected void successfulAuthentication(HttpServletRequest request, HttpServletResponse response, FilterChain chain, Authentication authResult) throws IOException, ServletException {
        TokenAuthenticationService.addAuthentication(response, authResult.getName());
    }
Phuơng thức TokenAuthenticationService.addAuthentication(response, authResult.getName()) thực hiện ghi các thông tin của JWT vào response gửi về phía người dùng. Mình giới thiệu luôn về TokenAuthenticationService.getAuthentication(request) sẽ đọc thông tin từ request để từ token suy ra được Authentcation. Hàm này trong tutorial mình viết rất sơ sài, trong bài tiếp theo mình sẽ nói cụ thể hơn nhé.
package com.nhs3108.services;

/**
 * Created by nhs3108 on 29/03/2017.
 */

import io.jsonwebtoken.Jwts;
import io.jsonwebtoken.SignatureAlgorithm;
import org.springframework.security
        .authentication.UsernamePasswordAuthenticationToken;
import org.springframework.security.core.Authentication;

import javax.servlet.http.HttpServletRequest;
import javax.servlet.http.HttpServletResponse;
import java.util.Date;

import static java.util.Collections.emptyList;

public class TokenAuthenticationService {
    static final long EXPIRATIONTIME = 864_000_000; // 10 days
    static final String SECRET = "ThisIsASecret";
    static final String TOKEN_PREFIX = "Bearer";
    static final String HEADER_STRING = "Authorization";

    public static void addAuthentication(HttpServletResponse res, String username) {
        String JWT = Jwts.builder()
                .setSubject(username)
                .setExpiration(new Date(System.currentTimeMillis() + EXPIRATIONTIME))
                .signWith(SignatureAlgorithm.HS512, SECRET)
                .compact();
        res.addHeader(HEADER_STRING, TOKEN_PREFIX + " " + JWT);
    }

    public static Authentication getAuthentication(HttpServletRequest request) {
        String token = request.getHeader(HEADER_STRING);
        if (token != null) {
            // parse the token.
            String user = Jwts.parser()
                    .setSigningKey(SECRET)
                    .parseClaimsJws(token.replace(TOKEN_PREFIX, ""))
                    .getBody()
                    .getSubject();

            return user != null ?
                    new UsernamePasswordAuthenticationToken(user, null, emptyList()) :
                    null;
        }
        return null;
    }
}
Thử request POST /login và gửi username password để login nhé. Khi đó, request của bạn trả về sẽ có thôn ting của JWT.
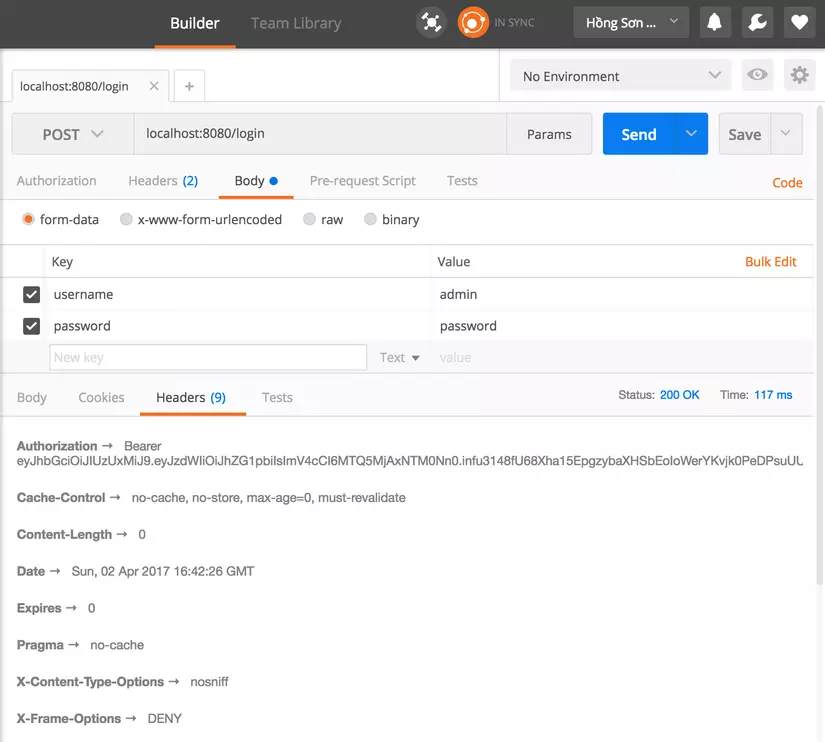 Xong bước tới phòng bảo vệ lấy chìa khóa nhé.
Giờ làm gì tiếp nhỉ? À, lấy chìa khóa vừa nhận được đi mở cửa vào phóng đúng k?
Xong bước tới phòng bảo vệ lấy chìa khóa nhé.
Giờ làm gì tiếp nhỉ? À, lấy chìa khóa vừa nhận được đi mở cửa vào phóng đúng k?
Như đã config phía trên, mọi request ngoài Login để phải được xác thực trước khi tiếp tục thực hiện lệnh được gọi từ phía controller. Bạn sẽ thấy JWTAuthenticationFilter#doFilter của mình cài đặt phía đây làm điều đó. Bằng cách lấy thông tin Authentication và set nó vào SecurityContext và tiếp tục gọi các filter tiếp theo bằng filterChain.doFilter(servletRequest, servletResponse); như dưới đây. Các filter tiếp theo tiếp tục được thực hiện.
package com.nhs3108.filtes;

import com.nhs3108.services.TokenAuthenticationService;
import org.springframework.security.core.Authentication;
import org.springframework.security.core.context.SecurityContextHolder;
import org.springframework.web.filter.GenericFilterBean;

import javax.servlet.FilterChain;
import javax.servlet.ServletException;
import javax.servlet.ServletRequest;
import javax.servlet.ServletResponse;
import javax.servlet.http.HttpServletRequest;
import java.io.IOException;

/**
 * Created by nhs3108 on 29/03/2017.
 */
public class JWTAuthenticationFilter extends GenericFilterBean {
    @Override
    public void doFilter(ServletRequest servletRequest, ServletResponse servletResponse, FilterChain filterChain) throws IOException, ServletException {
        Authentication authentication = TokenAuthenticationService.getAuthentication((HttpServletRequest) servletRequest);
        SecurityContextHolder.getContext().setAuthentication(authentication);
        filterChain.doFilter(servletRequest, servletResponse);
    }
}
Sau khi các filter được thực hiện xong xuôi, Spring sẽ thực hiện lệnh mà request yêu cầu. Ở đây ta ví dụ lệnh lấy danh sách news nhé.
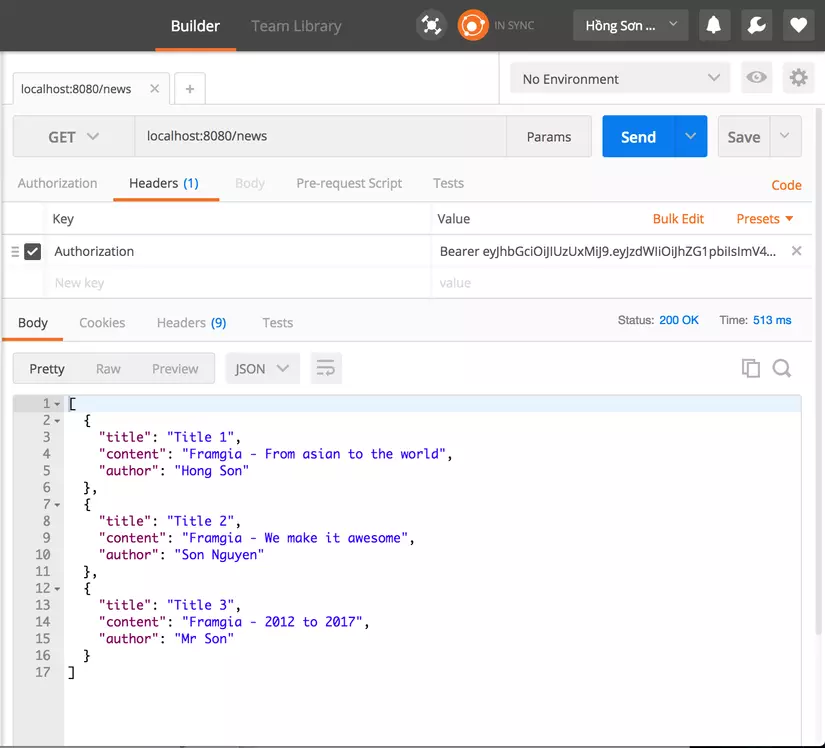 Để thực hiện lấy danh sách news (vào lớp học), ta cần gửi JWT lên phía server (cầm chìa khóa, cắm vào ổ khóa và mở khóa) để Server xác thực rồi thực hiện trả về cho user danh sách news. Ở trong ứng dụng này, mình sử dụng header có name là "Authorization" để truyền tải thông tin nhé.
3. Tổng kết
OK. vậy là mình sẽ giúp các bạn dễ dàng hình dung hơn về cách apply JWT trong ứng dụng của mình. Bài này mình đã tối giản nhất để ai đọc cũng có thể hiểu đựoc. nếu các bạn có gì khó hiểu trong quá trình cài đặt hay tùy biến, hoặc muốn hiểu sâu về luồng đi của nó ra sao, hãy liên hệ với mình qua FB /nhs3108 Gmail nhs3108@gmail.com nhé. Mình sẽ sẵn lòng hỗ trợ.
Clone repository Github để chạy demo tại https://github.com/nhs3108/SpringJWT nhé. Cảm ơn các bạn đã dành time theo dõi.
All rights reserved
