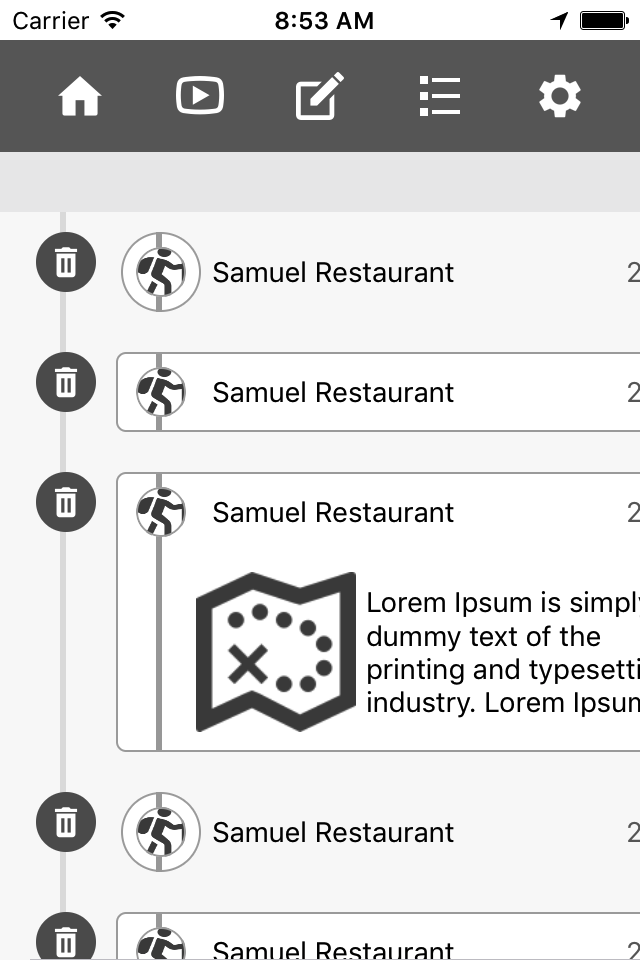
Swipe to right trên tableviewcell để show delete mà không sử dụng scrollview
Bài đăng này đã không được cập nhật trong 2 năm
Apple đã giới thiệu UITableViewRowAction cho phép chúng ta thêm nhiều action trên tableviewcell. Giống như Mail App, bạn chỉ việc swipe to left để show nhiều actions.
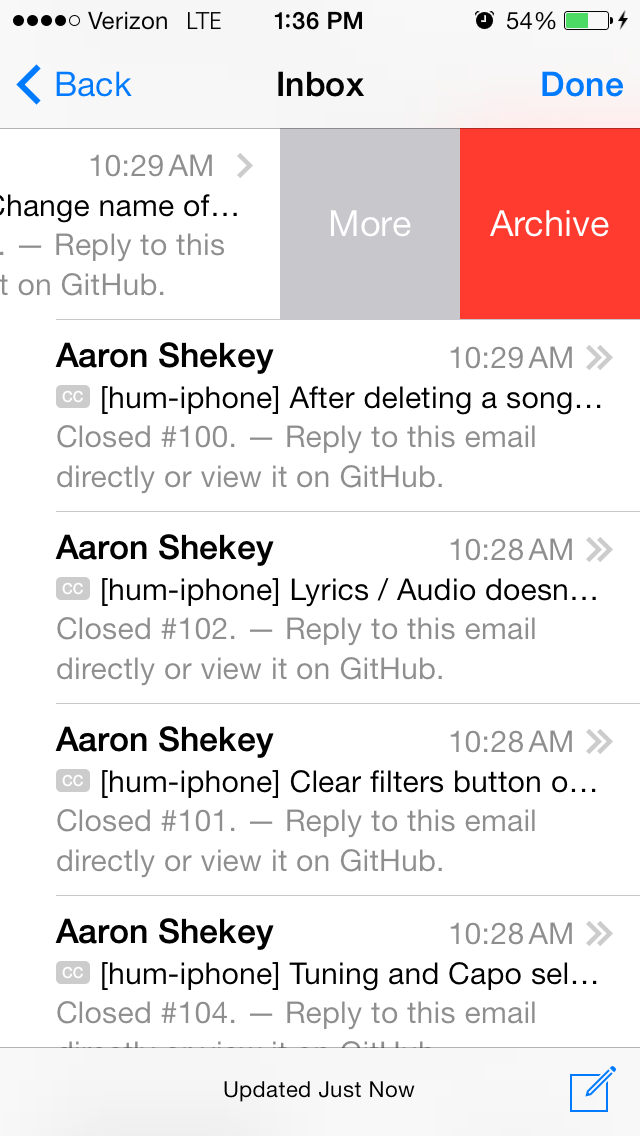 Nhưng các view action này đều nằm bên phải của cell, vì vậy khi UI/UX đòi hỏi chúng ta phải custom action nằm bên trái của cell và phải swipe to right để show các action đó ra. Topic này sẽ hướng dẫn các bạn thực hiện điều đó.
Tạo các subview và pan gesture
Đầu tiên, chúng ta tạo 1 button delete nằm ở bên trái của cell
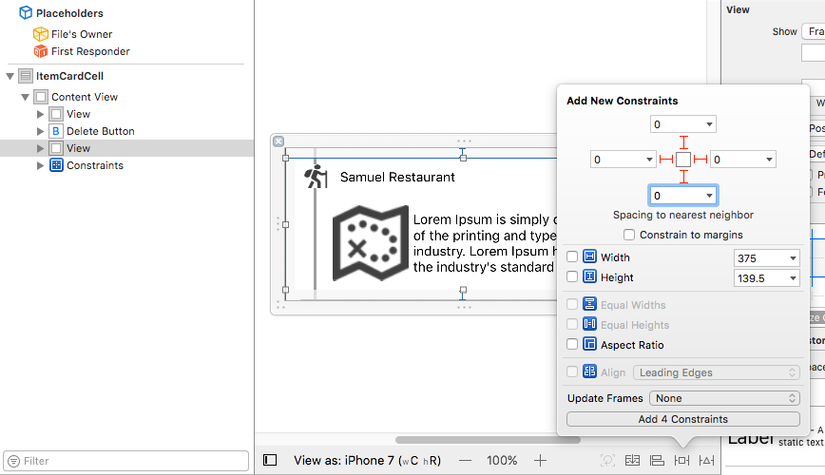
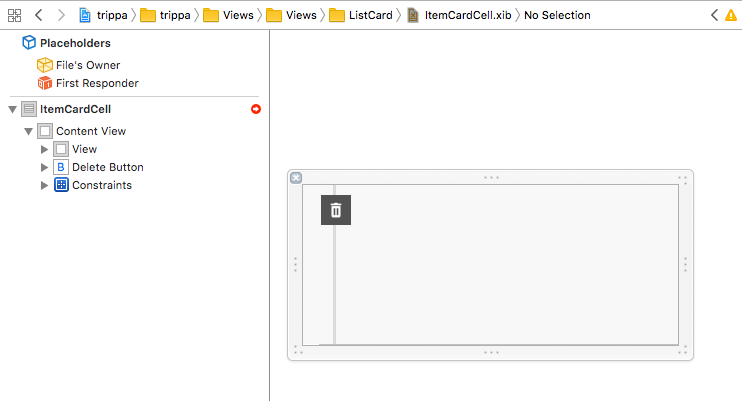 Sau đó, chúng ta thêm 1 view đè lên trên button delete và set constraints cho nó
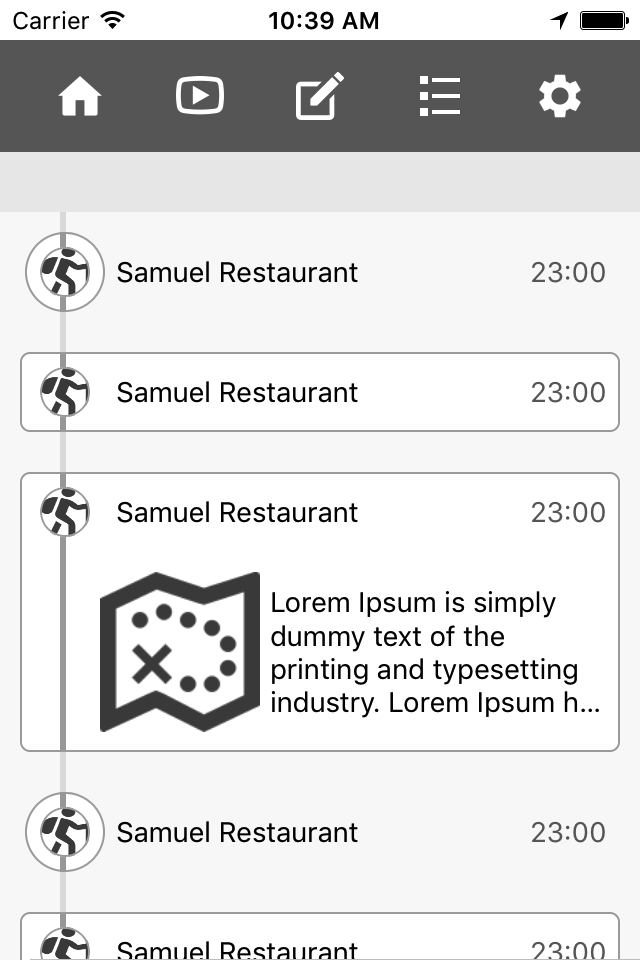
 Build và chạy app
 Để custom swipe to right chúng ta cần tạo 1 pan gesture và link 2 NSLayoutConstraint tương ứng với 2 contrastraint left và right của view chúng ta vừa thêm bên trên.
    private var panRecognizer : UIPanGestureRecognizer!
    private var panStartPoint : CGPoint!
    private var startingLeftLayoutConstraintConstant : CGFloat = 0.0
    @IBOutlet weak var contentViewRightConstraint: NSLayoutConstraint!
    @IBOutlet weak var contentViewLeftConstraint: NSLayoutConstraint!
Setup pan gesture và hàm của nó
    override func awakeFromNib() {
        super.awakeFromNib()

        self.panRecognizer = UIPanGestureRecognizer.init(target: self, action: #selector(ItemCardCell.panThisCell(recognizer:)))
        self.panRecognizer.delegate = self
        self.holderView.addGestureRecognizer(self.panRecognizer)
    }
    func panThisCell(recognizer:UIPanGestureRecognizer) {
        switch (recognizer.state) {
            case .began:
                self.panStartPoint = recognizer.translation(in: self.holderView)
                self.startingLeftLayoutConstraintConstant = self.contentViewLeftConstraint.constant
                break;
            case .changed:
                let currentPoint = recognizer.translation(in: self.holderView)
                let deltaX = currentPoint.x - self.panStartPoint.x
                break;
            case .ended:
                break;
            case .cancelled:
                break;
            default:
                break;
            }
    }
Đây là hàm được gọi khi ta thực hiện 1 pan gesture. Build app, đưa ngón tay lên cell, kéo qua kéo lại và log ra các giá trị được lưu bên trên. Bạn sẽ thấy các con số tăng/giảm khi ta thực hiện.
Xử lý pan gesture
Đầu tiên chúng ta cần xác định khoảng cách của contentView cách ra khi ta thực hiện swipe. Ở đây sẽ bằng với chiều dài của button delete.
    private func buttonTotalWidth() -> CGFloat {
        return self.deleteButton.frame.maxX
    }
    private func resetContraintContstantsToZero(animated:Bool, notifyDelegateDidClose notifyDelegate:Bool) {
    }
    private func setContraintToShowDeleteButton(animated:Bool, notifyDelegateDidOpen notifyDelegate:Bool) {
    }
Tiếp theo, chúng ta cần xử lý khi gesture recognizer thay đổi.
- Xác định pan trái hay phải
- Nhận biết contentView đang đóng hay mở
- Tùy vào khoảng cách và pan trái/phải ta sẽ đóng/mở contentView.
    case .changed:
                let currentPoint = recognizer.translation(in: self.holderView)
                let deltaX = currentPoint.x - self.panStartPoint.x
                var panningRight = false
                if self.panStartPoint.x < currentPoint.x {
                    panningRight = true
                }
                if self.startingLeftLayoutConstraintConstant == 0.0 {
                    //The cell was closed and is now opening
                    if panningRight {
                        let constant = min(deltaX,self.buttonTotalWidth())
                        if constant == self.buttonTotalWidth() {
                            self.setContraintToShowDeleteButton(animated: true, notifyDelegateDidOpen: false)
                        }
                        else {
                            self.contentViewLeftConstraint.constant = constant
                        }
                    }
                    else {
                        let constant = min(-deltaX, 0)
                        if constant == 0 {
                            self.resetContraintContstantsToZero(animated: true, notifyDelegateDidClose: false)
                        }
                        else {
                            self.contentViewLeftConstraint.constant = constant
                        }
                    }
                }
                break;
Ở bên trên là trường hợp contentView đang đóng. Với trường hợp, contentView đã mở ra ta cũng thực hiện tương tự
        else {
                    //The cell was at least partially open.
                    let adjustment = self.startingLeftLayoutConstraintConstant + deltaX;
                    if (panningRight) {
                        let constant = min(adjustment, self.buttonTotalWidth());
                        if (constant == self.buttonTotalWidth()) {
                            self.setContraintToShowDeleteButton(animated: true, notifyDelegateDidOpen: false)
                        }
                        else {
                            self.contentViewLeftConstraint.constant = constant;
                        }
                    } else {
                        let constant = max(adjustment, 0);
                        if (constant == 0) {
                            self.resetContraintContstantsToZero(animated: true, notifyDelegateDidClose: false)

                        } else {
                            self.contentViewLeftConstraint.constant = constant
                        }
                    }
                }
                self.contentViewRightConstraint.constant = -self.contentViewLeftConstraint.constant;
Animation
Chúng ta sẽ thực hiện các hàm đóng/mở contentView và animation tương ứng
    private func updateConstraintsIfNeeded(animated:Bool, completion: ((Bool) -> Swift.Void)? = nil) {

        var duration = 0.0
        if animated {
            duration = 0.1
        }

        UIView.animate(withDuration: duration, animations: {
            self.layoutIfNeeded()
        }, completion: completion)
    }
Để làm cho contentView chuyển động mượt mà, chúng ta cần tạo cho nó 1 bounce khi nó animation.
private let kBounceValue : CGFloat = 20.0
Chúng ta sẽ xử lý khi contentView được mở ra
- Nếu contentView đang mở ta sẽ không làm gì cả
- Set contraint cho left/right của contentView bằng tổng chiều dài của button và có thêm bounce. Nó sẽ làm contentView pull qua 1 chút khi ta thực hiện 1 animation
- Sau khi animation đầu tiên kết thúc, ta gọi thêm 1 animation để cho contentView trở lại đúng vị trí sau khi bounce
- Sau đó ta reset lại giá trị cho starting contraint
    private func setContraintToShowDeleteButton(animated:Bool, notifyDelegateDidOpen notifyDelegate:Bool) {
        if notifyDelegate {
            delegate?.cellDidOpen?()
        }

        if (self.startingLeftLayoutConstraintConstant == self.buttonTotalWidth() &&
            self.contentViewLeftConstraint.constant == self.buttonTotalWidth()) {
            return;
        }

        self.contentViewLeftConstraint.constant = self.buttonTotalWidth() + kBounceValue;
        self.contentViewRightConstraint.constant = -self.buttonTotalWidth() - kBounceValue;

        self.updateConstraintsIfNeeded(animated: animated) { (finished) in
            self.contentViewLeftConstraint.constant = self.buttonTotalWidth();
            self.contentViewRightConstraint.constant = -self.buttonTotalWidth();

            self.updateConstraintsIfNeeded(animated: animated, completion: { (finished) in
                self.startingLeftLayoutConstraintConstant = self.contentViewLeftConstraint.constant;
            })
        }
    }
Tương tự, ta cũng thực hiện khi contentView đóng lại
    private func resetContraintContstantsToZero(animated:Bool, notifyDelegateDidClose notifyDelegate:Bool) {
        if notifyDelegate {
            delegate?.cellDidClose?()
        }

        if (self.startingLeftLayoutConstraintConstant == 0.0 &&
            self.contentViewLeftConstraint.constant == 0.0) {
            //Already all the way closed, no bounce necessary
            return;
        }

        self.contentViewLeftConstraint.constant = -kBounceValue;
        self.contentViewRightConstraint.constant = kBounceValue;

        self.updateConstraintsIfNeeded(animated: animated) { (finished) in
            self.contentViewLeftConstraint.constant = 0.0;
            self.contentViewRightConstraint.constant = 0.0;

            self.updateConstraintsIfNeeded(animated: animated, completion: { (finished) in
                self.startingLeftLayoutConstraintConstant = self.contentViewLeftConstraint.constant;
            })
        }
    }
Run app và drag cell, chúng ta sẽ thấy 1 bounce action khi đóng/mở cell. Tuy nhiên, ta cần xử lý hoàn chỉnh việc đóng/mở cell bằng cách sau
    case .ended:
                //We were opening
                let halfOfButton = self.buttonTotalWidth() / 2;
                if (self.contentViewLeftConstraint.constant >= halfOfButton) { //3
                    self.setContraintToShowDeleteButton(animated: true, notifyDelegateDidOpen: true)
                } else {
                    self.resetContraintContstantsToZero(animated: true, notifyDelegateDidClose: true)
                }
                break;
    case .cancelled:
                if (self.startingLeftLayoutConstraintConstant == 0.0) {
                    self.resetContraintContstantsToZero(animated: true, notifyDelegateDidClose: true)
                } else {
                    //We were open - reset to the open state
                    self.setContraintToShowDeleteButton(animated: true, notifyDelegateDidOpen: true)
                }
                break;
Run app và scroll tableview chúng ta sẽ thấy bug xảy ra do việc reuse cell. Để fix điều này ta cần xử lý ở hàm prepareForReuse
    override func prepareForReuse() {
        super.prepareForReuse()
        self.resetContraintContstantsToZero(animated: false, notifyDelegateDidClose: false)
    }
Chúng ta đã hoàn tất việc xử lý show action khi swipe qua phải. Ngoài ra, bạn có thể lưu lại cell đã đóng/mở bằng cách xử lý các delegate gọi ra hoặc custom thêm các view action khác. Hi vọng Apple sẽ sớm cập nhật tính năng này cho các bản iOS về sau.
All rights reserved
