Viết api CRUD đơn giản theo chuẩn RESTful với nodejs express và mongoose
Bài đăng này đã không được cập nhật trong 4 năm
Cùng bắt đầu thôi nào 
1- Cài đặt Nodejs từ webside Node.js
2- Chúng ta tạo một folder có tên 'ProductsApp'
3- Trong folder vừa tạo, thực hiện lệnh sau: npm init
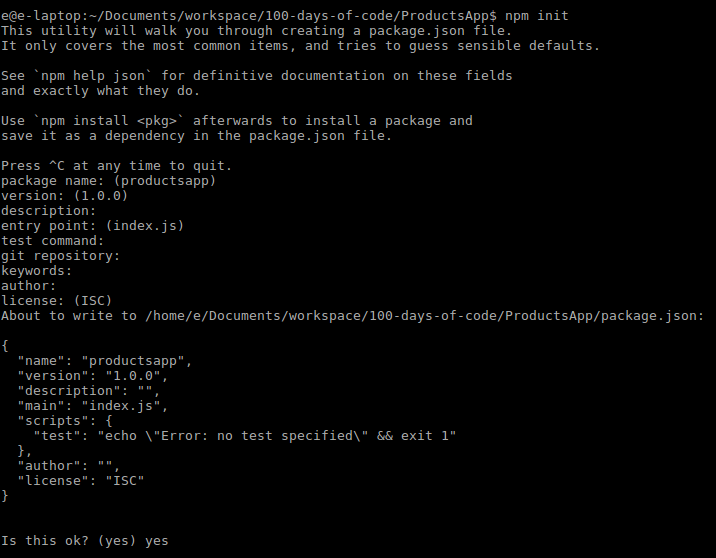
Lệnh trên sẽ tạo ra file pack.json. File pack.json được sử dụng để quản lý các gói npm được cài đặt cục bộ. Nó cũng bao gồm dữ liệu meta về dự án như tên và phiên bản.
Sau đó, chúng ta cần cài đặt các gói sau để phục vụ trong quá trình 'cốt': 1- ExpressJS : Framework của NodeJs 2- mongoose: mongoDB ODM cho Node.JS. 3- body-Parser: Được sử dụng để xử lý các yêu cầu JSON.
Chúng ta có thể cài đặt các packages ở trên thông qua việc gõ các lệnh sau trong command line. Nhớ là phải ở trong thư mục dự án đấy nhé
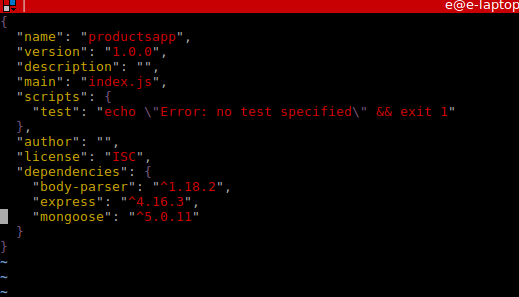
npm install --save express body-parser mongoose
Sau khi cài đặt chúng ta thấy những dòng sau trong file package.json nhé:
Giờ thì khởi tạo server thôi nào 
Chúng ta sẽ tạo một file mới, đặt tên là app.js ngay trong folder ProductsApp:
touch app.js
Mở tệp vừa tạo có tên** app.js** và require tất cả các dependencies mà chúng ta đã cài đặt trước đó. Tạm thời chưa require mongoose vội, cái này tớ sẽ nói sau
// app.js
const express = require('express');
const bodyParser = require('body-parser');
// initialize our express app
const app = express();
Bước tiếp theo sẽ là yêu cầu port để chạy:
let port = 1234;

app.listen(port, () => {
    console.log('Server is up and running on port numner ' + port);
});
Bây giờ, chúng ta sẽ có thể kiểm tra server của mình bằng lệnh sau trong terminal:
node app.js
Chúng ta sẽ thấy thông báo kia trên terminal:

Vậy là chúng ta đã có một máy chủ đang hoạt động rồi đó, cơ mà nó chưa làm được cái gì cả đâu  Vì vậy chúng ta hãy cùng tạo ra một ứng dụng nho nhỏ nhé!
Tổ chức ứng dụng của chúng ta
Chúng ta sẽ viết theo mô hình MVC nhé. Nếu ai chưa biết mô hình MVC là gì thì có thể search 'gu gồ' để tìm hiểu thêm nha. Nó cũng không khó đâu
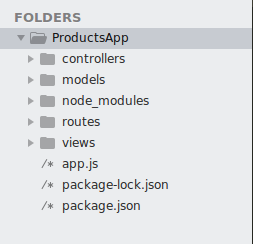
Trong folder ProductsApp, chúng ta sẽ tạo 4 folder con sau:
1- controllers
2- models
3- routes
4- views
Hãy bắt đầu bằng cách xác định model của chúng ta. Tạo một file mới trong folder models và để đặt tên cho tên đó là Product.model.js
const mongoose = require('mongoose');
const Schema = mongoose.Schema;

let ProductSchema = new Schema({
    name: {type: String, required: true, max: 100},
    price: {type: Number, required: true},
});

// Export the model
module.exports = mongoose.model('Product', ProductSchema);
Chúng ta sẽ require mongoose và sau đó chúng ta định nghĩa schema cho model của chúng ta. Cuối cùng là exporting model để sử dụng ở các file khác nhé. Thế là cúng ta đã hoàng thành phần M trong MVC rồi đó
Routes:
Trong folder routes, tạo file product.route.js. File để định nghĩa các router cho app của mình
const express = require('express');
const router = express.Router();

// Require the controllers WHICH WE DID NOT CREATE YET!!
const product_controller = require('../controllers/product.controller');

// a simple test url to check that all of our files are communicating correctly.
router.get('/test', product_controller.test);
module.exports = router;
Controllers:
Tạo file mới đặt tên là product.controller.js trong folder controllers của chúng ta:
const Product = require('../models/product.model');
//Simple version, without validation or sanitation
exports.test = function (req, res) {
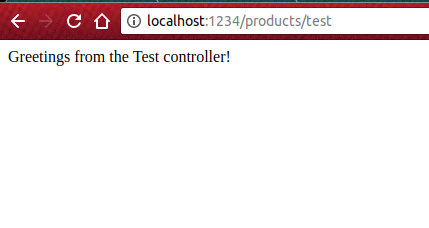
res.send('Greetings from the Test controller!');
};
Bước cuối cùng trước khi test router đầu tiên của chúng ta là require file router vào file app.js
//app.js
const express = require('express');
const bodyParser = require('body-parser');
const product = require('./routes/product.route'); // Imports routes for the products
const app = express();
app.use('/products', product);
let port = 1234;
app.listen(port, () => {
    console.log('Server is up and running on port numner ' + port);
});
Bây giờ hãy bật trình duyệt của chúng ta lên và test link sau: http://localhost:1234/products/test
Chúng ta sẽ được kết quả:
Database:
Chúng ta cài đặt mongooDB compass để xem DB của mình nhé. Đơn giản là ở trong file app.js chúng ta thêm đoạn này vào:
// Configuring the database
const dbConfig = 'mongodb://localhost:27017/productstutorial';
const mongoose = require('mongoose');

// Connecting to the database
mongoose.set('useCreateIndex', true);
mongoose.connect(dbConfig, {
    useNewUrlParser: true
}).then(() => {
    console.log("Successfully connected to the database");
}).catch(err => {
    console.log('Could not connect to the database. Exiting now...', err);
    process.exit();
});
Body Parser
Body parser được dùng để phân tích body cho các request đến của chúng ta. Trong file app.js chúng ta thêm đoạn sau:
app.use(bodyParser.json());
app.use(bodyParser.urlencoded({extended: false}));
Bây giờ thì thực hiện phần quan trọng nhất thôi nào )
CREATE
- Đầu tiên chúng ta khai báo router cho nó:
// routes/products.route.js
...
router.post('/create', product_controller.product_create);
- Sau đó chúng ta viết hàm productcreate vào file controllers/product.controller.js như sau:
// controllers/products.js
exports.product_create = function (req, res) {
    let product = new Product(
        {
            name: req.body.name,
            price: req.body.price
        }
    );

    product.save(function (err) {
        if (err) {
            return next(err);
        }
        res.send('Product Created successfully')
    })
};
- Cuối cùng là test trên postman nào

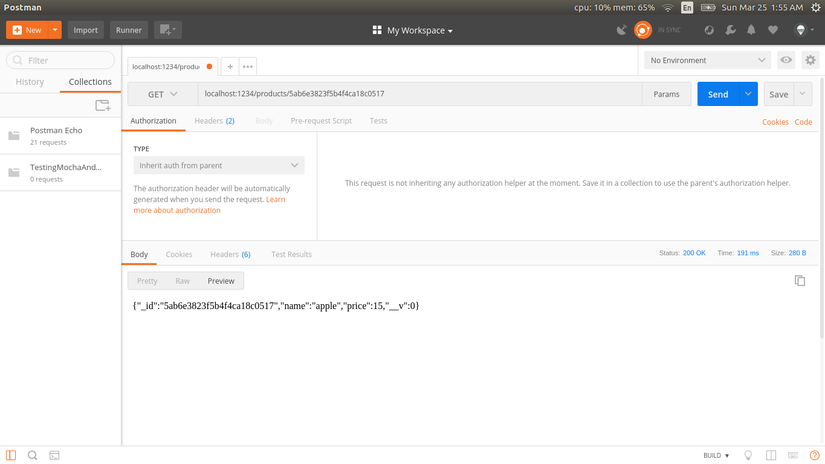
Read
Nhiệm vụ thứ 2 là lấy ra tất cả product hiện có:
- Cùng khai báo router bằng cách thêm đoạn này vào file router:
// routes/products.route.js
...
router.get('/:id', product_controller.product_details);
- Viết hàm productdetails trong file controllers/product.controller.js
// controllers/products.controller.js
exports.product_details = function (req, res) {
    Product.findById(req.params.id, function (err, product) {
        if (err) return next(err);
        res.send(product);
    })
};
- Mình test lại trên postman nhé
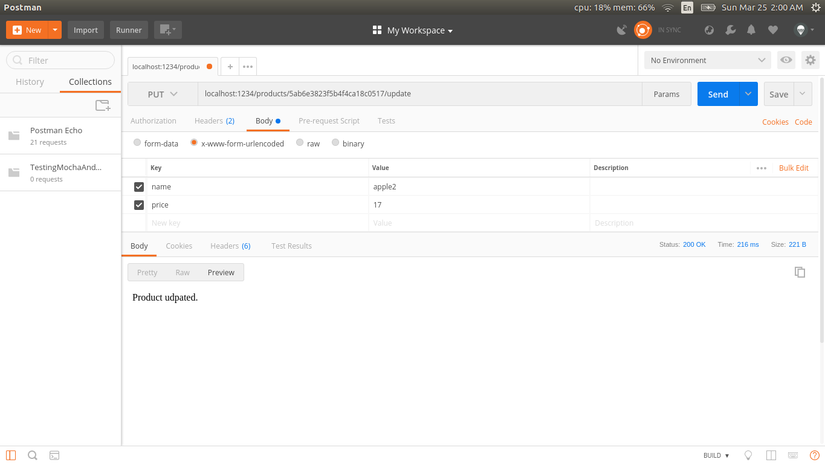
Update
- Vẫn làm tương tự như Create và Read thôi:))
// routes/products.route.js
...
router.put('/:id/update', product_controller.product_update);
- Viết hàm productupdate vào file *controllers/product.controller.js *
// controllers/products.controller.js
...
exports.product_update = function (req, res) {
    Product.findByIdAndUpdate(req.params.id, {$set: req.body}, function (err, product) {
        if (err) return next(err);
        res.send('Product udpated.');
    });
};
- Chúng mình test lại trên postman nhé
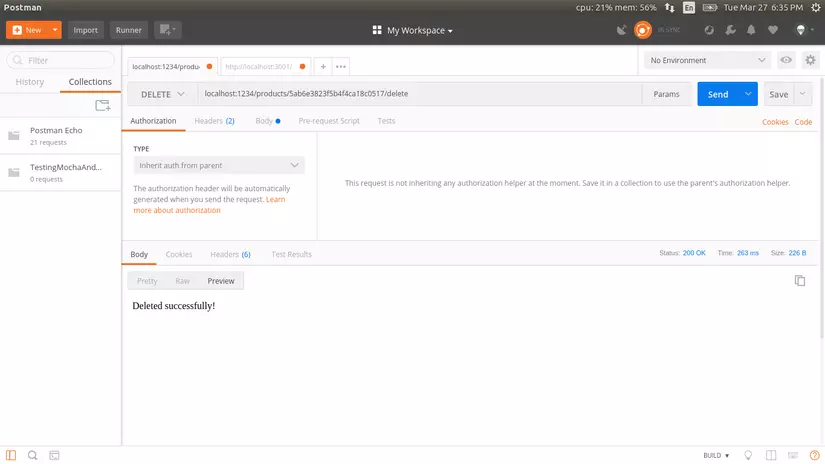
Delete
- Định nghĩa router cho phần delete
...
router.delete('/:id/delete', product_controller.product_delete);
- Viết function productdelete vào file controllers/products.js
// controllers/products.controller.js
exports.product_delete = function (req, res) {
    Product.findByIdAndRemove(req.params.id, function (err) {
        if (err) return next(err);
        res.send('Deleted successfully!');
    })
};
- Bây giờ ta test lại với postman và cùng xem thành quả thôi
Done
Đến bây giờ, chúng ta đã hoàn thành việc tạo một API đầy đủ thực hiện bốn thao tác (CRUD) rồi đấy^^
Cũng hơi phê nhỉ
Tài liệu tham khảo: https://codeburst.io/writing-a-crud-app-with-node-js-and-mongodb-e0827cbbdafb
All rights reserved
