Tạo lịch(calendar) cơ bản trong ruby on rails
Bài đăng này đã không được cập nhật trong 5 năm
Bài viết này sẽ chỉ cho bạn cách xây dựng lịch cơ bản trong Ruby on Rails
Trong bài viết này, tôi sẽ chỉ cho bạn cách xây dựng lịch trong Ruby on Rails. May mắn là nó tương đối dễ dàng để làm như vậy. Lịch mà chúng tôi xây dựng sẽ có thể mở rộng, có nghĩa là bạn có thể thêm chức năng của riêng mình khi cần, vì vậy hãy bắt đầu.
Điều đầu tiên chúng ta cần làm là tạo một tệp calendar.rb trong thư mục lib. File này sẽ chứa một lớp có chức năng lịch cốt lõi. Tạo file mới này và thêm vào đoạn code dưới đây.
#lib/calendar.rb:
class Calendar < Struct.new(:view, :date, :callback)
    HEADER = %w[Sunday Monday Tuesday Wednesday Thursday Friday Saturday]
    START_DAY = :sunday

    delegate :content_tag, to: :view

    def table
      content_tag :table, class: "calendar table table-bordered table-striped" do
        header + week_rows
      end
    end

    def header
      content_tag :tr do
        HEADER.map { |day| content_tag :th, day }.join.html_safe
      end
    end

    def week_rows
      weeks.map do |week|
        content_tag :tr do
          week.map { |day| day_cell(day) }.join.html_safe
        end
      end.join.html_safe
    end

    def day_cell(day)
      content_tag :td, view.capture(day, &callback), class: day_classes(day)
    end

    def day_classes(day)
      classes = []
      classes << "today" if day == Date.today
      classes << "not-month" if day.month != date.month
      classes.empty? ? nil : classes.join(" ")
    end

    def weeks
      first = date.beginning_of_month.beginning_of_week(START_DAY)
      last = date.end_of_month.end_of_week(START_DAY)
      (first..last).to_a.in_groups_of(7)
    end
end
Điều tiếp theo chúng ta cần làm là sửa đổi trong file config/application.rb để tự động tải các tệp .rb trong thư mục lib. Cẩn thận không ghi đè tên mô hình cho ứng dụng của bạn cũng như các tham số khác có thể được đặt.
#config/application.rb:
require File.expand_path('../boot', __FILE__)

require 'rails/all'

# Require the gems listed in Gemfile, including any gems
# you've limited to :test, :development, or :production.
Bundler.require(:default, Rails.env)

module CalendarExample
  class Application < Rails::Application
    config.autoload_paths += %W(#{config.root}/lib)
    # Settings in config/environments/* take precedence over those specified here.
    # Application configuration should go into files in config/initializers
    # -- all .rb files in that directory are automatically loaded.

    # Set Time.zone default to the specified zone and make Active Record auto-convert to this zone.
    # Run "rake -D time" for a list of tasks for finding time zone names. Default is UTC.
    # config.time_zone = 'Central Time (US & Canada)'

    # The default locale is :en and all translations from config/locales/*.rb,yml are auto loaded.
    # config.i18n.load_path += Dir[Rails.root.join('my', 'locales', '*.{rb,yml}').to_s]
    # config.i18n.default_locale = :de
  end
end
Điều tiếp theo chúng ta cần làm include bootstrap để cung cấp cho lịch của chúng ta một chút màu mè cho dể nhìn. Nếu ai muốn làm đẹp thêm thì các bạn có thể tự mình css cho nó hoành tráng thêm cho giao diện của mình nhé!!!!
app/views/layouts/application.html.erb:
<!DOCTYPE html>
<html>
<head>
  <title>CalendarExample</title>
  <%= stylesheet_link_tag    "application", media: "all", "data-turbolinks-track" => true %>
  <%= javascript_include_tag "application", "data-turbolinks-track" => true %>
  <%= stylesheet_link_tag "http://yandex.st/bootstrap/3.0.2/css/bootstrap.min.css", media: "all" %>
  <%= javascript_include_tag "http://yandex.st/bootstrap/3.0.2/js/bootstrap.min.js" %>
  <%= csrf_meta_tags %>
</head>
<body>
<div class="container">
<%= yield %>
</div>

</body>
</html>
Điều tiếp theo chúng ta cần làm là tạo một controller. Chạy lệnh dưới đây để tạo calendar_controller.
rails g controller Calendar show
Tuyệt vời! Bây giờ chúng ta config lại một chút trong routes nhé.
config/routes.rb:
CalendarExample::Application.routes.draw do
  resource :calendar, only: :show
  root to: "calendar#show"
end
Bây giờ chúng ta tạo một method trong helper để dễ dàng render calendar ra nhé.
app/helpers/calendar_helper.rb:
module CalendarHelper
  def calendar(date = Date.today, &block)
    Calendar.new(self, date, block).table
  end
end
Bây giờ hãy mở calendar controller và thêm vào code
app/controllers/calendar_controller.rb:
class CalendarController < ApplicationController
  def show
    @date = params[:date] ? Date.parse(params[:date]) : Date.today
  end
end
Cuối cùng đến view rồi mở view lên và thêm đoạn code này vào
view/calendar/show.html.erb
<div class="row">
  <div class="col-md-12 text-center">
    <div class="well controls">
      <%= link_to calendar_path(date: @date - 1.month), class: "btn btn-default" do %>
        <i class="glyphicon glyphicon-backward"></i>
      <% end %>
      <%= "#{@date.strftime("%B")} #{@date.year}" %>
      <%= link_to calendar_path(date: @date + 1.month), class: "btn btn-default" do %>
        <i class="glyphicon glyphicon-forward"></i>
      <% end %>
    </div>
  </div>
</div>
<div class="row">
  <div class="col-md-12">
    <%= calendar @date do |date| %>
      <%= date.day %>
    <% end %>
  </div>
</div>
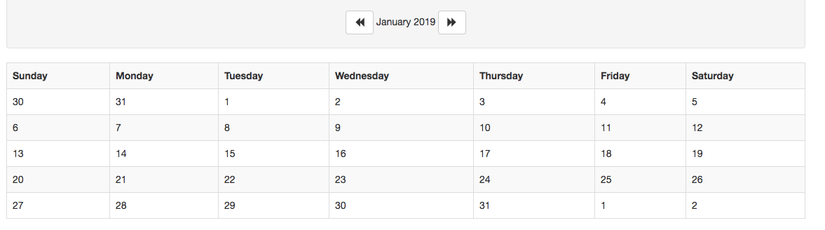
Và đây là kết quả:
 Chúc các bạn thành công! (Thanks for reading!)
All rights reserved
