Tạo data table web app lấy dữ liệu từ Google Sheets sử dụng Apps Script
Bài đăng này đã không được cập nhật trong 3 năm
Google Sheets là công cụ tuyệt vời để lưu trữ bảng tính trực tuyến, bạn có thể truy cập bảng tính bất kỳ lúc nào ở bất kỳ đâu và luôn sẵn sàng để chia sẻ với người khác.
Nếu bạn chỉ muốn chia sẻ một phần của bảng tính, tạo một sheet mới và dùng hàm importRange có thể đã đáp ứng yêu cầu của bạn. Tuy nhiên, nếu bạn muốn cung cấp một giao diện trực quan hơn cho người dùng để thực hiện các thao tác như sort, search, highlight, paging... thì bạn có thể viết web app sử dụng Apps Script của Google cung cấp.
Bài này gồm 2 phần. Phần 1 chúng ta sẽ hiển thị toàn bộ dữ liệu mỗi khi load web app. Phần 2 chúng ta sẽ tạo chức năng Search và chỉ hiển thị đúng dữ liệu mà người dùng yêu cầu. Lưu ý, bài này dành cho beginner.
1. Hiển thị data table
Để tạo table, chúng ta có thể sử dụng JavaScript thuần, nhưng mình sử dụng Data Tables jQuery plug-in để việc tạo table dễ dàng hơn và có sẵn nhiều chức năng.
Mình tìm table jQuery plug-in trên Google và thấy plug-in này hiện ra đầu tiên nên dùng luôn. Nếu bạn biết plug-in nào hay ho hơn thì hãy cho mình biết nhé.
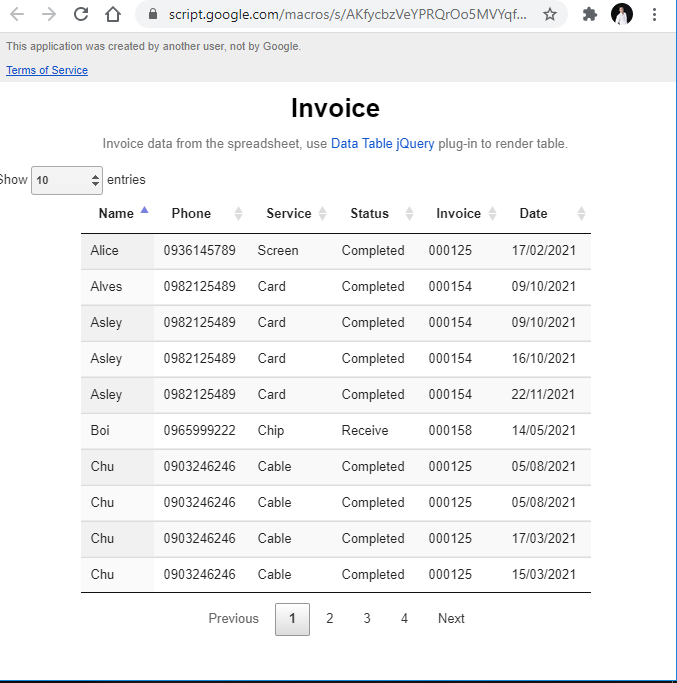
Chúng ta cùng xem qua thành quả trước khi bắt tay vào viết code.
Code Apps Script
Theo hướng dẫn của Google, chúng ta cần hàm doGet() hoặc doPost() có trả về HTML Service object để tạo giao diện cho web app. Chúng ta tách file CSS, JavaScript với file HTML theo hướng dẫn best practices của Google bằng hàm include().
// file Code.gs
function doGet(e) {
  return HtmlService.createTemplateFromFile('Index.html')
    .evaluate();
}

function include(filename) {
  return HtmlService.createHtmlOutputFromFile(filename)
    .getContent();
}
Index.html
Trong file HTML, chúng ta sẽ tạo thẻ <table> với id="table" để render table sau khi lấy dữ liệu từ file Google Sheets. Các bạn lưu ý, Data Tables jQuery là 1 plug-in của jQuery nên đừng quên chèn link CDN jQuery vào file HTML trước khi chèn link plug-in.
Bây giờ mình đã biết chèn link file JavaScript cũng phải đúng thứ tự thì code máy chạy. Hồi đó tự học nên không có ai dạy về điều này hết.
<!DOCTYPE html>
<html>
  <head>
    <base target="_top">
    <link rel="stylesheet" type="text/css"
          href="https://cdn.datatables.net/1.10.24/css/jquery.dataTables.css">
    <?!= include('Stylesheet') ?>
  </head>
  <body>
    <div class="heading">
      <h1>Invoice</h1>
      <p class="grey">Invoice data from the spreadsheet, use
          <a href="https://datatables.net/" target="_blank">
              Data Table jQuery
          </a>
          plug-in to render table.</p>
    </div>

    <div>
      <table id="table" class="display" width="75%"></table>
    </div>
    <script
      src="https://code.jquery.com/jquery-3.6.0.min.js"
      integrity="sha256-/xUj+3OJU5yExlq6GSYGSHk7tPXikynS7ogEvDej/m4="
      crossorigin="anonymous"></script>

    <script type="text/javascript" charset="utf8"
            src="https://cdn.datatables.net/1.10.24/js/jquery.dataTables.js">
   </script>
    <?!=  include('JavaScript') ?>
  </body>
</html>
Code JavaScript
Chúng ta dùng hàm ready của jQuery để thực thi một hàm callback khi DOM đã sẵn sàng. Chúng ta sẽ sử dụng class google.script.run để chạy hàm Apps Script khi ở client-side.
Để khởi tạo DataTable instance thì chúng ta cần truyền vào columns, data và một số option khác các bạn có thể tham khảo tại https://datatables.net/.
// File JavaScript.html
<script>
  $().ready(function(){
    google.script.run.withSuccessHandler(showDataTable)
      .getAllData();
  });

  function showDataTable(dataTable) {
    var header = [];
    dataTable.header.forEach(item => {
       header.push({title: item});
    })

    $('#table').DataTable({
      data: dataTable.data,
      columns: header,
      searching: false,
      info: false
    })
  }
</script>
Code server- side
Ở server-side (file Code.gs) chúng ta sẽ viết hàm getAllData() để trả về dữ liệu để tạo bảng.
// File Code.gs
var ss = SpreadsheetApp.getActiveSpreadsheet();
var sheet = ss.getSheetByName('Invoice');
function doGet(e) {
    ...
}

function include(filename) {
    ...
}

function getAllData() {
  var range = sheet.getRange(2, 1, sheet.getLastRow()-1, sheet.getLastColumn());
  var values = range.getValues();
  return {
    header: getHeaderArr(),
    data: values
  }
}

function getHeaderArr() {
  var headerRowPosition = 1;
  var range = sheet.getRange(headerRowPosition, 1, 1, sheet.getLastColumn());
  return range.getValues()[0];
}
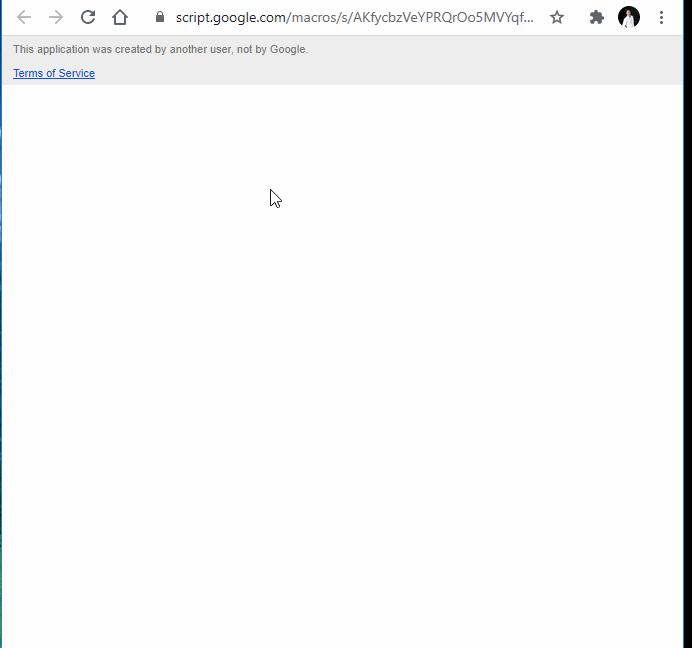
Thêm loader
Mỗi lần load dữ liệu có thể mất vài giây nên chúng ta sẽ thêm loader để báo hiệu cho người dùng biết là dữ liệu đang được load.
<!-- File Index.html -->
...
<div id="loading">
</div>
...
Chúng ta sẽ tạo một vùng có id là loading để chèn loader. Code CSS được tham khảo từ website https://www.w3schools.com/.
<!-- File Stylesheet.htm l-->
<style>
  #loading {
    margin: auto;
    border: 16px solid #f3f3f3;
    border-radius: 50%;
    border-top: 16px solid #3498db;
    width: 120px;
    height: 120px;
    -webkit-animation: spin 2s linear infinite; /* Safari */
    animation: spin 2s linear infinite;
  }

  /* Safari */
  @-webkit-keyframes spin {
    0% { -webkit-transform: rotate(0deg); }
    100% { -webkit-transform: rotate(360deg); }
  }

  @keyframes spin {
    0% { transform: rotate(0deg); }
    100% { transform: rotate(360deg); }
  }
</style>
Chúng ta sẽ ẩn loader này đi khi dữ liệu đã được tải xong.
  function showDataTable(dataTable) {
    $('#loading').hide();
    ...
}
Kết quả
Như vậy chúng ta đã lấy được dữ liệu từ Google Sheets và tạo table trên web app sử dụng Data Table jQuery plug-in.
2. Chức năng Search
Data Tables jQuery plug-in cũng có chức năng search build-in. Tuy nhiên, để search thì cần phải fetch toàn bộ data giống như phần 1 ở trên. Trong nhiều trường hợp, chúng ta không muốn công khai toàn bộ dữ liệu mà chỉ muốn người dùng search tìm đúng thông tin của họ. Chẳng hạn:
- Tra cứu tình trạng đơn hàng bằng mã vận đơn.
- Tra cứu hóa đơn bằng mã số hóa đơn.
- Tra cứu lịch sử giao dịch bằng số tài khoản (hoặc số điện thoại).
- Tra cứu thông tin nhân sự bằng mã nhân viên.
Chúng ta sẽ viết lại web và chỉ hiển thị thông tin theo dữ liệu mà người dùng search.
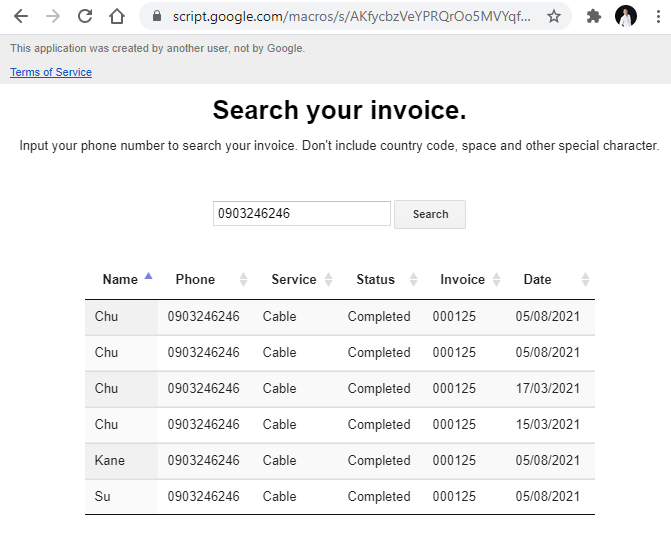
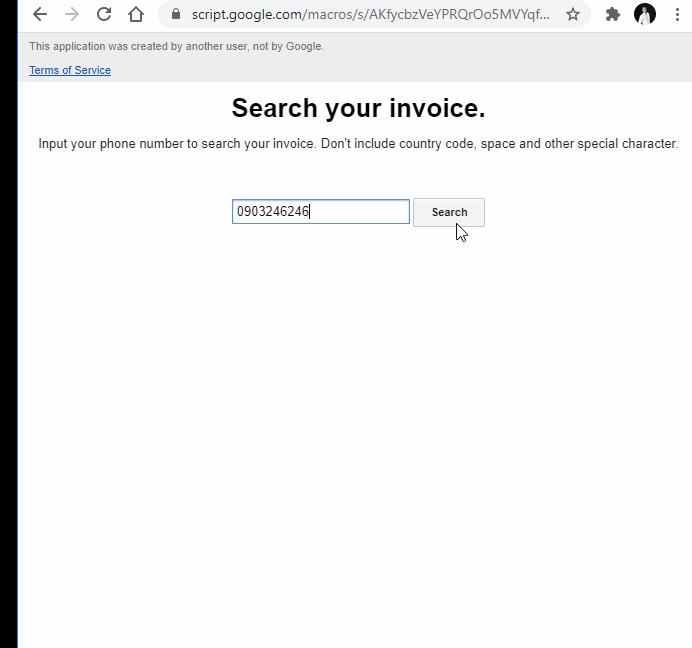
Search.html
File HTML này tương tự ở trên, chỉ có thêm thẻ <input> để người dùng nhập nội dung cần tìm.
<!-- File Search.html -->
<body>
    <div class="heading">
      <h1>Search your invoice.</h1>
      <p>Input your phone number to search your invoice.
          Don't include country code, space and other special character.</p>
    </div>

    <div class="search-box">
      <input id="searchText" type="text">
      <button id="searchBtn" onclick="handleSearch()">Search</button>
    </div>

    <div class="response" id="status-box">
      <table id="result" class="display" width="75%"></table>
    </div>
</body>
JavaScript.html
Khi người dùng nhấn button Search sau khi đã input dữ liệu thì client-side sẽ dùng class google.script.run để thực thi hàm searchByPhone(input) ở file code Apps Script. Sau khi return thì thêm dữ liệu vào Data Tables instance đã khởi tạo.
<script>
  function handleSearch() {
    // remove data in the previous search
    if ($.fn.DataTable.isDataTable('#result')) {
      $('#result').DataTable().clear().draw();
    }
    $('#searchBtn').attr('disabled', true);
    // get value
    let input = document.getElementById('searchText').value;

    // validation

    // request server-side
    google.script.run
       .withSuccessHandler(onSuccess)
       .withFailureHandler(onFailure)
      .searchByPhone(input);

    // render response see function onSuccess()
  };

  function onSuccess(result) {
    if ($.fn.DataTable.isDataTable('#result')) {
      appendDataTable('#result', result.data);
    } else {
      renderTable('#result', result);
    }
    $('#searchBtn').removeAttr('disabled');
  };

  function appendDataTable(elementSelector, rowData) {
    $(elementSelector).DataTable().rows.add(rowData).draw();
  }

  function renderTable(elementSelector, option) {
    var table = $(elementSelector);
    var field = [];
    option.header.forEach(name => {
      field.push({title: name});
    });
    table.DataTable({
      data: option.data,
      columns: field,
      paging: false,
      ordering: true,
      info: false,
      searching: false
      });
  }

  function onFailure() {
    window.alert('Đã xảy ra lỗi khi truy cập file.')
  }
</script>
Route
Web app của chúng ta giờ đã có 2 trang nên viết lại hàm doGet(e) để thêm tham số p.
function doGet(e) {
  var page = e.parameter.p || 'Index';
  return HtmlService.createTemplateFromFile(page)
    .evaluate();
}

function searchByPhone(input) {
  var range = sheet.getDataRange();
  var data = range.getValues();
  var header = data[0];
  var phoneCol = header.indexOf('Phone');
  var result = data.filter(function(row) {
      return row[phoneCol] === input
    });
  return {
    header: getHeaderArr(),
    data: result
    };
}
Như vậy, chúng ta đã xây dựng được chức năng search cơ bản để hiển thị dữ liệu lên web app Apps Script từ Google Sheets. Để hoàn thiện chức năng search này thì bạn có thể thực hiện validate search text và thêm loader để báo hiệu trạng thái load dữ liệu cho người dùng biết (giống phần 1), cũng như xử lý lỗi trong một số tình huống như không tìm thấy dữ liệu, người dùng chỉnh sửa tham số p nên không tìm thấy file.
All rights reserved
