Push Notification cho Android app sử dụng Firebase
Bài đăng này đã không được cập nhật trong 4 năm
Bài viết này sẽ tìm hiểu mọi thứ từ việc tạo token đến nhận và hiển thị thông báo (notification).
Chúng ta sẽ tìm hiểu cách kết hợp các thông báo trong ứng dụng của mình - xử lý token, gửi chúng đến máy chủ, nhận dữ liệu thông báo và hiển thị chúng cho người dùng.
Để làm cho thông báo hoạt động, trước tiên chúng ta cần đảm bảo ứng dụng của mình có thể kết nối với internet. Thêm quyền truy cập Internet và Access Network State vào tệp manifest để cung cấp cho nó khả năng kết nối với internet.
<uses-permission android:name=”android.permission.INTERNET” />
<uses-permission android:name=”android.permission.ACCESS_NETWORK_STATE” />
Bây giờ, chúng ta cần đăng ký ứng dụng của mình với Firebase để tiếp tục chuyển tiếp và tạo token. Chuyển đến Firebase Console và thêm một project như sau:
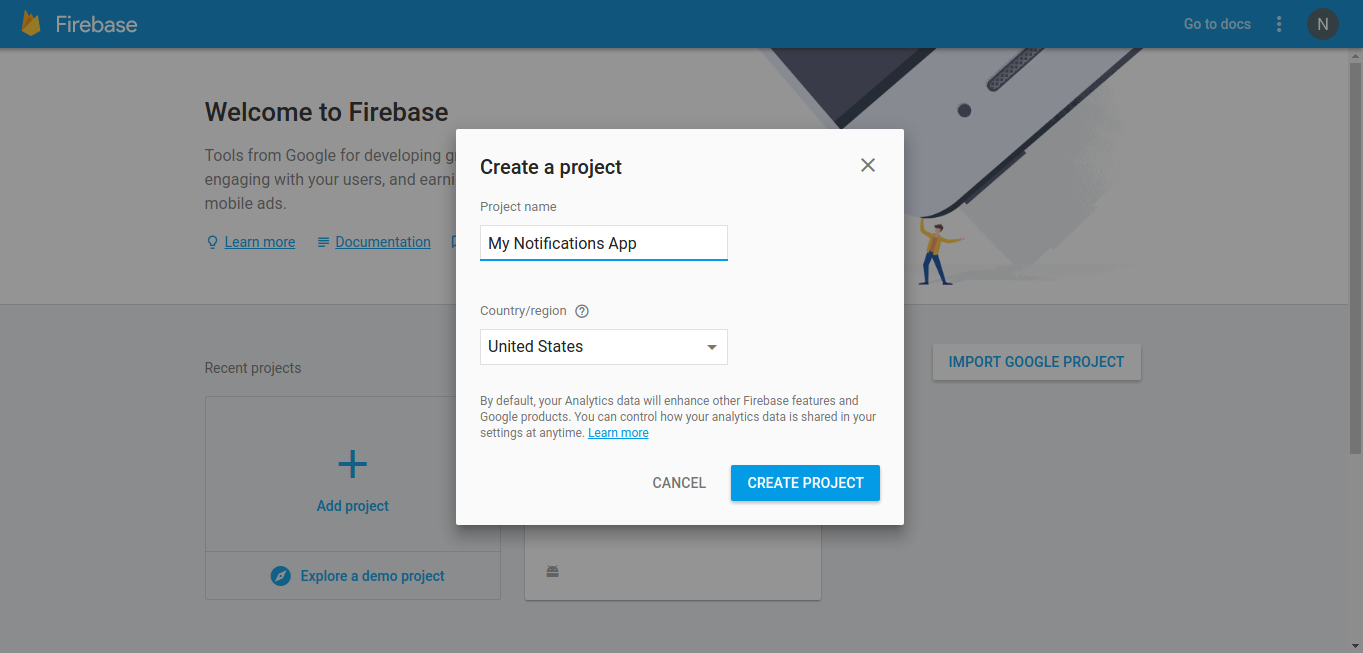
Nhập thông tin chi tiết và nhấn tạo dự án. Sau khi hoàn tất, một cửa sổ mới sẽ bật lên yêu cầu bạn tải xuống tệp google-services.json. Tải xuống tệp json và đặt nó vào thư mục ứng dụng dự án của bạn. FCM framework trên Android sử dụng tệp json này để xác thực ứng dụng của bạn dưới dạng một ứng dụng đã đăng ký và do đó tạo token thông báo cho mọi user của ứng dụng. Nhấn tiếp tục.
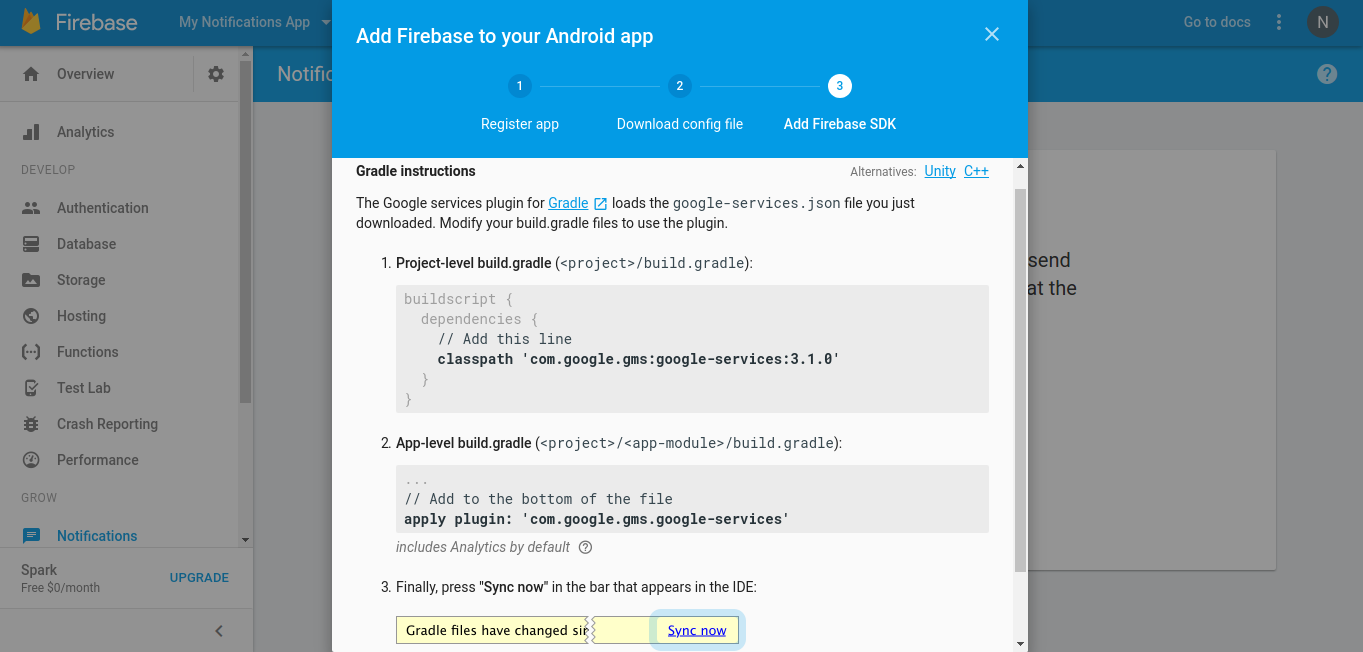
Thực hiện theo các hướng dẫn gradle và thêm phụ thuộc gms và plugin gms vào các tệp gradle chính xác. Sau khi thêm gradle đồng bộ hóa dự án của bạn. Bây giờ quay trở lại console. Bạn sẽ được chào đón với một overview tổng quan để thêm ứng dụng vào dự án mới được tạo để bắt đầu. Chọn Android và bạn sẽ thấy cửa sổ này bật lên:
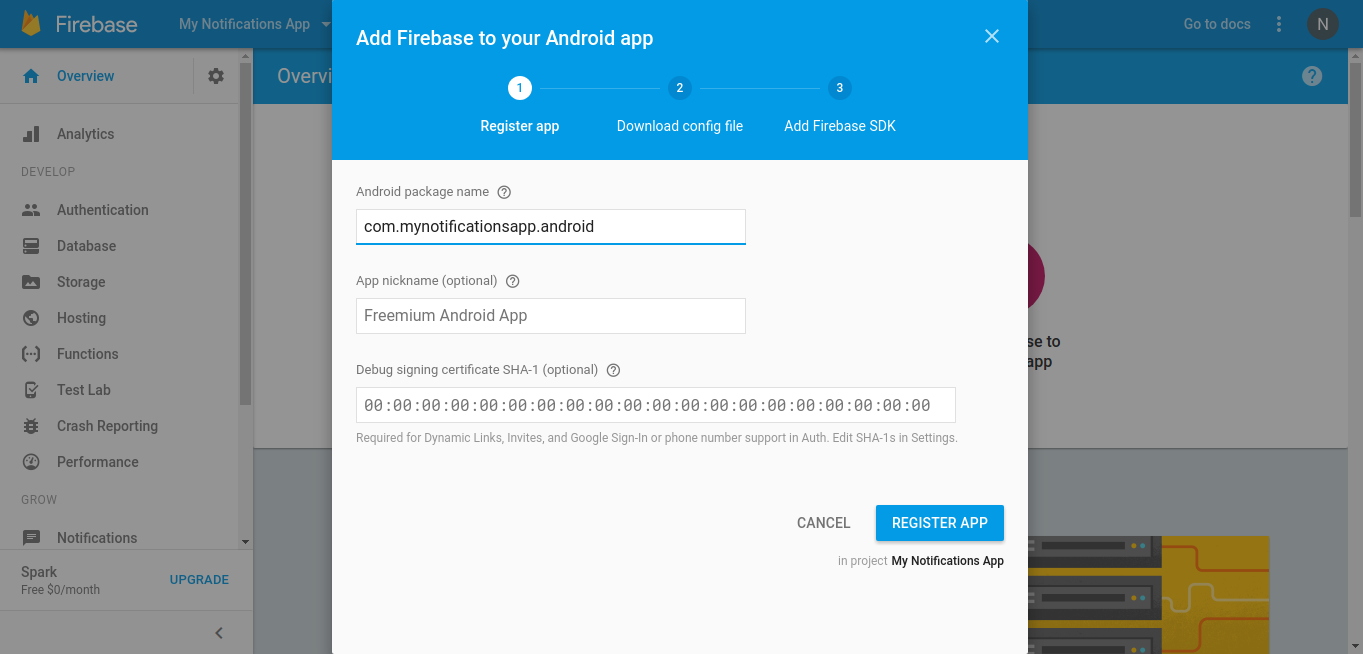
Nhập package name cho ứng dụng của bạn là một điều bắt buộc vì nó là unique key sử dụng để xác minh token cho ứng dụng. Bạn cũng có thể tùy chọn thêm một nickname cho ứng dụng. Mặc dù việc thêm chứng chỉ ký (SHA1) là tùy chọn nhưng bạn rất khuyến khích bạn thêm nó. Đăng ký ứng dụng là kết thúc quá trình thực hiện với phần Firebase Console. Tiếp theo là thiết lập ứng dụng.
Thêm phần sau vào build.gradle (Module: app) và đồng bộ hóa.
implementation 'com.google.firebase:firebase-messaging:20.1.0'
Điều này sẽ thêm module firebase messaging vào ứng dụng của chúng ta. Bây giờ chúng ta cần tạo token bằng class FirebaseInstanceIdService và gửi nó đến server sẽ được lưu trữ. Tạo một class InstanceIdService mới và mở rộng nó với FirebaseInstanceIdService. Bây giờ chúng ta cần thêm một hàm tạo và các phương thức onTokenRefresh bên trong class này.
String token = FirebaseInstanceId.getInstance().getToken();
Điều này sẽ giúp chúng ta lấy được token. Và bây giờ chúng ta có thể gửi nó đến server của chúng ta và lưu trữ để sử dụng tiếp.
package com.mynotificationsapp.android;

import com.google.firebase.iid.FirebaseInstanceId;
import com.google.firebase.iid.FirebaseInstanceIdService;

import java.io.DataOutputStream;
import java.io.IOException;
import java.net.HttpURLConnection;
import java.net.MalformedURLException;
import java.net.URL;

public class InstanceIdService extends FirebaseInstanceIdService {
    public InstanceIdService() {
        super();
    }

    @Override
    public void onTokenRefresh() {
        super.onTokenRefresh();
        String token = FirebaseInstanceId.getInstance().getToken();

        //sends this token to the server
        sendToServer(token);
    }

    private void sendToServer(String token) {

        try {
            URL url = new URL(api_end_point);
            HttpURLConnection connection = (HttpURLConnection) url.openConnection();

            connection.setDoOutput(true);
            connection.setDoInput(true);

            connection.setRequestMethod("POST");

            DataOutputStream dos = new DataOutputStream(connection.getOutputStream());

            dos.writeBytes("token=" + token);

            connection.connect();

            if (connection.getResponseCode() == HttpURLConnection.HTTP_OK) {
                // Do whatever you want after the
                // token is successfully stored on the server
            }

        } catch (MalformedURLException e) {
            e.printStackTrace();
        } catch (IOException e) {
            e.printStackTrace();
        }
    }
Giờ là lúc để chúng ta xử lý các tin nhắn. Tạo một class MessageReceiver mới và extend nó với FirebaseMessagingService và thêm phương thức khởi tạo và phương thức onMessageReceived. Phương thức sau để xử lý dữ liệu bạn gửi từ máy chủ hoặc Firebase Console.
package com.mynotificationsapp.android;

import android.app.Notification;
import android.app.NotificationManager;
import android.app.PendingIntent;
import android.content.Intent;
import android.support.v4.app.NotificationCompat;

import com.google.firebase.messaging.FirebaseMessagingService;
import com.google.firebase.messaging.RemoteMessage;

public class MessageReceiver extends FirebaseMessagingService {
    private static final int REQUEST_CODE = 1;
    private static final int NOTIFICATION_ID = 6578;

    public MessageReceiver() {
        super();
    }

    @Override
    public void onMessageReceived(RemoteMessage remoteMessage) {
        super.onMessageReceived(remoteMessage);

        final String title = remoteMessage.getData().get("title");
        final String message = remoteMessage.getData().get("body");

        showNotifications(title, message);
    }

    private void showNotifications(String title, String msg) {
        Intent i = new Intent(this, MainActivity.class);

        PendingIntent pendingIntent = PendingIntent.getActivity(this, REQUEST_CODE,
                i, PendingIntent.FLAG_UPDATE_CURRENT);

        Notification notification = new NotificationCompat.Builder(this)
                .setContentText(msg)
                .setContentTitle(title)
                .setContentIntent(pendingIntent)
                .setSmallIcon(R.mipmap.ic_launcher_round)
                .build();

        NotificationManager manager = (NotificationManager) getSystemService(NOTIFICATION_SERVICE);
        manager.notify(NOTIFICATION_ID, notification);
    }
}
Cuối cùng, chúng ta cần cập nhật manifest để phản ánh các thay đổi và FCM để hoạt động. Chúng ta cần thêm cả các class (services) mà chúng ta vừa tạo vào tệp kê khai.
<service android:name=”.MessageReceiver”>
 <intent-filter>
 <action android:name=”com.google.firebase.MESSAGING_EVENT” />
 </intent-filter>
</service>
<service android:name=”.InstanceIdService”>
 <intent-filter>
 <action android:name=”com.google.firebase.INSTANCE_ID_EVENT” />
 </intent-filter>
</service>
Chạy ứng dụng và truy cập Firebase Console > Notifications và chọn gửi tin nhắn mới. Nhập tin nhắn, chọn ứng dụng trong phần target và trong phần advanced, nhập tiêu đề và gửi. Bạn sẽ có thể thấy một Notification như bên dưới.
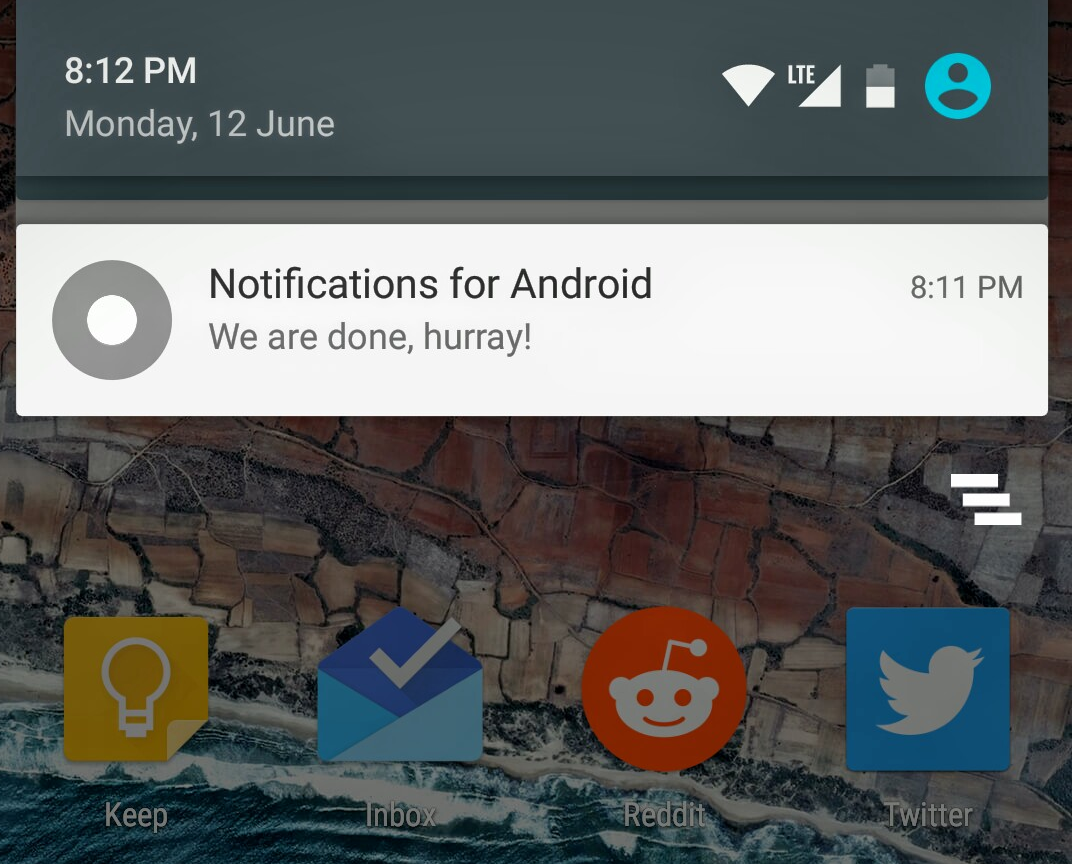
Như vậy là hoàn tất. Bây giờ chúng ta có thể sử dụng Firebase Console để gửi thông báo. Nếu bạn cần kiểm soát nhiều hơn đối với những gì cần gửi và ai sẽ gửi, thì tốt hơn hết là gửi thông báo bằng server của riêng bạn.
All rights reserved
