Laravel + Vue - sử dụng song song Vue Router và Router laravel
Bài đăng này đã không được cập nhật trong 3 năm
I. Lời mở đầu
Sau một thời gian tìm hiểu về Laravel và VueJS, cũng như áp dụng hai em nó vào một số project. Mình thấy laravel và vue js kết hợp với nhau khá là thú vị, bạn có thể chạy song song giữa router của vue và của laravel.
Vậy nên nay mình viết bài viết ngắn gọn này mình nghĩ có thể giúp ích được gì đó cho các bạn mới học vue và laravel.
II. Import Vue vào laravel.
Do thư viện Vue đã được thêm sẵn trong laravel cho nên các bạn chỉ việc import vào file app.js. Như sau
window.Vue = require('vue');

/**
 * Next, we will create a fresh Vue application instance and attach it to
 * the page. Then, you may begin adding components to this application
 * or customize the JavaScript scaffolding to fit your unique needs.
 */

const app = new Vue({
    el: '#app',
});
app.$mount('#app')
Xong bạn chỉ cần chạy npm run dev là bạn có thể gọi file vào blade để dùng vue.
III. Có 2 cách sử dụng vue ở laravel.
1. Gọi component vue vào blade của laravel.
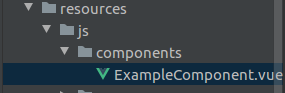
bước 1: Tạo 1 component ExampleComponent.vue. Như sau.
theo mình thì các Component bạn nên để ở folder Components như ảnh:
<template>
    <div class="container">
        <div class="row justify-content-center">
            <div class="col-md-8">
                <div class="card">
                    <div class="card-header">Example Component</div>

                    <div class="card-body">
                        I'm an example component.
                    </div>
                </div>
            </div>
        </div>
    </div>
</template>

<script>
    export default {
        mounted() {
            console.log('Component mounted.')
        }
    }
</script>
bước 2. Khai báo component ở app.js.
Để gọi được component ở các file blade thì ta phải đăng ký tên component với root của vue. Như sau:
window.Vue = require('vue');
/**
 * The following block of code may be used to automatically register your
 * Vue components. It will recursively scan this directory for the Vue
 * components and automatically register them with their "basename".
 *
 * Eg. ./components/ExampleComponent.vue -> <example-component></example-component>
 */

// const files = require.context('./', true, /\.vue$/i)
// files.keys().map(key => Vue.component(key.split('/').pop().split('.')[0], files(key).default))

Vue.component('example-component', require('./components/ExampleComponent.vue').default);

const app = new Vue({
    el: '#app',
});
app.$mount('#app')
bước 3: gọi component vào blade.
    <!-- Scripts -->
    <script src="{{ asset('js/app.js') }}" defer></script>
Các bạn chú ý là trong file blade app bạn đã import file app.js rồi nhé.
@extends('layouts.app')

@section('content')
    <example-component></example-component>
@endsection
khi chạy bạn sẽ thấy content của component vậy bạn đã thành công.

Chú ý trường hợp này là trường hợp chạy bằng router của laravel.
2. Gọi component bằng vue router. bước 1: đầu tiên bạn cần install thư viện vue router.
chạy lệnh:
npm install vue-router
sau đó bạn cần tạo router.
Theo mình thì các bạn nên chia thành 2 file: cấu trúc như sau:
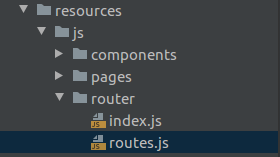
file router.js để các bạn khai báo các router như sau:
import ExampleComponent from '../components/ExampleComponent'

export default [{
    path: '/',
    component: ExampleComponent,
    name: 'ExampleComponent',
    meta: {
        permission: []
    }
}]
file index.js để config vue router.
import VueRouter from 'vue-router'
import routes from './routes'

const router = new VueRouter({
    base: 'app/',
    routes,
    mode: 'history'
})

export default router
tiếp theo bạn cần khai báo với root vue.
/**
 * Next, we will create a fresh Vue application instance and attach it to
 * the page. Then, you may begin adding components to this application
 * or customize the JavaScript scaffolding to fit your unique needs.
 */
import router from './router'
import VueRouter from 'vue-router'

Vue.use(VueRouter)

const app = new Vue({
    el: '#app',
    router,
});
app.$mount('#app')
để chạy được song song giữa router của vue và laravel thì t cần định nghĩa base url cho router vue như ở trên.
sau đó bạn cần tạo controller để tạo liên kết với router của vue js như hình sau:
<?php

namespace App\Http\Controllers;

use Illuminate\Http\Request;

class VueController extends Controller
{
    public function index() {
        return view('app');
    }
}
Thêm router chỉ tới Controllers.
Route::get('/app/{any}', 'VueController@index')->where('any', '.*');
Tạo 1 file balde để vue router render ra.
<!doctype html>
<html lang="{{ str_replace('_', '-', app()->getLocale()) }}">
<head>
    <meta charset="utf-8">
    <meta name="viewport" content="width=device-width, initial-scale=1">

    <!-- CSRF Token -->
    <meta name="csrf-token" content="{{ csrf_token() }}">

    <title>{{ config('app.name', 'Laravel') }}</title>

    <!-- Scripts -->
    <script src="{{ asset('js/app.js') }}" defer></script>

    <!-- Fonts -->
    <link rel="dns-prefetch" href="//fonts.gstatic.com">
    <link href="https://fonts.googleapis.com/css?family=Nunito" rel="stylesheet">

    <!-- Styles -->
    <link href="{{ asset('css/app.css') }}" rel="stylesheet">
</head>
<body>
    <div id="app">
        <router-view></router-view>
    </div>
     <!-- Scripts -->
     <script src="{{ asset('js/app.js') }}"></script>
</body>
</html>
cuối cùng bạn có thể truy cập vào: http://127.0.0.1:8000/app/ bạn thấy content như cách trên vậy là bạn đã thành công.
Lời kết
Cảm ơn các bạn đã đọc bài viết của mình. Nếu các bạn có góp ý gì vui lòng comment giúp mình nhé và đừng quên upvote cho mình nha nha.
All rights reserved
