Introduction to Flutter
Bài đăng này đã không được cập nhật trong 3 năm

Introduction
Flutter is developed by Google and it uses Google’s UI toolkit for building natively compiled applications for mobile platforms, web, and desktop all from a single codebase. It aims at delivering Fast Development with support for hot reloading, Expressive and Flexible User Interfaces and all while delivering Native Performance in different platforms. The native performance is archeived by compiling your code to native ARM machine code using Dart's native compilers. This tutorial will guide you into understanding the basics of Flutter and i like to teach by demonstration so as always we will make a working application with a database (Sql Lite) for demostrating how easy it is to build a multiplatform app that fetches data, save data and update this data using flutter. Ill do my best to avoid anything that may complicate your learning progress so without further ado, let us dive right in.
Download flutter here . Select your platform either Mac or Windows or Ubuntu. Downlaod the zip/file and extract to C: directory so your flutter folder will be located at C:flutter (On Windows). You can also add the flutter to your Variable path by clicking the start icon then go to Edit the system enviroment variable. Next select Enviroment Variables > Path > Edit then add new and input C:\flutter\bin (Note because in my case flutter was pasted into C: so i specify this directory). Click ok and close the pop up.
Next you can verify what version of flutter is installed by opening the command line and entering where flutter (On windows) or which flutter (On Mac). Also if you have an error specifying that dart isnt installed you can follow the instruction to install dart then run flutter doctor to see some infos about flutter. Moving on! I will be using Android studio as my IDE because it natively supports flutter making it easier to develop our apps. Open android studio and follow the following steps to setup you enviroment.
More note on Mac Version
To fully set up Mac version. After you paste your flutter in a directory. In my case Desktop (Mac) you can add it to PATH by opening command line and typing: rm -rf <flutter_repo_directory>/Desktop/bin/cache (Please note my specified directory includes Desktop so input yours accordingly). To test if it works close the command line and re open then type flutter doctor this will download necessary files and give you a summary. Also its important to update your XCode to latest version if you want to test on ios devices also. Next follow the instruction to fix remaining errors. In my case i got an error to install cocopods which i did by typing: sudo gem install cocoapods and also updating xcode by typing: sudo xcode-select --switch /Applications/Xcode.app/Contents/Developer
After you have successfully run and updated this tools you can run flutter doctor again and this time you should get no error and also will be able to detect attached devices. If you encounter any error please follow this guide again.
Step1
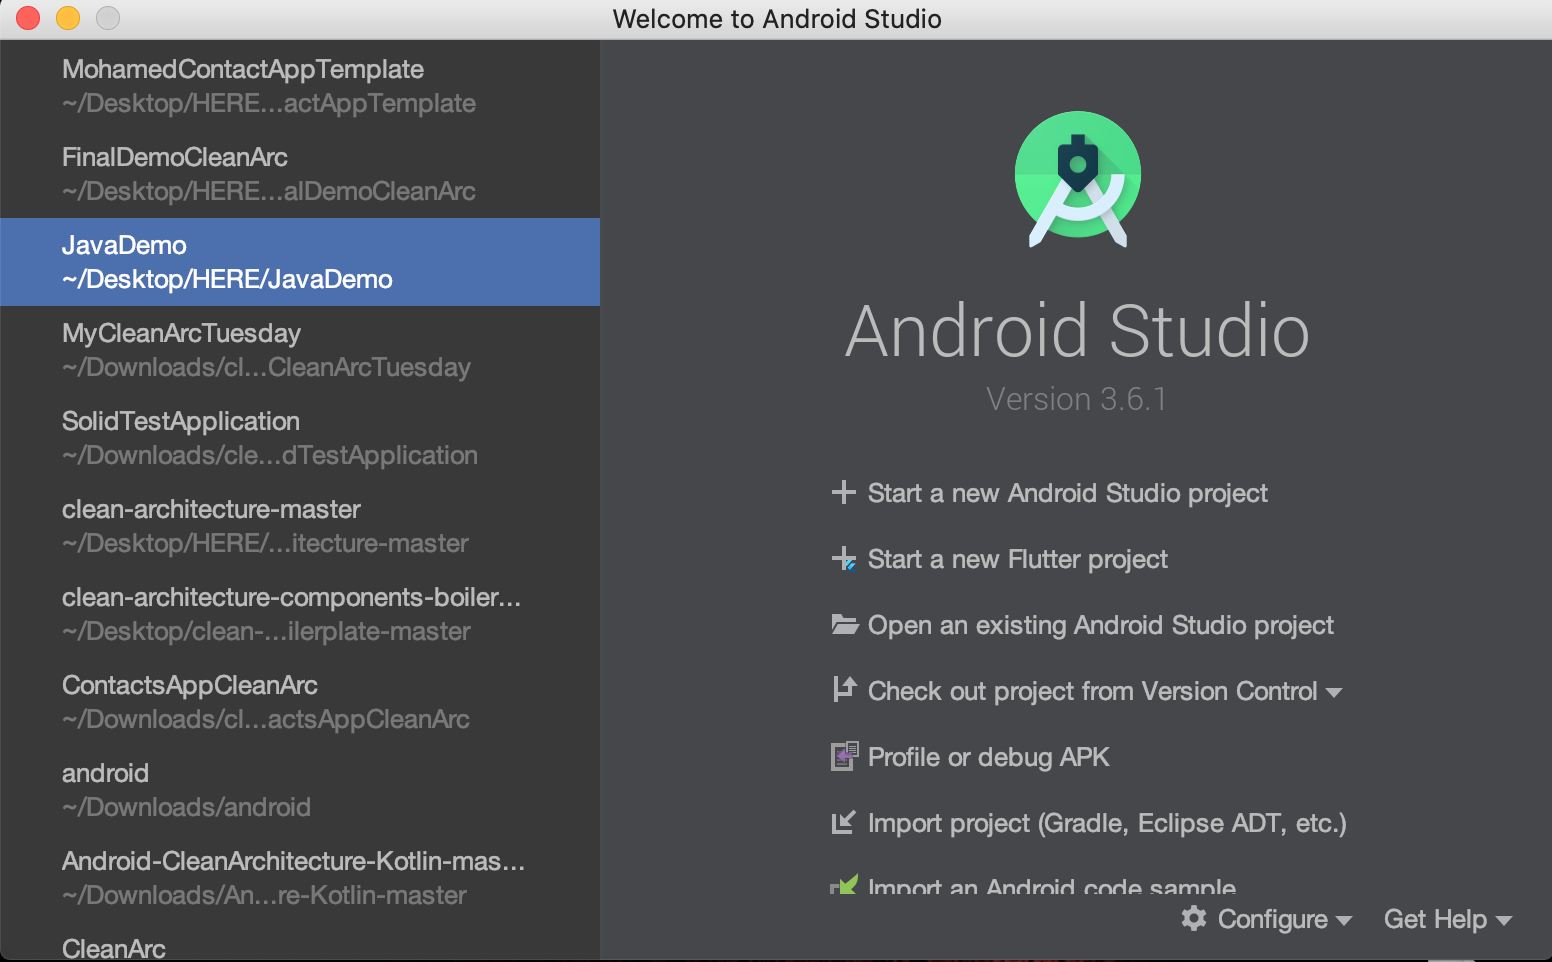
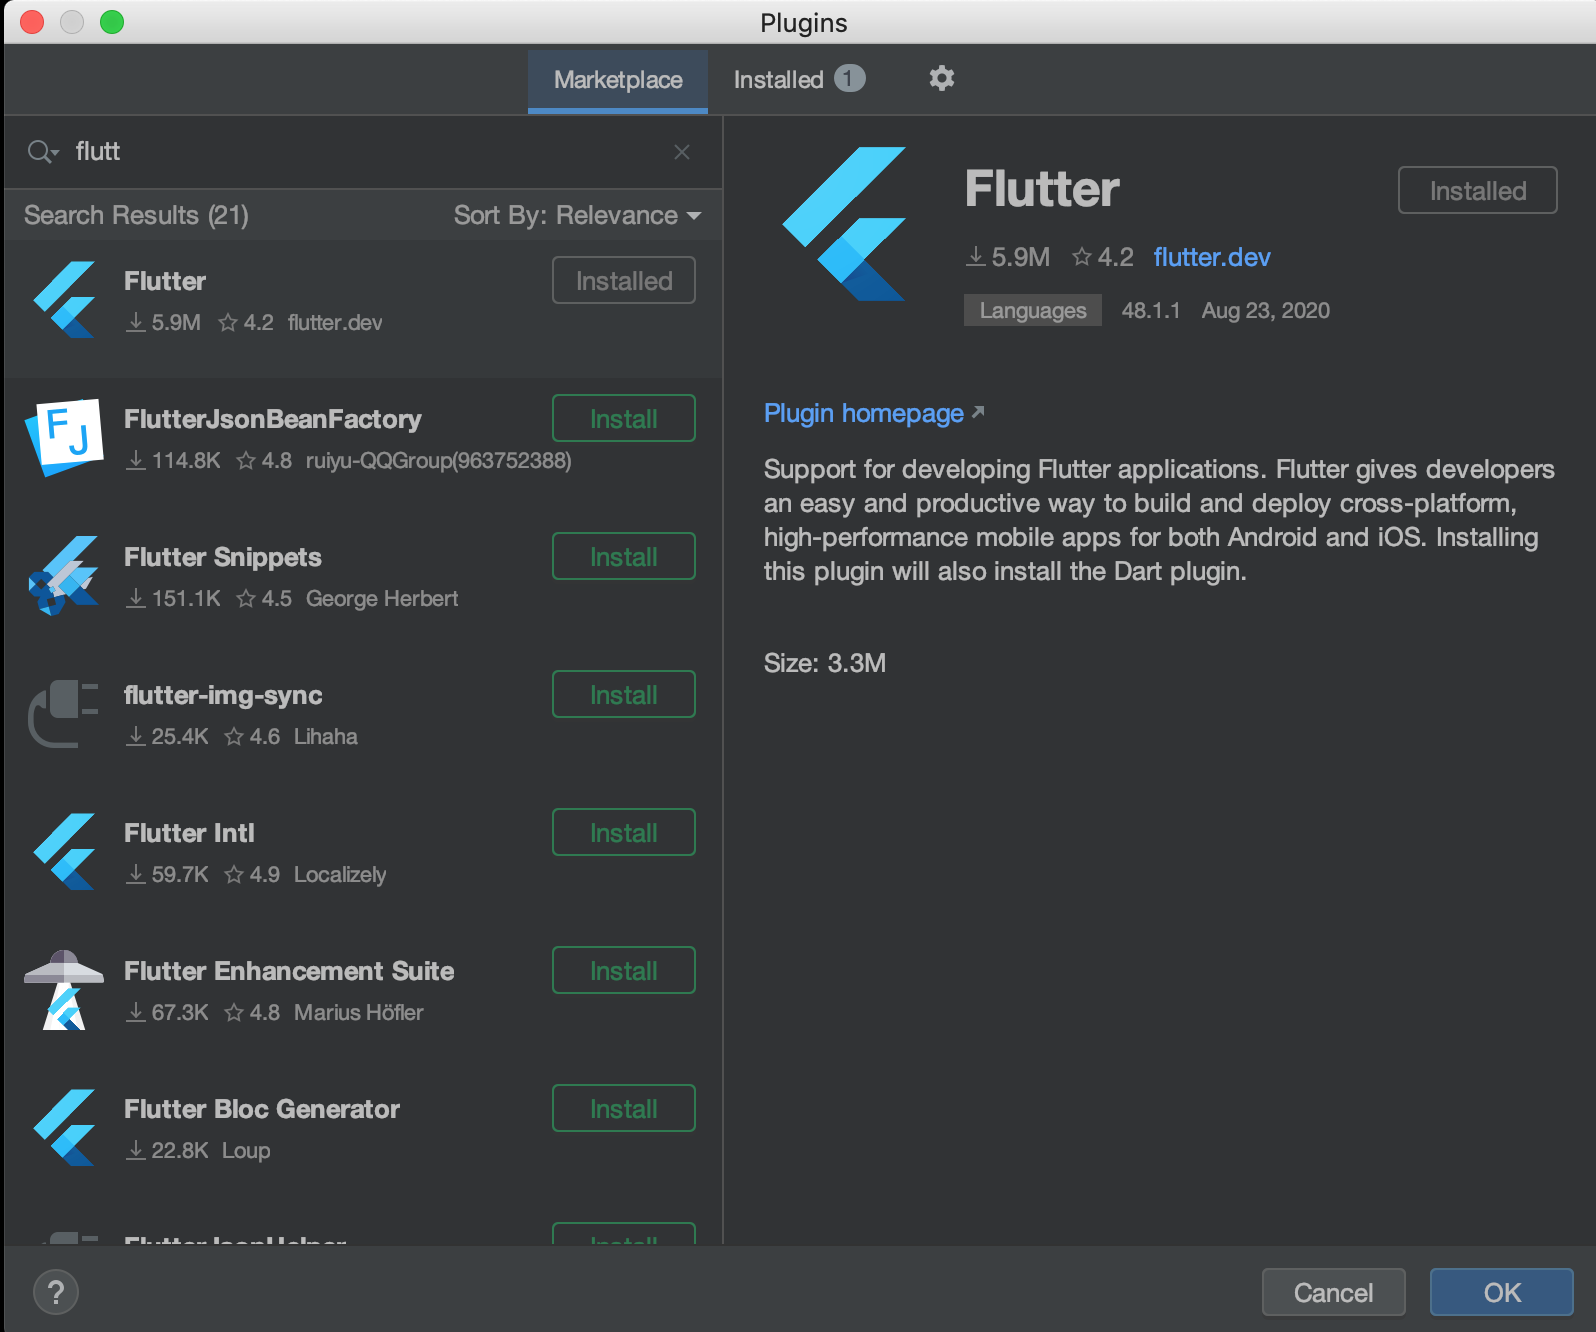
Click Configure >> Packages and search flutter. Install it then restart Android Studio.
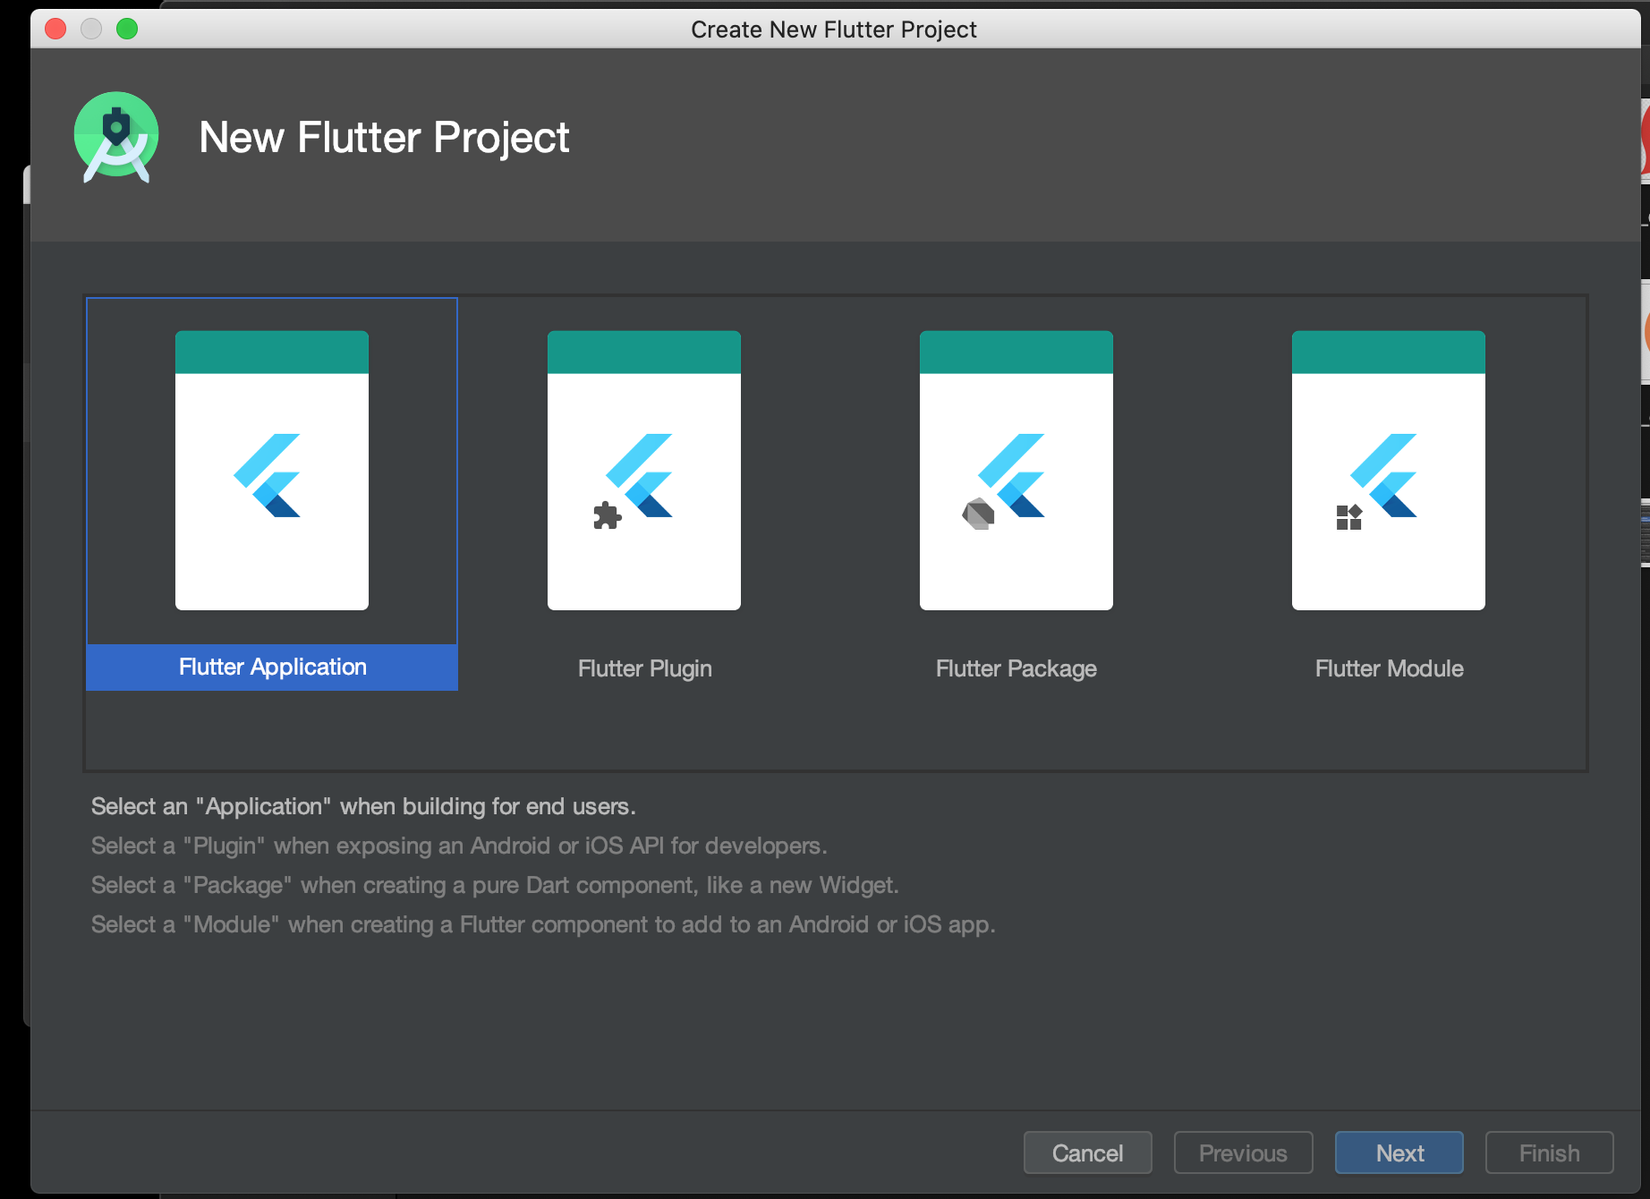
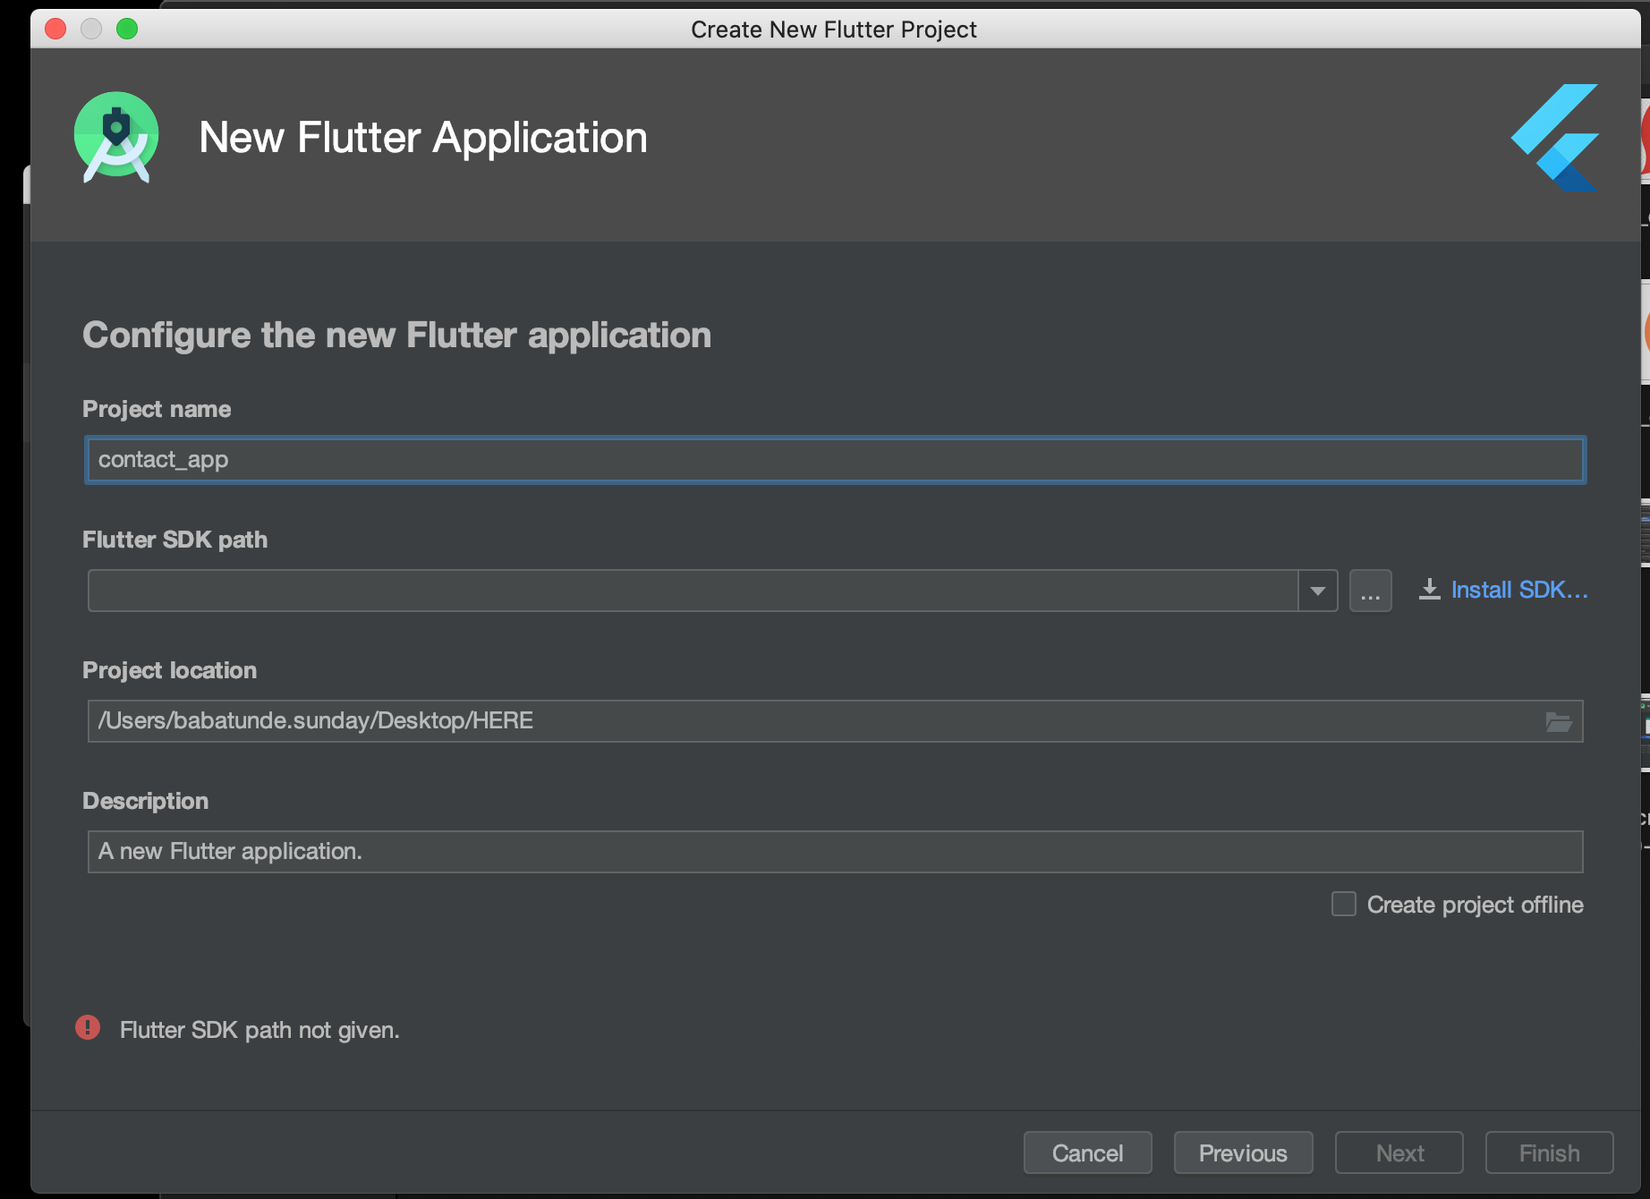
Step2
Click create new Flutter App >> Set the sdk path of your flutter >> Set name of the app (contact_app) and Finish.
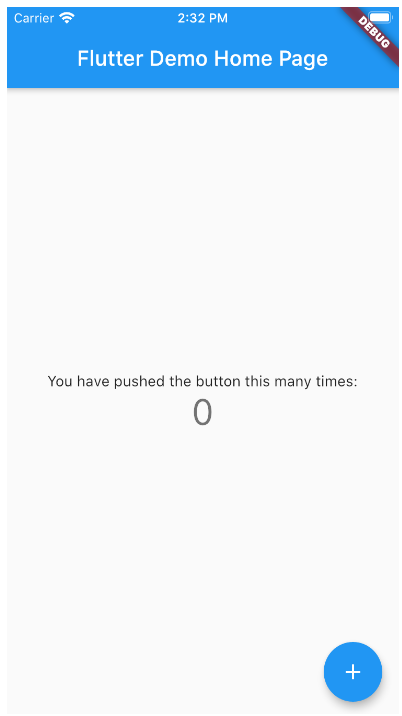
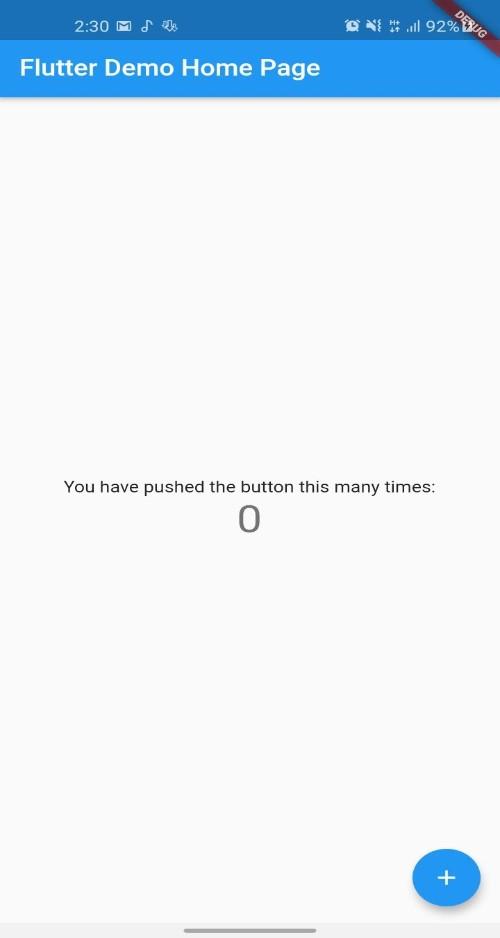
Once your apps is done building, Run it to make sure everything is fine.
Ios
Android
Now lets begin the fun parts 
Part1
Inside the lib folder, create a new folder called model and in this a dart class Contact.
Contact.dart
class Contact {
  final int id;
  final String avatar;
  final String name;
  final String address;
  final String phone;
  final int gender;
  static const String TABLE_NAME = "contacts";

  Contact({this.id, this.avatar, this.name, this.address, this.phone, this.gender});

  Map<String, dynamic> toMap() {
    return {'id': id, 'avatar': avatar, 'name': name, 'address': address, 'phone': phone, 'gender': gender};
  }
}
Next lets update the pubspec.yaml file to import sqflite library. sqflite is a sql lite library that we can use to save our data. Remove all the unecessary text so your file appears cleaner and add the sqflite: path: to the dependency as shown below.
pubspec.yaml
name: contact_app
description: A new Flutter application.

version: 1.0.0+1

environment:
  sdk: ">=2.7.0 <3.0.0"

dependencies:
  flutter:
    sdk: flutter
  sqflite:
  path:

  cupertino_icons: ^0.1.3

dev_dependencies:
  flutter_test:
    sdk: flutter

flutter:
  uses-material-design: true
Now we need to add another package screens. Here we will add a screen CreateContactScreen.dart. This will have our contacts input such as name, number and so on. But first lets set up our Homescreen.dart which is the starting screen of our app.
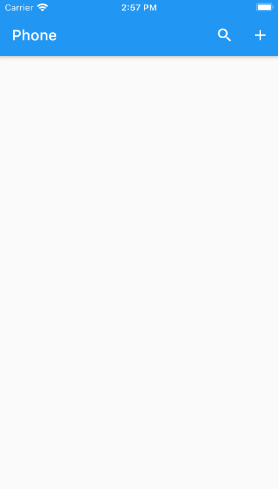
Homescreen.dart
import 'package:flutter/material.dart';

class HomeScreen extends StatelessWidget {
  @override
  Widget build(BuildContext context) {
    return Scaffold(
      appBar: AppBar(
        title: Text('Phone'),
        actions: <Widget>[
          IconButton(
            icon: Icon(
              Icons.search,
              color: Colors.white,
            ),
            onPressed: () {
              // Todo Search
            },
          ),
          IconButton(
            icon: Icon(
              Icons.add,
              color: Colors.white,
            ),
            onPressed: () {
              _navigateToCreateContactScreen(context);
            },
          )
        ],
      ),
      body: Column(
        children: <Widget>[

        ],
      ),
    );
  }

  _navigateToCreateContactScreen(BuildContext context) async {
    final result = await Navigator.push(
      context,
      MaterialPageRoute(builder: (context) => CreateContactScreen()),
    );
    Scaffold.of(context)
      ..removeCurrentSnackBar()
      ..showSnackBar(SnackBar(content: Text("$result")));
  }
}
In this class we have added an app bar which includes two icons. One is the add icon to open the CreateContactScreen when clicked and the second is a search icon which we will also implement later on. The function navigateToCreateContactScreen will take us to the CreateContactScreen using MaterialPageRoute which we pass the instance of our screen to. You have one error because we havent created this screen CreateContactScreen() as of yet so lets do that but before we do that we have to let the app know we want our HomeScreen to be the launch and start screen of our app so open main.dart class and set it.
main.dart
import 'package:contact_app/widgets/HomeScreen.dart';
import 'package:flutter/material.dart';

void main() {
  runApp(MyApp());
}

class MyApp extends StatelessWidget {
  @override
  Widget build(BuildContext context) {
    return MaterialApp(
      debugShowCheckedModeBanner: false,
      title: 'Contact App',
      theme: ThemeData(
      //You can change the theme of your app here. Change the color from blue to your choice
        primarySwatch: Colors.blue,
      ),
      home: HomeScreen(),
    );
  }
}
A breif explanation of what we have done here. First we cleared the default auto generated code and set the title of the App and theme to color blue (You can change to whatever color you prefer) but the most important part is we set the home: HomeSceen() letting the app knows we want this to be our launch screen. The first and second line are imports only. The first imports the HomeScreen class and the other imports material.dart library which allows us to use a kind of material design elements as provided by google. Enough talk lets proceed. Now we need to fix the error on the HomeScreen by creating another screen in our screens package called CreateContactScreen but first lets create an images directory and add camera.png to it (Note that this directory should be added to the main project folder not lib)
image (camera.png)

We also have to reference this image in the pubspec.yaml file else you wont be able to use it. So add this line to the file right under uses-material-design: true .
pubspec.yaml
  assets:
    - images/camera.png
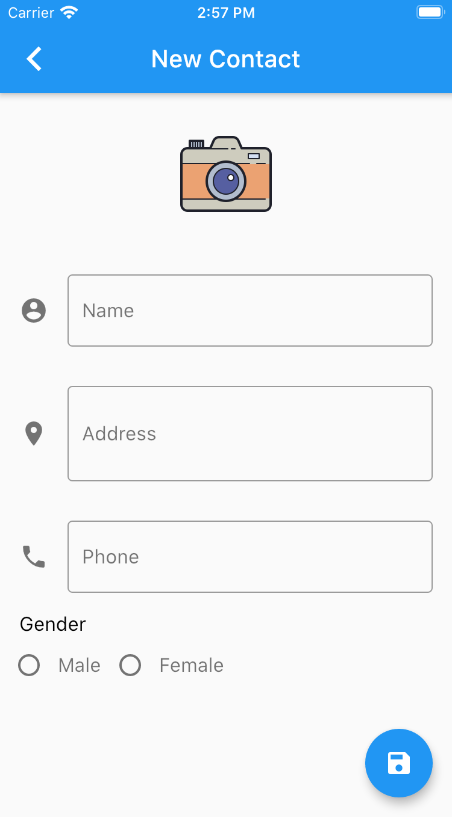
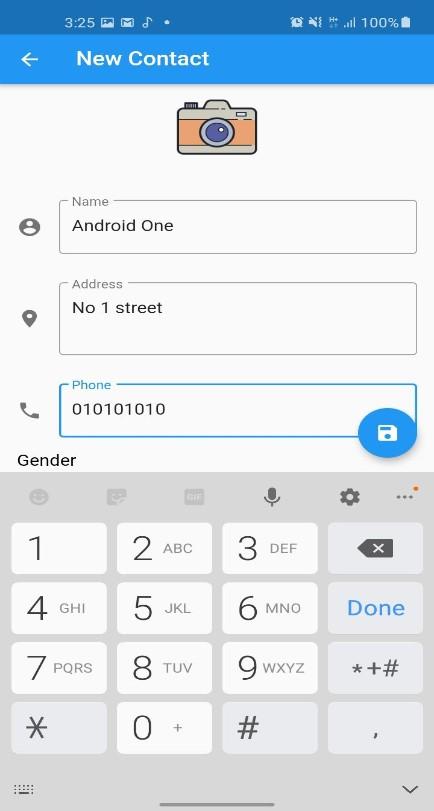
Alright now the CreateContactScreen design we want to archeive should look something like this:
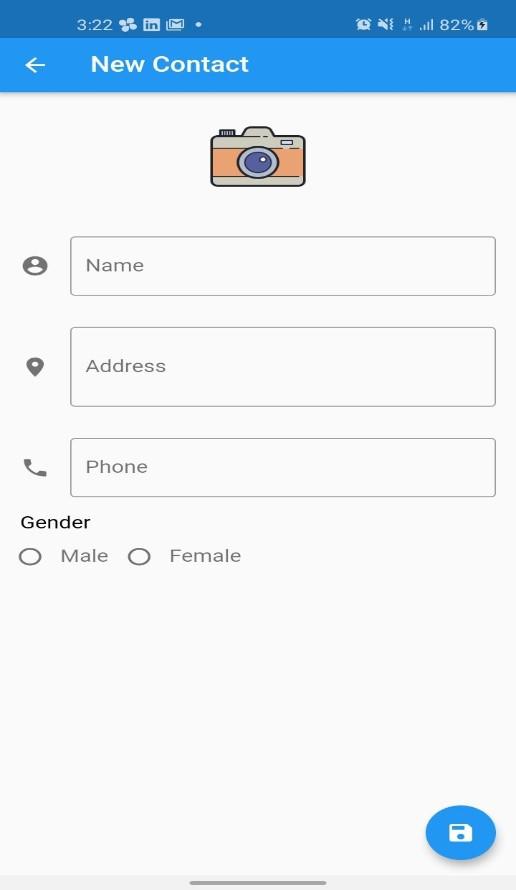
Its a simple design and ill explain each part of it as simple as i can.
CreateContactScreen.dart
import 'package:contact_app/model/Contact.dart';
import 'package:flutter/material.dart';
import 'package:flutter/services.dart';

class CreateContactScreen extends StatefulWidget {
  static const routeName = '/createContactScreen';
  final Contact contact;

  const CreateContactScreen({Key key, this.contact}) : super(key: key);

  @override
  State<StatefulWidget> createState() => _CreateContactState(contact);
}

class _CreateContactState extends State<CreateContactScreen> {
  Contact contact;
  String avatarController = "";
  final nameTextController = TextEditingController();
  final phoneTextController = TextEditingController();
  final addressTextController = TextEditingController();
  int _radioGenderValue = -1;
  String title = "New Contact";
  _CreateContactState(this.contact);

  @override
  void initState() {
    super.initState();
    if (contact != null) {
      avatarController = contact.avatar;
      nameTextController.text = contact.name;
      phoneTextController.text = contact.phone;
      addressTextController.text = contact.address;
      _radioGenderValue = contact.gender;
      title = contact.name;
    }
  }

  @override
  void dispose() {
    super.dispose();
    nameTextController.dispose();
    phoneTextController.dispose();
    addressTextController.dispose();
  }

  @override
  Widget build(BuildContext context) {
    return Scaffold(
      appBar: AppBar(
        title: Text(title),
      ),
      body: SingleChildScrollView(
          child: Column(
            children: <Widget>[
              Padding(
                padding: const EdgeInsets.all(16.0),
                child: Image.asset(
                  'images/camera.png',
                  width: 100,
                  height: 100,
                  fit: BoxFit.cover,
                ),
              ),
              Padding(
                padding: const EdgeInsets.all(16.0),
                child: TextField(
                  decoration: InputDecoration(
                      border: OutlineInputBorder(),
                      labelText: "Name",
                      icon: Icon(Icons.account_circle, color: Colors.black54)),
                  maxLines: 1,
                  controller: nameTextController,
                  keyboardType: TextInputType.name,
                ),
              ),
              Padding(
                padding: const EdgeInsets.all(16.0),
                child: TextField(
                  decoration: InputDecoration(
                      border: OutlineInputBorder(),
                      labelText: "Address",
                      icon: Icon(Icons.location_on, color: Colors.black54)),
                  maxLines: 2,
                  controller: addressTextController,
                  keyboardType: TextInputType.streetAddress,
                ),
              ),
              Padding(
                padding: const EdgeInsets.all(16.0),
                child: TextField(
                  decoration: InputDecoration(
                      border: OutlineInputBorder(),
                      labelText: "Phone",
                      icon: Icon(Icons.phone, color: Colors.black54)),
                  maxLines: 1,
                  controller: phoneTextController,
                  keyboardType: TextInputType.phone,
                ),
              ),
              new Padding(
                padding: new EdgeInsets.all(0.0),
              ),
              Align(
                  alignment: Alignment.centerLeft,
                  child: Container(
                    child: Text(
                      'Gender',
                      textAlign: TextAlign.left,
                      style: new TextStyle(
                          fontWeight: FontWeight.normal,
                          fontSize: 16.0,
                          color: Colors.black),
                    ),
                    padding: new EdgeInsets.fromLTRB(16, 0, 0, 0),
                  )),
              new Row(
                mainAxisAlignment: MainAxisAlignment.start,
                children: <Widget>[
                  new Radio(
                    value: 0,
                    groupValue: _radioGenderValue,
                    onChanged: _handleRadioGenderValueChange,
                  ),
                  new Text(
                    'Male',
                    style: new TextStyle(fontSize: 16.0, color: Colors.black54),
                  ),
                  new Radio(
                    value: 1,
                    groupValue: _radioGenderValue,
                    onChanged: _handleRadioGenderValueChange,
                  ),
                  new Text(
                    'Female',
                    style: new TextStyle(
                        fontSize: 16.0, color: Colors.black54
                    ),
                  ),
                ],
              ),
            ],
          )),
      floatingActionButton: FloatingActionButton(
          child: Icon(Icons.save),
          onPressed: () async {
            //Save Contact to db
            setState(() {});
          }),
    );
  }

  void _handleRadioGenderValueChange(int value) {
    setState(() {
      _radioGenderValue = value;
    });
  }
}
So lets get to it. Here are the important parts of this class and what they do:
- Line 1 to 3: Our imports. We imported the Model (Contact.dart) class and other libraries we need.
- Line 5: We extended the StatefulWidget class. Do not worry much about what StatefulWidget is but understand that most design interfaces in Flutter are treated as widgets and in this case we are using StatefulWidget because it is a widget that describes part of the user interface by building a constellation of other widgets (widget within widget) that describe the user interface more concretely. So we use Stateful widgets when the part of the user interface can change dynamically. Also Since the fields we are using now are editables, the Widget must be a StatefulWidget, so we have created our StatefulWidgets with their respective States (nameTextController, phoneTextController....). Moving on!
- Line 15 to end: Defintely where all the actions happens. Because we will be using this screen to add new Contact and also update a contact we can archieve this by extending Sate framework. In the initState we will recieve an instance of the Contact class which we will check if not null and set the present widgets values (In case of update only. You can see we also set the title to contact.name. this will be fully integrated when we finish the database). Name will be set, gender and all others.
Next we are disposing our controllers in the dispose method. This is Called when an object is removed from the tree permanently. This is to release any resources retained by any of our objects/controllers. Now lets move on to the build (Line 45+). Here one can customize the Appbar, body and add child widgets to the interface. Each widget is put in a seperate padding wrapper so you can easily find them. there is the Image where we set the assets as our camera.png, then there are mutiple TextFields for Name, Address, Phone and so on. You can also see we set the keyboardType specifically for each TextField and pass the controllers to their respective owners while aslo using material icons to set custom icons for the Fields.
The last Widgets are the radio buttons which are placed in a row and assigned value 0 and 1 respectively. 0 for Male and 1 for female. We also added an onChanged events that will be fired when a radio button is checked where the value of the radio button will be passed to the variable _radioGenderValue
The floatingActionButton we added when clicked will call a method which we will create later to save our Contact in the database. I know this is a lot to digest but dont worry about the blabering, at least not all of it. Only try to understand the essential part of the class. What does what, Which function is responsible for what and thats all.
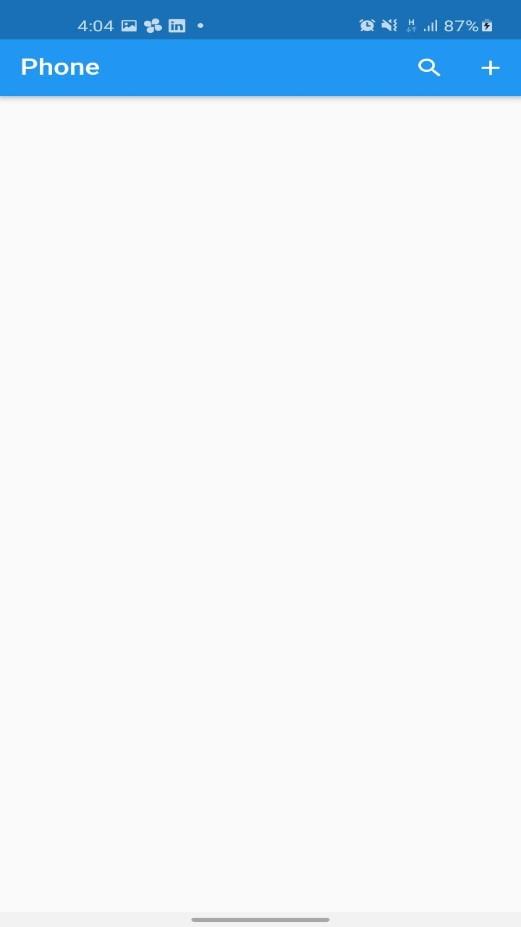
With this class done we can test the app. Connect the device and click on run and you should be directed to the HomeScreen. Click on the + icon and the CreateContactScreen should open.
HomeScreen and CreateContactScreen Android

HomeScreen and CreateContactScreen Ios
Lets call this the end of Part1 and now we move on to Part2.
Part 2
In this part we will integrate the sqllite database in our app. We already added the sql library to the dependency so now we will create the databaseHelper classes and such. Inside the lib directory add a new package db and in here add a class DatabaseHelper
DatabaseHelper.dart
import 'package:contact_app/model/Contact.dart';
import 'package:path/path.dart';
import 'package:sqflite/sqflite.dart';

class DatabaseHelper {
  DatabaseHelper._();

  static const databaseName = 'contacts_database.db';
  static final DatabaseHelper instance = DatabaseHelper._();
  static Database _database;

  Future<Database> get database async {
    if (_database == null) {
      return await initializeDatabase();
    }
    return _database;
  }

  initializeDatabase() async {
    return await openDatabase(join(await getDatabasesPath(), databaseName),
        version: 1, onCreate: (Database db, int version) async {
          await db.execute(
              "CREATE TABLE contacts(id INTEGER PRIMARY KEY AUTOINCREMENT NOT NULL, avatar TEXT, name TEXT, address TEXT, phone TEXT, gender INTEGER)");
        });
  }

  insertContact(Contact contact) async {
    final db = await database;
    var res = await db.insert(Contact.TABLE_NAME, contact.toMap(),
        conflictAlgorithm: ConflictAlgorithm.replace);
    return res;
  }

  Future<List<Contact>> retrieveContacts() async {
    final db = await database;

    final List<Map<String, dynamic>> maps = await db.query(Contact.TABLE_NAME);

    return List.generate(maps.length, (i) {
      return Contact(
        id: maps[i]['id'],
        avatar: maps[i]['avatar'],
        name: maps[i]['name'],
        address: maps[i]['address'],
        phone: maps[i]['phone'],
        gender: maps[i]['gender'],
      );
    });
  }

  updateContact(Contact contact) async {
    final db = await database;

    await db.update(Contact.TABLE_NAME, contact.toMap(),
        where: 'id = ?',
        whereArgs: [contact.id],
        conflictAlgorithm: ConflictAlgorithm.replace);
  }

  deleteContact(int id) async {
    var db = await database;
    db.delete(Contact.TABLE_NAME, where: 'id = ?', whereArgs: [id]);
  }
}
Using the sql lite query: "CREATE TABLE contacts(id INTEGER PRIMARY KEY AUTOINCREMENT NOT NULL, avatar TEXT, name TEXT, address TEXT, phone TEXT, gender INTEGER)"); we have created a table contacts and added an auto generated id for each row with collums to hold all the contact data from avatar to gender. The method insertContact() will be used to add a contact to the database while we retrieve all the contacts as a List using the retrieveContacts() method. To delete we will also call the deleteContact() method which accepts the id as a parameter to locate a contact and finally the updateContact() will you guessed it, update a contact.
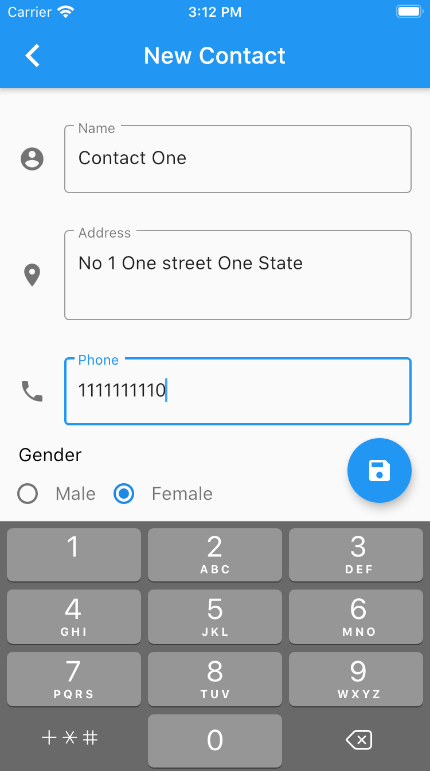
Next open the CreateContactScreen.dart and add this function:
   _saveContact(String avatar, String name,String address, String phone, int gender) async {
    if (contact == null) {
      DatabaseHelper.instance.insertContact(Contact(
          avatar: avatarController,
          name: nameTextController.text,
          address: addressTextController.text,
          phone: phoneTextController.text,
          gender: _radioGenderValue
      ));
    } else {
      await DatabaseHelper.instance
          .updateContact(Contact(id: contact.id, avatar: avatar, name: name, address: address, phone: phone, gender: gender));
    }
    _gotoHomeScreen();
  }

  _gotoHomeScreen() async{
    await Navigator.pushReplacement(context, MaterialPageRoute(builder: (context) => HomeScreen()),
    );
  }
Finally call this method in the onPressed of the floating button to save. Note that we also check if an object contact exist and if so we will update and not create a new contact. This contact will be passed when user selects a contact from HomeScreen as we will be using the same screen (CreateContactScreen) for creating new contact and also updating a contact.
......
      floatingActionButton: FloatingActionButton(
          child: Icon(Icons.save),
          onPressed: () async {
            _saveContact(avatarController, nameTextController.text, addressTextController.text, phoneTextController.text, _radioGenderValue);
            setState(() {});
          })
          ....
We will have to update our HomeScreen so that all our contacts are loaded and displayed automatically when we open the screen as a normal contact app should. We will make use of the retrieveContacts() in the DatabaseHelper class to get all our contacts then pass to a List which is then displayed in the body of our HomeScreen.dart. We also have to update the HomeScreen to extend a StatefulWidget rather than the previous StatelessWidget. There will be a class ContactListView which will return our custom view layout. Below is the full updated HomeScreen.dart.
Homescreen.dart
import 'package:contact_app/screens/CreateContactScreen.dart';
import 'package:flutter/material.dart';
import 'ContactsListView.dart';

class HomeScreen extends StatefulWidget {
  @override
  _ReadContactScreenState createState() => _ReadContactScreenState();
}

class _ReadContactScreenState extends State<HomeScreen> {
  @override
  Widget build(BuildContext context) {
    return Scaffold(
      appBar: AppBar(
        title: Text('Phone'),
        actions: <Widget>[
          IconButton(
            icon: Icon(
              Icons.search,
              color: Colors.white,
            ),
            onPressed: () {
              // Todo Search
            },
          ),
          IconButton(
            icon: Icon(
              Icons.add,
              color: Colors.white,
            ),
            onPressed: () {
              _navigateToCreateContactScreen(context);
            },
          )
        ],
      ),
      body: Center(
          child: ContactsListView()
      ),
    );
  }

  _navigateToCreateContactScreen(BuildContext context) async {
    final result = await Navigator.pushReplacement(
      context,
      MaterialPageRoute(builder: (context) => CreateContactScreen()),
    );
    Scaffold.of(context)
      ..removeCurrentSnackBar()
      ..showSnackBar(SnackBar(content: Text("$result")));
  }
}
Next add a class ContactsListView which we have already passed as the body to out HomeScreen body in line 38.
ContactsListView
import 'package:contact_app/db/DatabaseHelper.dart';
import 'package:contact_app/model/Contact.dart';
import 'package:flutter/material.dart';
import 'CreateContactScreen.dart';

class ContactsListView extends StatelessWidget {
  BuildContext _context;
  @override
  Widget build(BuildContext context) {
    _context = context;
    return FutureBuilder<List<Contact>>(
      future: _fetchContacts(),
      builder: (context, content) {
        if (content.hasData) {
          List<Contact> data = content.data;
          return _contactsListView(data);
        } else if (content.hasError) {
          return Text("${content.error}");
        }
        return CircularProgressIndicator();
      },
    );
  }

  Future<List<Contact>> _fetchContacts() async {
    return DatabaseHelper.instance.retrieveContacts();
  }

  ListView _contactsListView(data) {
    return ListView.builder(
        itemCount: data.length,
        itemBuilder: (context, index) {
          return _tile(data[index]);
        });
  }

  ListTile _tile(Contact contact) => ListTile(
    title: Text(contact.name),
    subtitle: Text(contact.phone),
    onTap: () => _navigateToUpdate(contact),
    trailing: IconButton(
        alignment: Alignment.centerRight,
        icon: Icon(Icons.delete, color: Colors.red),
        onPressed: () async {
          _deleteContact(contact);
        }),
  );

  _deleteContact(Contact contact) {
    DatabaseHelper.instance.deleteContact(contact.id);
  }

  _navigateToUpdate(Contact contact) async {
    //Todo Navigate to UpdateContact passing the contact selected
    await Navigator.pushReplacement(
      _context,
      MaterialPageRoute(builder: (context) => CreateContactScreen(contact: contact)),
    );
  }
}
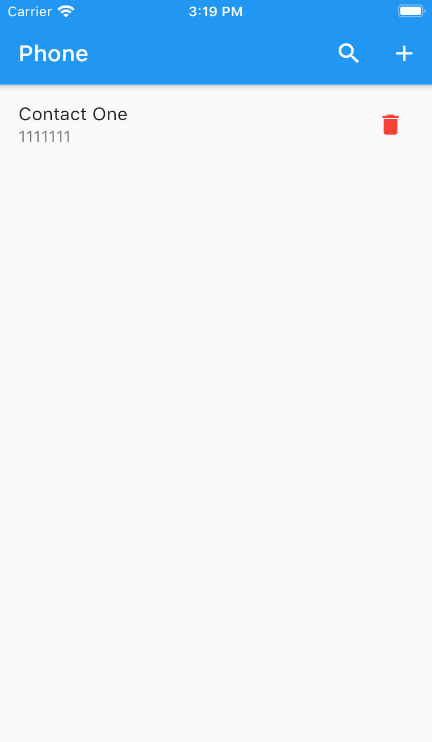
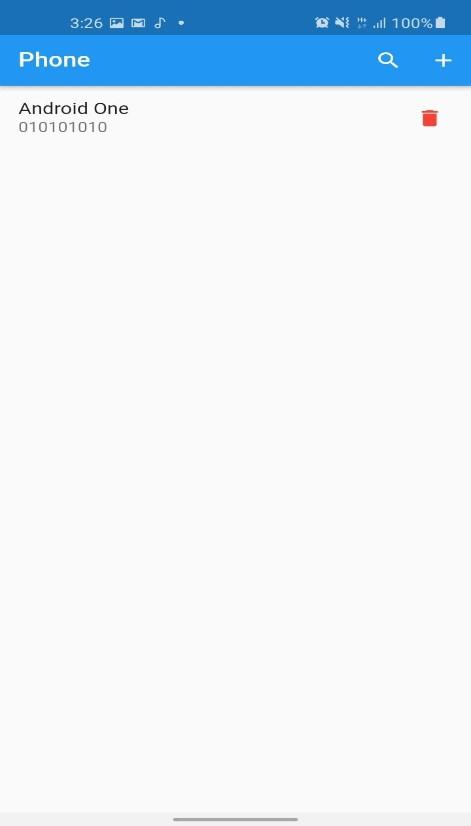
We fecth the contacts saved from the database using the method _fetchContacts Using name as title and the phone as subtitle then we set a delete icon as trailing and added a onPressed() event so whenever user click the delete icon it calls _deleteContact(). Also we navigate to the CreateContact screen when the user selects a contact except this time we pass the selected contacts to the instance. This will allow us to update the contact rather than create a new one. Refer to the button save clicked to understand where and how this happens.
Run the App (Note that the Contacts will not auto upload when you return to the HomeScreen. We will fix this later. You can quit the app after saving a contact then reopen to see you saved contact for now).
iOS Test
Android Test
In the next part we will add the add image feature using image picker library for flutter and share feature with anything else i can come up with while also improving the app. Further more we will create a DetailsScreen for the contacts where you can call, message and send email rather than simply updating alone. Until then........Happy Coding!!!
All rights reserved
