Implement OpenID Login with Docomo OpenID Provider
Bài đăng này đã không được cập nhật trong 2 năm
Chắc hẳn trong đa số chúng ta sẽ có rất nhiều ngừoi đang và đã từng làm việc với khách hàng Nhật bản.
Một ngày đẹp trời khi bạn được giao nhiệm vụ tích hợp tính năng xác thực OpenID với nhà cung cấp Docomo trong hệ thống của mình - cái gần như chỉ hướng tới người dùng tại Nhật đang sử dụng hợp đồng với nhà mạng Docomo.
Trong môi trường outsource và phạm vi người sử dụng hạn chế như thế này thì thật khó để tìm kiếm những tài liệu mang tính toàn cầu để đáp ứng nhu cầu triển khai trong hệ thống của bạn.
Nhưng thật may, Docomo OpenID Provider sử dụng những giao tiếp chuẩn và tuân thủ các khai báo của OpenID 2.0, cái bạn có thể tham khảo trên http://openid.net/specs/openid-authentication-2_0.html
Bài viết này mình sẽ mình sẽ hướng dẫn cách triển khai tính năng Login với OpenID sử dụng OpenID Provider là nhà mạng Docomo. Ví du được thực hiện trên web application trên nền J2EE với Spring MVC framework.
Nào , cũng điểm qua một vài giới thiệu về OpenID nhé!
OpenID là gì ?
Bạn rất ngại việc tạo một tài khoản mới mỗi khi join một website, diễn đàn nào đó ?
Bạn muốn sử dụng duy nhất một tài khoản cho các dịch vụ trên internet của mình ?
Hay bạn không muốn các website bạn ghé thăm, thấy được mật khẩu trong tài khoản của mình ? .... vv
Từ những mong muốn đó, công nghệ OpenID ra đời giúp user có thể sử dụng duy nhất một tài khoản của mình , đăng nhập vào nhiều website khác nhau chỉ bằng một ID.
Ví dụ : bạn đang có 1 tài khoản yahoo, bạn có thể sử dụng tài khoản này để đăng nhập vào các website CÓ HỖ TRỢ login bằng OpenID chẳng hạn như www.abc.com, www.xyz.com thật là tuyệt vời phải không nào.
OpenID được tạo ra vào năm 2005 bởi cộng đồng mã nguồn mở, ban đầu được phát triển bởi Brad Fitzpatrick vào tháng 5/2005 khi làm việc tại Six Apart. Nó được đặt tên là OpenID với tên miền http://openid.net để hỗ trợ cho dự án. Một bài đăng blog về ý kiến đánh giá cho OpenID trên diễn đàn LiveJournal và nhanh chóng giành được sự chú ý của cộng đồng.
Tháng 6/2007 OpenID Foundation được thành lập, là một tổ chức phi lợi nhuận, tổ chức tiêu chuẩn quốc tế hóa của các cá nhân và công ty cam kết sẽ tạo điều kiện và thúc đẩy công nghệ OpenID. Giúp cộng đồng cung cấp cơ sở hạ tầng cần thiết trong việc áp dụng và mở rộng OpenID .
Đến nay đã có hơn 50.000 website tích hợp OpenID với một số OpenID Provider tiêu biểu như : Google, Yahoo, Flickr , WordPress , myspace ...vvv
Để biết thêm về OpenID bạn có thể xem tài website http://openid.net . Còn bây giờ , bắt tay vào tìm hiểu thôi nào!.
Thuật ngữ cơ bản
- OP Identifier:
- là định danh cho nhà cung cấp OpenID dưới dạng URL(có thể sử dụng giao thức "http"hoặc "https" ).
- Relying Party ( RP) :
- Viết tắt là RP, là một ứng dụng web để kiểm soát kết quả của việc xác thực trả về từ OpenID Provider.
- OpenID Provider (OP) :
- Viết tắt là OP - là một máy chủ OpenID Authentication để xác thực người dùng. Kết quả xác thực sẽ được trả về qua Relying Party.
- OP Endpoint URL :
- URL gửi để xác thực OpenID, chứa đựng thông tin về các định danh, các options ,mode callback url ..vvv
- Realm :
- "realm" là một pattern biểu diễn dưới dạng URL để chứng minh rằng request cho OpenID Authentication này là hơp lệ. Realm được setup tại merchant site để chỉ định scope of authentication, nó cũng sử dụng để nhận diện Relying Party được config trong response của Realm URL gọi là văn bản XRDS.
- XRDS :
- là một văn bản XML mô tả các metadata, các options, scope of authentication trong "realm".
- Yadis :
- Yadis là một
communications protocolphục vụ tìm kiếm các services chẳng hạn như OP Endpoint. Nó được dựa trên chuẩn của REST-ful vì vậy Yadis sử dụng một Yadis URL để nhận về một service descriptor được gọi là Yadis Resource Descriptor , cái follow theo format của XRDS document.
- Yadis là một
Tích hợp Docomo OpenID Provider
Trong khuôn khổ của bài viết mình sẽ không đề cập đến cách tạo một project với Spring như thế nào.
Mình hiểu rằng, bạn đã biết cách khai báo các action, controller và view trong Spring framework.
Môi trường sử dụng trong project.
- JavaEE 7
- Tomcat 7
- Spring version
4.2.5.RELEASE - Maven 3 cho việc quản lý libraries .
Cấu trúc project
Mình đang có một cấu trúc project như bên dưới.
| Important File | Description |
|---|---|
| DocomoLoginController.java | File controller khai báo các actions, giao tiếp consumer site với OP |
| OpenIdLoginProcessor.java | Class untility cho việc xử lý các request tới OP và verify authen request |
| WEB-INF\views\docomo | Folder chứa các view jsp page tương ứng cho các action trong DocomoLoginController.java |
| pom.xml | File cấu hình của maven build, nơi khai báo các library denpendency và thông tin về project |

Add library dependecy
Thêm openid4java dependency vào file pom.xml trong thẻ
<dependencies>như sau.
		<!-- https://mvnrepository.com/artifact/org.openid4java/openid4java -->
		<dependency>
			<groupId>org.openid4java</groupId>
			<artifactId>openid4java</artifactId>
			<version>1.0.0</version>
		</dependency>
Trong projec này, mình có sử dụng openid4java library , nó hỗ trợ làm việc và giao tiếp consumer site với OpenID Provider. Nếu bạn đã từng làm việc với maven build thì việc khai báo dependency trong pom.xml sẽ không còn lạ lẫm gì phải không nào
Init ConsumerManager
ConsumerManager là một class trong gói support library openid4java , nó cho phép bạn quản lý các giao tiếp với OpenID Provider.
Trên Docomo, sử dụng các public OP Identifier sau :
- OP : https://i.mydocomo.com/
- OP Endpoint URL : https://i.mydocomo.com/oid/auth
Tạo file DocomoLoginController.java được kế thừa từ AbstractController , khai báo OP Identifier và khởi tạo ConsumerManager như sau.
@Controller
public class DocomoLoginController extends AbstractController {

    private static ConsumerManager consumerManager;
    private final String DOCOMO_OP_IDENTIFER = "http://i.mydocomo.com";

    private String realm = "http://yourdomain.com/openid/docomo";
    private String returnUrl = realm + "/loginCallback";

    // Session attribute - storage openid result after authentication.
    public static final String SESSION_OPEN_ID = "session_openid";

    @Override
    protected void initServletContext(ServletContext servletContext) {
        super.initServletContext(servletContext);
        ConsumerManager manager = new ConsumerManager();
        DocomoLoginController.setManager(manager);
    }

   @Override
    protected ModelAndView handleRequestInternal(HttpServletRequest httpServletRequest, HttpServletResponse httpServletResponse) throws Exception {
        //do nothing
        return null;
    }
Với đoạn code này, mình cũng khai báo realm và return_to url cho việc verify authentication request.
Để hiểu rõ hơn về realm và return to url , bạn có thể tham khảo trực tiếp tại http://openid.net/specs/openid-authentication-2_0.html
Create XRDS Document
Một file XRDS sẽ có format như sau :
<?xml version="1.0" encoding="UTF-8"?>
<xrds:XRDS
        xmlns:xrds="xri://$xrds"
        xmlns="xri://$xrd*($v*2.0)">
    <XRD>
        <Service priority="0">
            <Type>http://specs.openid.net/auth/2.0/return_to</Type>
            <URI>http://yourdomain.com/openid/docomo/loginCallback</URI>
        </Service>
    </XRD>
</xrds:XRDS>
Theo đó, nội dung được define theo chuẩn của OpenID 2.0, như method bên dưới mình sẽ tạo 1 action docomo/xrds cho việc get XRDS document khi OP request đến.
    // return XRDS document once OP Docomo request.
    @RequestMapping(value = "docomo/xrds")
    public String xrds(HttpServletResponse response) {
        String returnTo = realm + "/loginCallback";
        String document =
                "<?xml version=\"1.0\" encoding=\"UTF-8\"?>\n" +
                        "   <xrds:XRDS\n" +
                        "    xmlns:xrds=\"xri://$xrds\"\n" +
                        "    xmlns:openid=\"http://openid.net/xmlns/1.0\"\n" +
                        "    xmlns=\"xri://$xrd*($v*2.0)\">\n" +
                        "    <XRD>\n" +
                        "      <Service priority=\"0\">\n" +
                        "         <Type>http://specs.openid.net/auth/2.0/return_to</Type>\n" +
                        "         <URI>" + returnTo + "</URI>\n" +
                        "      </Service>\n" +
                        "    </XRD>\n" +
                        "</xrds:XRDS>";
        try {
            response.setContentType("application/xrds+xml");
            response.setHeader("Content-disposition", "attachment;filename=" + "xrds");
            response.getOutputStream().print(document);
            response.getOutputStream().print("\n");
            response.getOutputStream().flush();
        } catch (IOException e) {
            e.printStackTrace();
        }
        return null;
    }
Tạo method xrds(HttpServletResponse response) trong DocomoLoginController.
URL sẽ có dạng : http://yourdomain.com/openid/docomo/xrds
Mapping Realm vs XRDS Document
Để đảm bảo việc verify authentication request là hợp lệ từ OP, mình cần tạo 1 action cho realm tương ứng với realm URL bên trên.
Trong HTML của realm , mình sẽ khai báo location của XRDS document , cái sẽ được đặt trong cặp thẻ <meta http-equiv="x-xrds-location" content="${xrdsUrl}"> và trong setHeader của http response,
mục đích để Yadis có thể tìm kiếm và get được nội dung file xrds tương ứng.
File DocomoLoginController.java
@RequestMapping("docomo")
public String loginPage(Model model) {
   String xrdsUrl = realm + "/xrds";
   model.addAttribute("xrdsUrl", xrdsUrl);   // create xrdsUrl variable which used in view index.jsp
   return "docomo/index";  //return view  :  WEB-INF\view\docomo\index.jsp
}
File WEB-INF\view\docomo\index.jsp
<?xml version="1.0" encoding="UTF-8"?>
<%@ page session="false" %>
<%
	String xrdsUrl = (String) request.getAttribute("xrdsUrl");
	response.setHeader("x-xrds-location", xrdsUrl);
%>
<!DOCTYPE html PUBLIC "-//W3C//DTD XHTML 1.0 Strict//EN" "http://www.w3.org/TR/xhtml1/DTD/xhtml1-strict.dtd">
<html xmlns="http://www.w3.org/1999/xhtml">
<head>
	<meta http-equiv="x-xrds-location" content="${xrdsUrl}">
	<meta http-equiv="Content-Type" content="text/html; charset=UTF-8"/>
	<meta name="viewport" content="width=device-width,initial-scale=1.0,minimum-scale=1.0">
	<title>index page.</title>
</head>
<body>
<form action="${pageContext.request.contextPath}/docomo/check_id/">
	<input type="submit" value="Discovery Docomo Endpoint"/><br/>
</form>
</body>
</html>
Có một lưu ý rằng :
Việc khai báo xrds-location trong <meta http-equiv="x-xrds-location" ...> không hẳn là cần thiết.
Tuy nhiên để tránh một số issue khi Yadis Resource Descriptor thực hiện tìm kiếm xrds document, thì việc khai báo xrds-location trong thẻ <meta> là không thừa.
Có thể bạn đã biết :
Yadis Resource Descriptor tìm kiếm xrds document theo các options sau :
- Qua HTTP response header gọi là X-XRDS-Location
- Qua khai báo trong thẻ :
<meta http-equiv .....>- Response contentType được set là
application/xrds+xml
Discovery OP Endpoint URL
Tiếp theo, là bước xử lý việc tìm kiếm OP Endpoint URL từ phía OP cùng với các params - cái URL sẽ tiếp nhận các parameters cho việc authentication.
Để thực hiện việc tìm kiếm này, mình có tạo một class utils OpenIdLoginProcessor với method doAuthRequest() như sau
public class OpenIdLoginProcessor {

    public OpenIdLoginProcessor(ConsumerManager consumerManager, String realm, String returnTo) {
        this.consumerManager = consumerManager;
        this.realm = realm;
        this.returnTo = returnTo;
    }

    //Perform authentication request.
    public AuthRequest doAuthRequest(HttpServletRequest request, String identifier) throws Exception {
        AuthRequest authRequest;
        try {
            _log.info("start process.");
            // Start and Discovery
            List discoveries = consumerManager.discover(identifier);
            // Establishment of Association
            DiscoveryInformation discoveryInformation = consumerManager.associate(discoveries);
            // Discovery result verification
            if (discoveryInformation == null) {
                throw new Exception("can't found OP EndPoint.");
            } else if (!discoveryInformation.isVersion2()) {
                // When OpenID provider does not support OpenID 2.0
                throw new Exception("don't support OpenID 2.0.");
            }
            // Store discovery information in session
            request.getSession().setAttribute(SES_KEY_DISCOVERY_INFO, discoveryInformation);
            // Generate AuthRequest message to send to OpenID provider
            authRequest = consumerManager.authenticate(discoveryInformation, returnTo, realm);
            _log.info("end process.");
        } catch (Exception e) {
            _log.error("error:" + e.getMessage());
            throw e;
        }
        return authRequest;
    }
Như vậy, sau khi ConsumerManager thực hiện authenticate() sẽ trả về cho chúng ta một AuthRequest object, cái sẽ lưu trữ toàn bộ thông tin về OP Endpoint URL , kèm với đó là các parameters cái mình đã config khi authenticate như returnTo, realm, openid mode , identity, claimed_id ..vv
Quay trở lại với DocomoLoginController mình sẽ tạo một acton cho việc gửi request discovery endpoin url này
    @RequestMapping(value = "docomo/check_id")
    public String authenticatePost(RedirectAttributes redirectAttributes) {
        OpenIdLoginProcessor proc = new OpenIdLoginProcessor(consumerManager, realm, returnUrl);
        try {
            AuthRequest authRequest = proc.doAuthRequest(request, DOCOMO_OP_IDENTIFER);
            if (authRequest != null) {
                return "redirect:" + setupRedirectPage(authRequest);
            }
        } catch (Exception e) {
            e.printStackTrace();
        }
        redirectAttributes.addFlashAttribute("check_id_failed", true);
        return "redirect:/docomo";
    }
Sau khi nhận được AuthRequest từ proc.doAuthRequest() , kết quả trả về sẽ quyết định việc discovery và verify có thành công hay không.
Trong trường hợp authRequest = NULL, bạn cần check lại realm và returnTo trong một vài điều kiện sau :
- Đảm bảo rằng realm URL có thể gọi từ out side
- realm và returnUrl URL phải matching bắt đầu trong cùng một domain.
Với trường hợp tiếp nhận thành công authRequest , mình sẽ gửi các params kèm với OP Endpoint Url lấy được , bắt đầu quá trình xác thực từ phía Docomo OP .
Send Authenticate Request
Sau khi tìm kiếm được OP Endpoint URL cái được trả về trong AuthRequest tại method bên trên.
Từ AuthRequest này, mình sẽ build các parameters bắt đầu việc xác thực từ phía OP.
Tạo method setupRedirectPage() trong DocomoLoginController
    private String setupRedirectPage(AuthRequest authRequest) throws Exception {
        String destinationUrl = authRequest.getDestinationUrl(false);  // get OP Endpoint Url

        Map paramMap = authRequest.getParameterMap();
        Iterator keys = authRequest.getParameterMap().keySet().iterator();

        StringBuilder builder = new StringBuilder();
        builder.append(destinationUrl).append("?");

        while (keys.hasNext()) {
            String keyword = (String) keys.next();
            Object value = paramMap.get(keyword);
            if (value instanceof String) {
                String encodedValue = URLEncoder.encode((String) value, "UTF-8");
                builder.append(keyword).append("=").append(encodedValue);
                builder.append("&");
            }
        }
        return builder.toString();
    }
Sau quá trình build params trong method setupRedirectPage() , việc còn lại là redirect đến OP Endpoint URL thông qua HTTP GET cho việc authentication.
public String authenticatePost(RedirectAttributes redirectAttributes) {
            .....
            AuthRequest authRequest = proc.doAuthRequest(request, DOCOMO_OP_IDENTIFER);
            if (authRequest != null) {
                return "redirect:" + setupRedirectPage(authRequest);
            }
Để biết thêm chi tiết về các parameters bạn có thể tham khảo tại : Request Parameters
Và đây là màn hình login d-account từ phía Docomo.
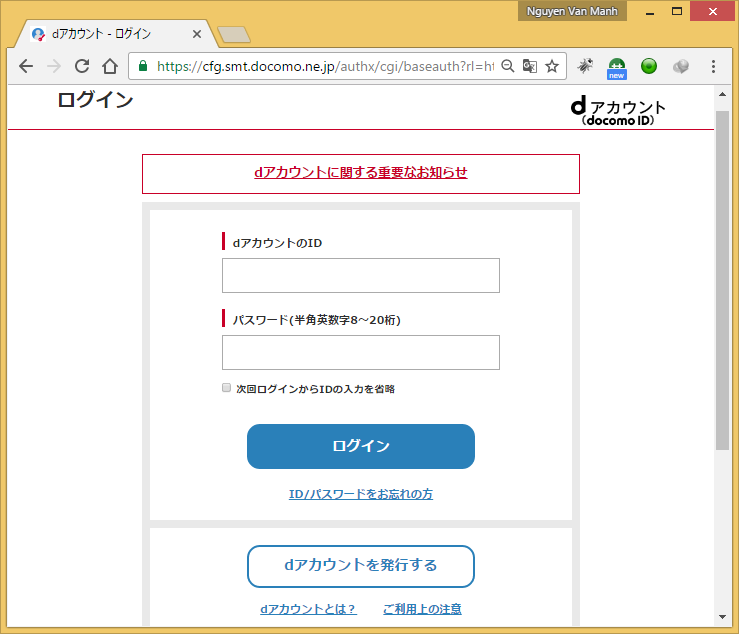
Handle Login Result
Một khi user login d-account và được xác thực thành công từ phía Docomo OP, trên OP sẽ notify lại kết quả thông qua URL trong param openid.return_to cái mình đã setup khi redirect login page.
Giá trị của openid.return_to cũng chính là returnUrl đã được config trong DocomoLoginController
Nào, để thực hiện việc này mình cần tạo 1 action để handle returnUrl này.
Tạo handleLoginPage() trong DocomoLoginController như sau
    @RequestMapping(value = "docomo/loginCallback")
    public String handleLoginPage(Model model) {
        if ("id_res".equals(request.getParameter("openid.mode"))) {
            // In case of OpenID authentication response
            OpenIdLoginProcessor proc = new OpenIdLoginProcessor(consumerManager, realm, returnUrl);
            try {
                String openId = proc.doVerifyResponse(request);
                if (openId != null) {
                    //Storage openid in session todo business logic
                    request.getSession().setAttribute(SESSION_OPEN_ID, openId);
                    model.addAttribute("openid", openId);
                }
            } catch (Exception e) {
                e.printStackTrace();
            }
        }
        return "docomo/login_result";
    }
Trong đoạn code trên , mình có tạo một method doVerifyResponse() trong OpenIdLoginProcessor, mục đích để verify request và lấy về open id.
Tạo doVerifyResponse() trong OpenIdLoginProcessor
    //Authentication assertion verification.
    public String doVerifyResponse(HttpServletRequest request) throws Exception {
        try {
            _log.info("start process.");
            // Extract authentication response message from OpenID Provider
            ParameterList openidResponseParam = new ParameterList(request.getParameterMap());
            // Acquire discovery information stored with AuthnRequest
            DiscoveryInformation discoveryInfomation = (DiscoveryInformation) request.getSession().getAttribute(SES_KEY_DISCOVERY_INFO);
            // Check if manager has been acquired
            if (consumerManager == null) {
                throw new Exception("consumerManager is null.");
            }
            // Extract the URL of the receiving side from the HTTP Request
            StringBuffer returnUrl = request.getRequestURL();
            String query = request.getQueryString();
            // Append only if there is a query
            if (query != null && query.length() > 0) {
                returnUrl.append("?").append(request.getQueryString());
            }
            // Verify authentication response
            VerificationResult verification = consumerManager.verify(returnUrl.toString(), openidResponseParam,
                    discoveryInfomation);
            // Check validation result and verified OpenID
            Identifier verified = verification.getVerifiedId();
            String openId = null;
            if (verified != null) {
                openId = verified.getIdentifier();
            }
            _log.info("end process.");
            return openId;
        } catch (Exception e) {
            _log.error("error:" + e.getMessage());
            throw e;
        }
    }
Với đoạn code trên, mình thực hiện double check information với DiscoveryInformation đã được lưu trữ trong session attribute SES_KEY_DISCOVERY_INFO khi request authen ( refer method doAuthRequest() tại mục Discovery OP Endpoint URL )
Việc verify sẽ được thực hiện thông qua verify() của ConsumerManager. Và như các bạn thấy một VerificationResult sẽ được trả về, cái mà nó sẽ thực sự tồn tại 1 openid identifier hay không.
            VerificationResult verification = consumerManager.verify(returnUrl.toString(), openidResponseParam,
                    discoveryInfomation);
            // Check validation result and verified OpenID
            Identifier verified = verification.getVerifiedId();
            String openId = null;
            if (verified != null) {
                openId = verified.getIdentifier();
            }
Một khi request callback là đúng đắn, open id sẽ được lưu trữ trong Identifier.
Quay trở lại với handleLoginPage() bên trên, kết quả sẽ được lưu trữ trong SESSION_OPEN_ID attribute cho các task vụ sau này
                String openId = proc.doVerifyResponse(request);
                if (openId != null) {
                    //Storage openid in session todo business logic
                    request.getSession().setAttribute(SESSION_OPEN_ID, openId);
                    model.addAttribute("openid", openId);
                }
Và đây là kết quả cuối cùng , open id sẽ có dạng URL : https://i.mydocomo.com/id/zUWSdHhF39hV~AuFD~XS5SJmxbR4nYQ4yrgmdIYgNn8_
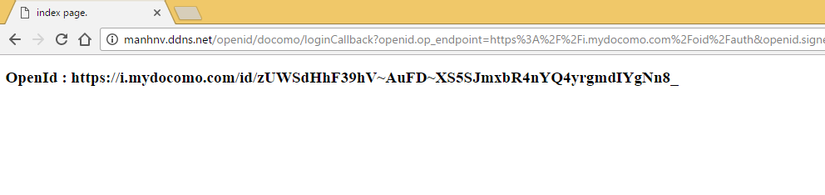
Bạn có thể sử dụng open id này như parameter cho việc call một số API riêng biệt mà OP cung cấp, như lấy thông tin profile chẳng hạn.
Trên Docomo OP với một số API nhất định bạn cần đăng ký site của bạn với NTT Docomo.
Trong khuân khổ bài viết mình không hướng dẫn nội dung đăng ký và thực hiện các API riêng biệt đó
Testing
Để thực việc testing với OP của Docomo , bạn cần chú các điểm sau :
- Port cho site của bạn phải là 80 đối với http hoặc 443 với https
- Host có thể gọi từ out site cho phép Docomo OP có thể get XRDS document từ site của bạn. Vì vậy, nếu bạn đang sử dụng locahost, bạn có thể config NAT qua router và sử dụng WAN IP của bạn
- returnUrl phải match với realm trong cùng một domain và nằm dưới pattern của realm. Ví dụ :
- Nếu
realmlà http://youdomain.com/docomo thìreturnUrlphải nằm dưới path/docomocủarealm==>returnUrl= http://youdomain.com/docomo/return_url_here
- Nếu
- Tài khoản D-account phải được liên kết với mobile phone của nhà mạng Docomo ,để liên kết mobile phone bạn có thể thực hiện tại trang sau : https://id.smt.docomo.ne.jp/cgi7/id/registernumber
Bài viết tới đây là hết, hy vọng nó có thể giúp ích phần nào đó cho các bạn và đừng quên VOTE ( arrow UP ) nếu thấy hữu ích ^^ .
Chúc bạn thành công!
All rights reserved
