Deploy server lưu trữ và resize ảnh như Viblo trên Kubernetes
Bài đăng này đã không được cập nhật trong 2 năm
Hello các bạn, vẫn là mình đây 👋👋👋. Chúc các bạn kì nghỉ lễ 30/4-1/5 vui vẻ 🇻🇳🇻🇳🇻🇳
Hôm nay ta sẽ cùng nhau làm một bài nhiều não tí nhé 😂. Khá dài đấy các bạn kiếm cốc nước uống và lên thuyền cùng mình nha ⛵️⛵️⛵️
Mở đầu
Không biết các bạn có như mình không, vô trang web nào thấy hay hay là phải inspect liền xem tech stack rồi network http/websocket các thứ xem nó như thế nào, nhất là những cái mà mình hay dùng hàng ngày như Facebook, Youtube, Github, Tiktok,... Và cả Viblo cũng vậy
Các đây chừng 1 tháng thì team Viblo có publish bài xây dựng server ảnh mình thấy khá là thú vị, vì nó giúp mình hiểu hơn cách mà người ta xây dựng sản phẩm mà mình vẫn sử dụng thường xuyên (để viết blog). Mình cũng đã thử vọc vạch qua.
Và hôm nay ta sẽ cùng nhau deploy một server ảnh giống với những gì mà Viblo làm nha 😎😎 Tất nhiên có thể bên dưới server của họ phức tạp, nhưng ta sẽ làm theo những gì mà ta hiểu được từ bài viết blog của họ nhé
Server ảnh của Viblo
Mình sẽ lấy luôn ảnh từ bài viết của Viblo nhé:
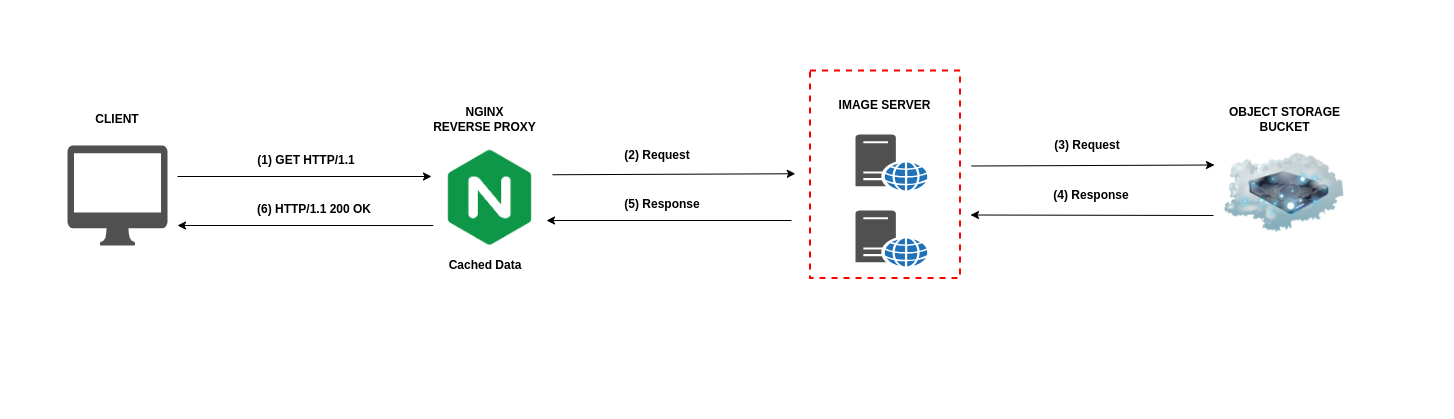
Flow cơ bản như sau:
- khi ta đọc blog trên viblo, và đến đoạn xem hình ảnh thì từ trình duyệt (client) sẽ tạo 1 request lên để lấy ảnh
- request đầu tiên đi qua Nginx, sau đó tới Server ảnh (image server). Server ảnh sẽ gọi tới Object Storage Bucket (AWS S3) để lấy ảnh về và thực hiện resize tối ưu ảnh trước khi gửi trả về lại client
- Về server ảnh thì Viblo dùng 1 cái Opensource tên là Imaginary viết bằng Go bên dưới gọi tới
libvips(C). Có Docker image dễ deploy, cung cấp API cho nhiều thao tác với ảnh (resize, crop, rotate,....) - Ở phía Nginx thì Viblo cũng cache lại ảnh khi nhận được từ Server ảnh để giảm tải cho server ảnh. Vì thường thao tác xử lý ảnh tốn resource (RAM/CPU)
- Nếu đường dẫn ảnh có dạng "full", ví dụ: https://images.viblo.asia/full/98eef5e0-42cd-491d-9547-8dd3673ef843.png. Thì sẽ trả về ảnh gốc luôn mà không gọi qua server ảnh nữa
Kiến trúc trên được Viblo deploy với Kubernetes (K8S), có autoscale
Những gì ta sẽ làm
Những gì Viblo viết trong bài blog của họ thì ta cũng sẽ làm như vậy 😉 bài này ta cũng sẽ dùng K8S 😉. Họ nói rằng của họ có autoscale, bài này ta cũng có autoscale với K8S HorizontalPodAutoscaling. Họ có nginx cache, ta cũng sẽ cache ảnh với nginx 💪💪.
Ở bài này ta sẽ build một app demo cho phép upload ảnh lên server, và sau đó xem ảnh vừa tải lên:
Viblo có Progessive image loading, chúng ta cũng có😉 (cái mà ban đầu load ảnh nhẹ mờ mờ, sau đó load ảnh nét hơn á 😉)

Cụ thể các bước ta sẽ làm trong bài này gồm:
- chạy test local, vọc vạch để hiểu ý tưởng
- setup/build cho production
- đẩy image lên dockerhub
- deploy lên k8s
- cấu hình autoscale, caching
Nãy giờ dài dòng quá, ta vô phần chính thôi 🚀🚀
Clone source
Đầu tiên các bạn clone source code cho bài này ở đây nhé. Nhánh master nhé
Sau khi clone về thì ta có như sau:
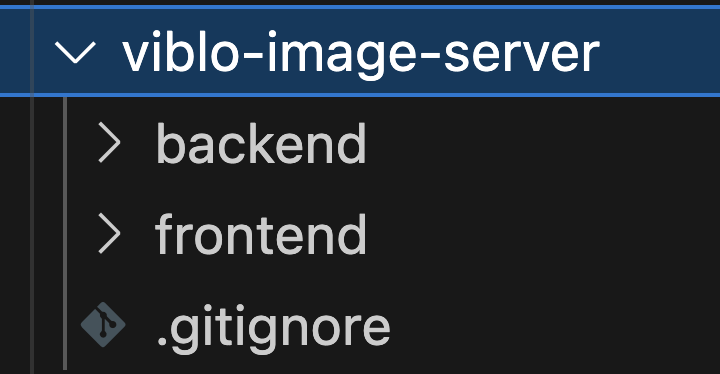
Ở đây ta có các phần như sau:
- Frontend: Giao diện, tí nữa khi deploy ta cũng sẽ đặt Nginx ở đây
- Backend: chính là Object Storage Bucket
- Server resize ảnh thì ta sẽ dùng Imgproxy - server ảnh cũng code bằng Go và dùng
libvips, lí do mình không dùngImaginaryvì mình bị lỗi crash liên tục khi setup nó 🥲🥲 (tính năng thìImgproxythậm chí còn nhiều hơnImaginarynữa đó 😜)
Setup local
Bài này yêu cầu máy các bạn phải có Docker và đã có tài khoản Dockerhub để lát ta push image lên nhé
Ta chạy thử lên coi xem nó như nào nhé. Yêu cầu là máy các bạn phải có Docker.
Đầu tiên là ở từng folder frontend và backend ta install dependencies cho chúng nha (2 folder chạy y hệt 1 command):
# Mac và Linux
docker run --rm -v $(pwd):/app -w /app node:20-alpine npm install

# Dành cho Windows:
# Git bash
docker run --rm -v "/$(pwd)":/app -w //app node:20-alpine npm install

# PowerShell
docker run --rm -v "$(pwd):/app" -w /app node:20-alpine npm install

# Command Prompt
docker run --rm -v "%cd%:/app" -w /app node:20-alpine npm install
Ở root folder mình đã để sẵn file docker-compose.local.yml rồi các bạn chỉ việc up lên là xong:
docker compose -f docker-compose.local.yml up -d
trong file
docker-compose.local.ymlmình có chạy cả serviceimgproxynó chính là server để resize ảnh
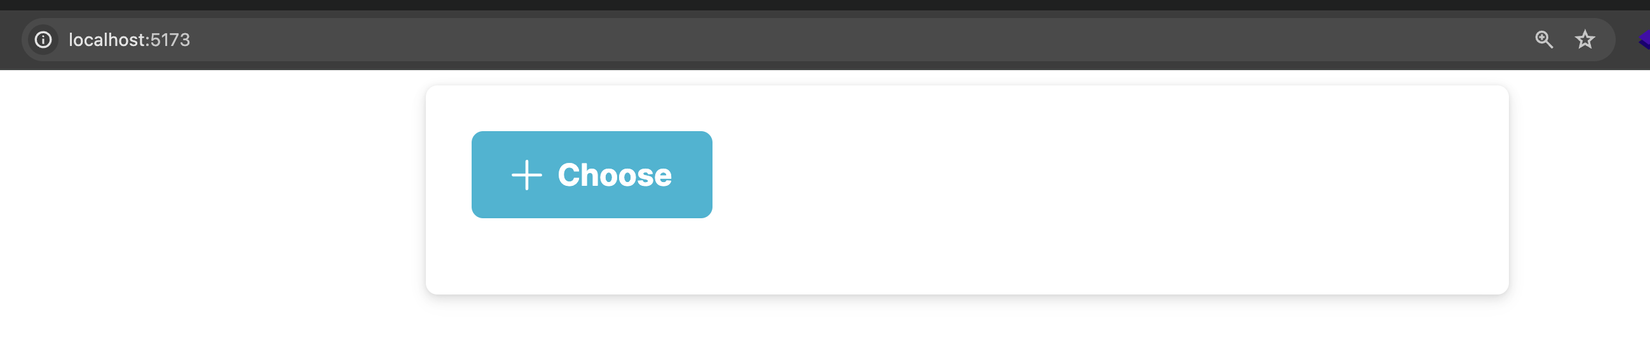
Sau khi chạy lên ta có thể truy cập từ trình duyệt ở địa chỉ http://localhost:5173:
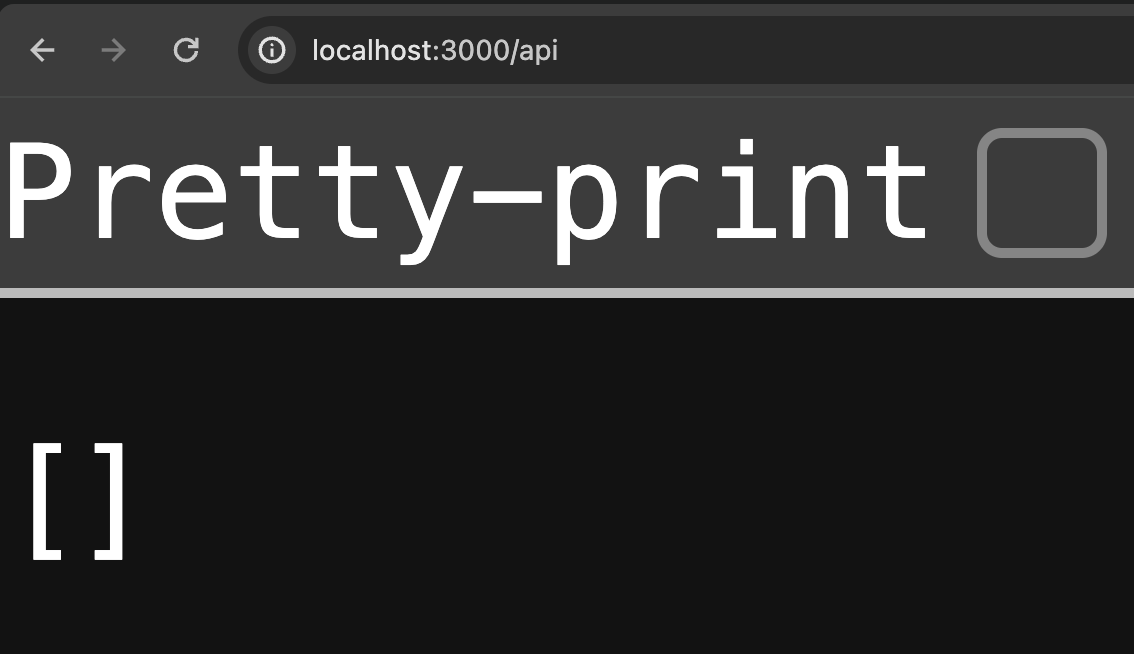
Sau đó ta test thử từ trình duyệt xem backend lên chưa nha. Ta mở địa chỉ http://localhost:3000/api:
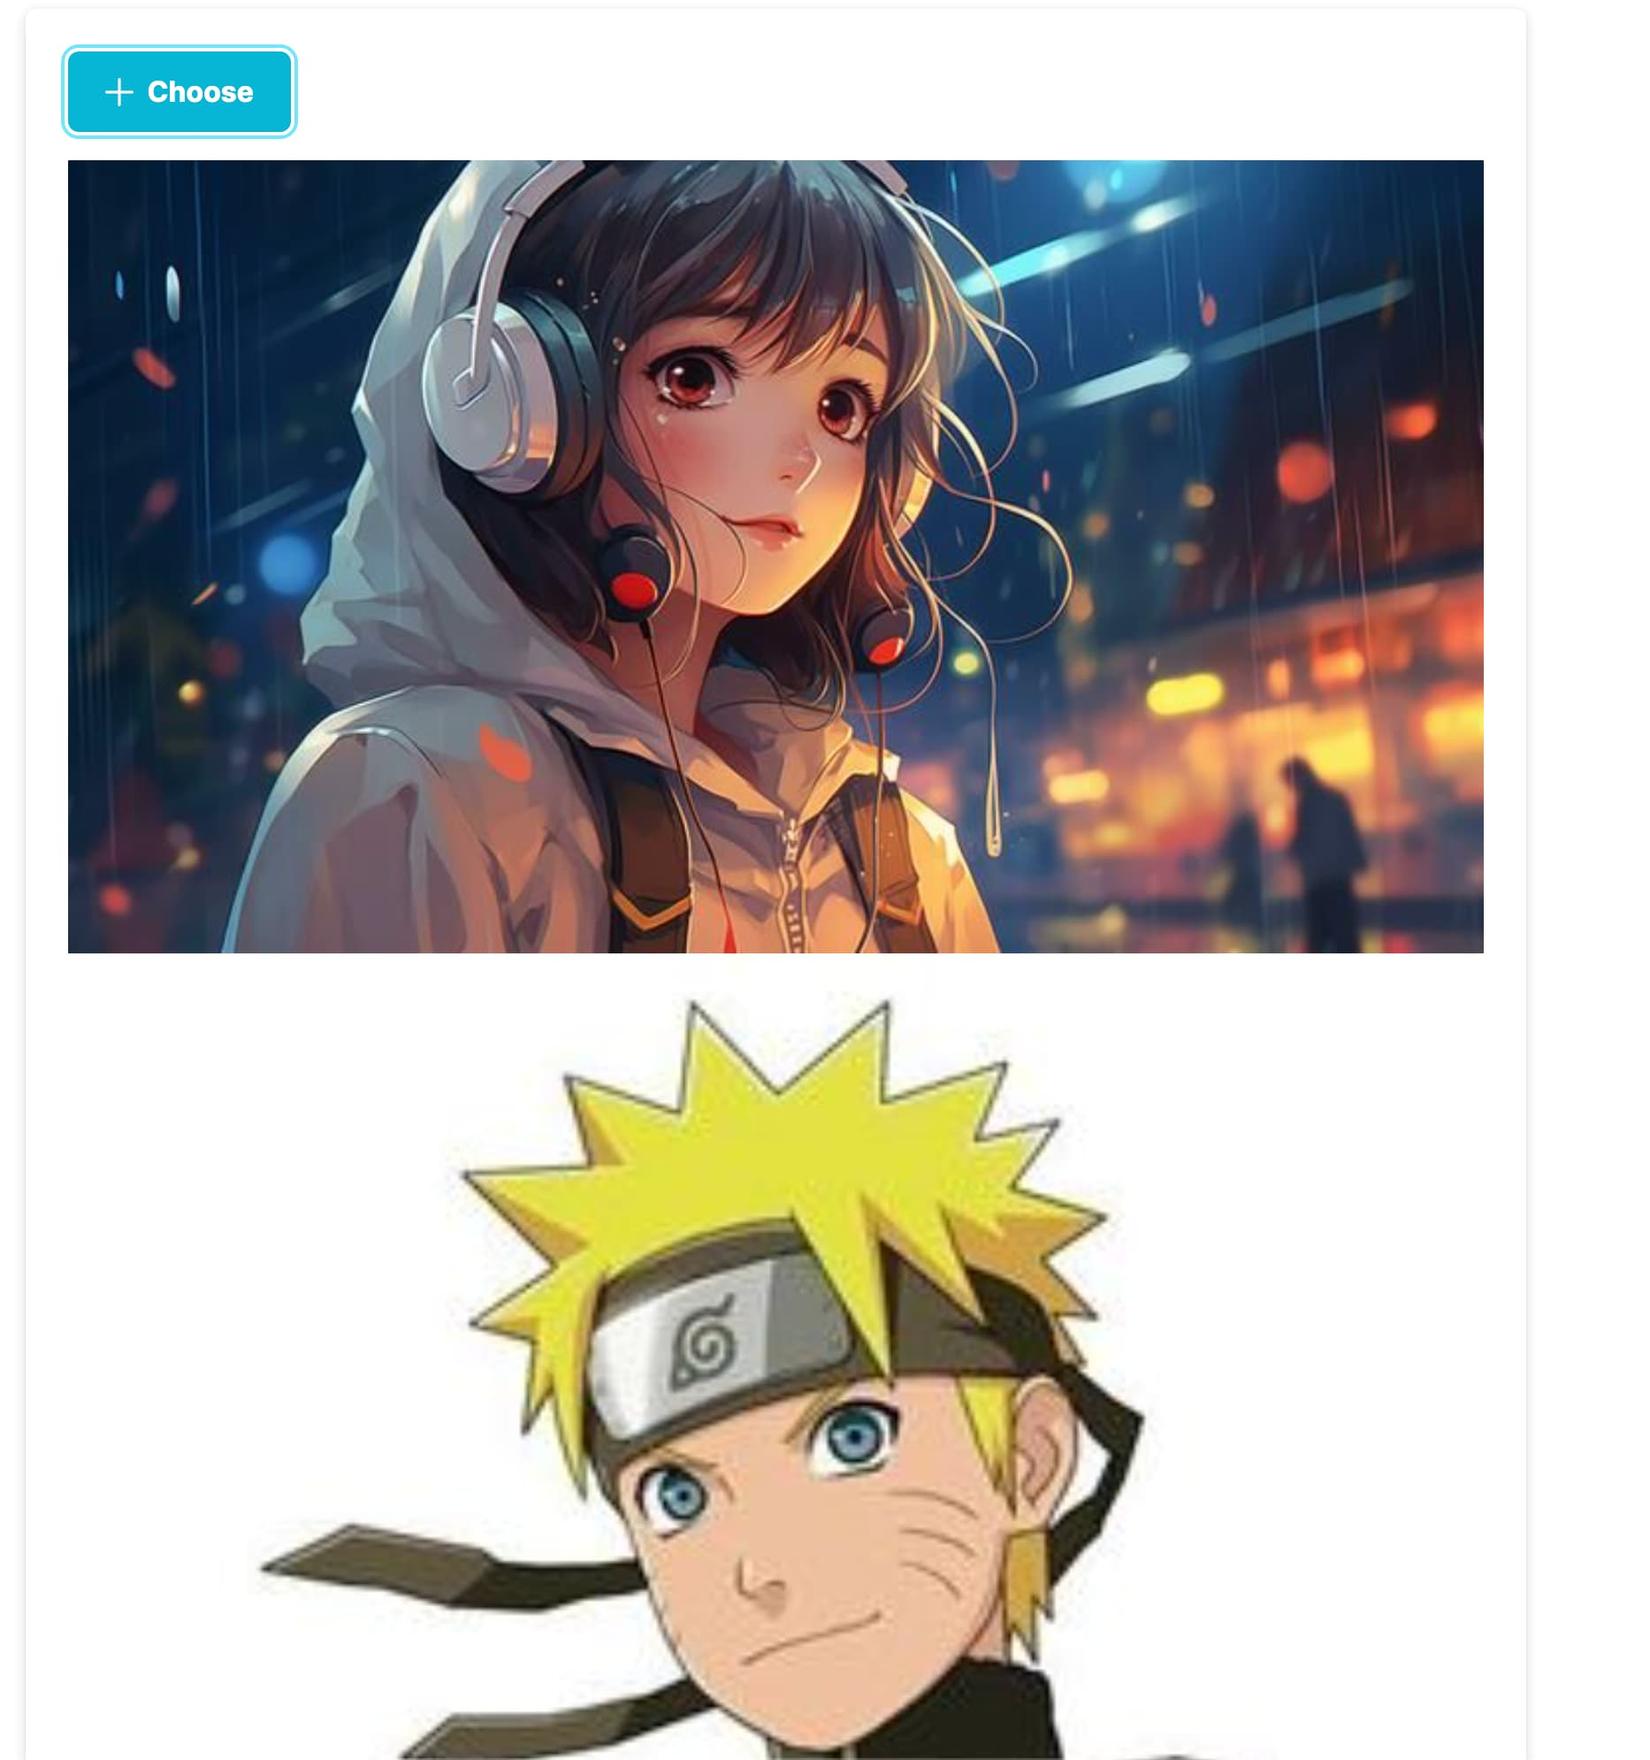
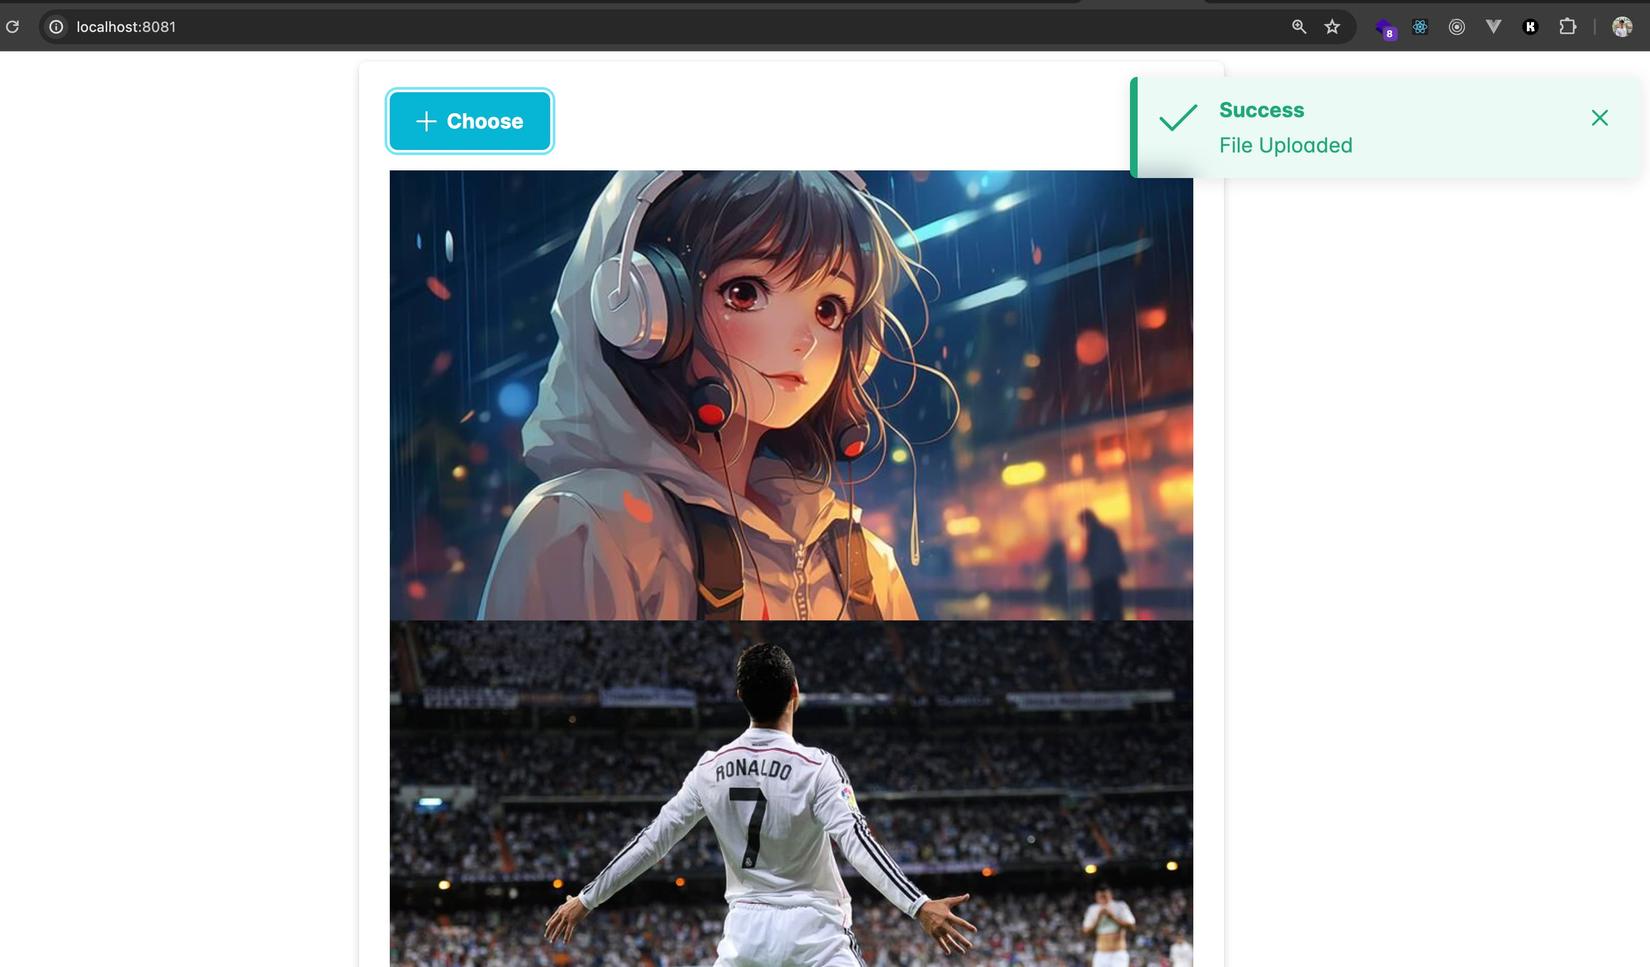
âu cây các thành phần lên hết rồi ta quay lại frontend và test upload ảnh nha (Các bạn có thể chọn nhiều ảnh cũng được:
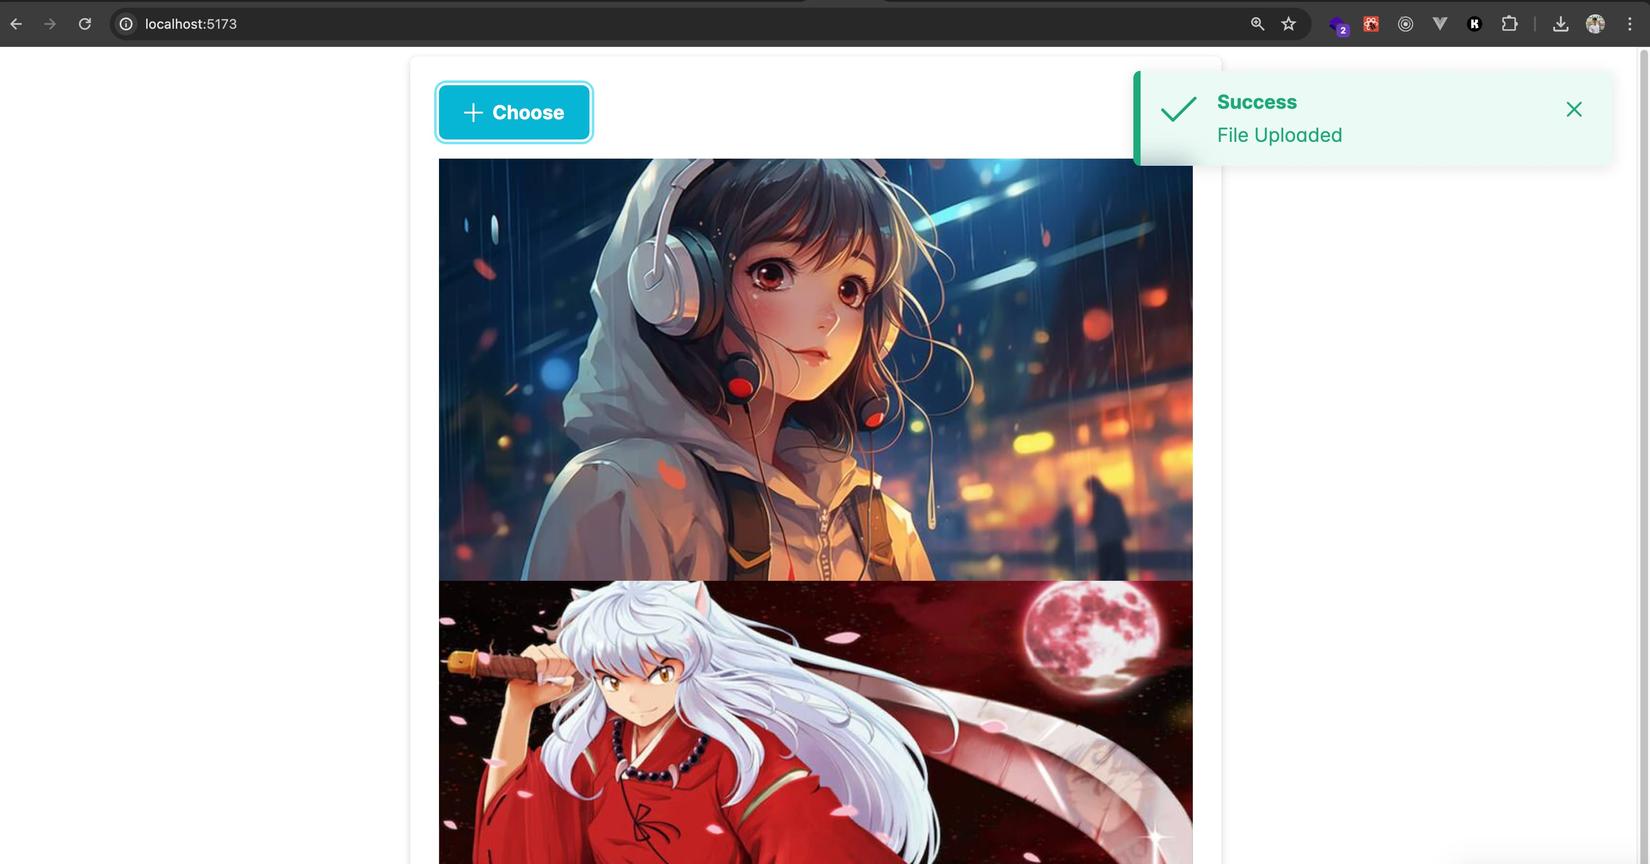
Thấy thông báo như trên là upload ảnh thành công rồi nhé 💪
Vọc vạch
Ta cùng nhau xem tổng quan hệ thống hoạt động như nào nha.
Bắt đầu từ frontend trước, các bạn mở file vite.config.ts ta sẽ thấy mình cấu hình proxy (dành cho việc dev ở local):
const createProxyConfig = (width: number) => ({
  target: "http://imgproxy:8080",
  changeOrigin: true,
  rewrite: (path: string) => {
    const filename = path.split("/").pop();
    return `/insecure/resize:fit:${width}:0:no:0/plain/http://backend:3000/images/${filename}`;
  },
});

export default defineConfig({
  plugins: [react()],
  server: {
    proxy: {
      "/api": "http://backend:3000",
      "/images/full": {
        target: "http://backend:3000",
        changeOrigin: true,
        rewrite: (path) => path.replace(/^\/images\/full/, "/images"),
      },
      "/images/tiny": createProxyConfig(20),
      "/images": createProxyConfig(825),
    },
  },
});
Ở trên ta có:
- Khi frontend (FE) call vào
/api...thì sẽ proxy thẳng vào backend đang chạy ở môi trường ngoài cổng 3000. Chú ý rằng tất cả các service đang chạy chung 1 network nên ta có thể proxy thẳng container->container thông qua service name - tiếp theo với image mà có
/fullthì sẽ bỏ qua server resize ảnh mà trả thẳng về ảnh gốc luôn - cuối cùng ta có 2 đường dẫn
/images/tinyđể show ảnh mờ, và/imagesđể show ảnh resize. Request tới cả 2 path này sẽ đi quaImgproxyđể resize - ta có function
createProxyConfigđể rewrite lại url khi proxy tới server resize cho phù hợp với định dạng màImgproxyyêu cầu (Các bạn có thể xem thêm ở đây)
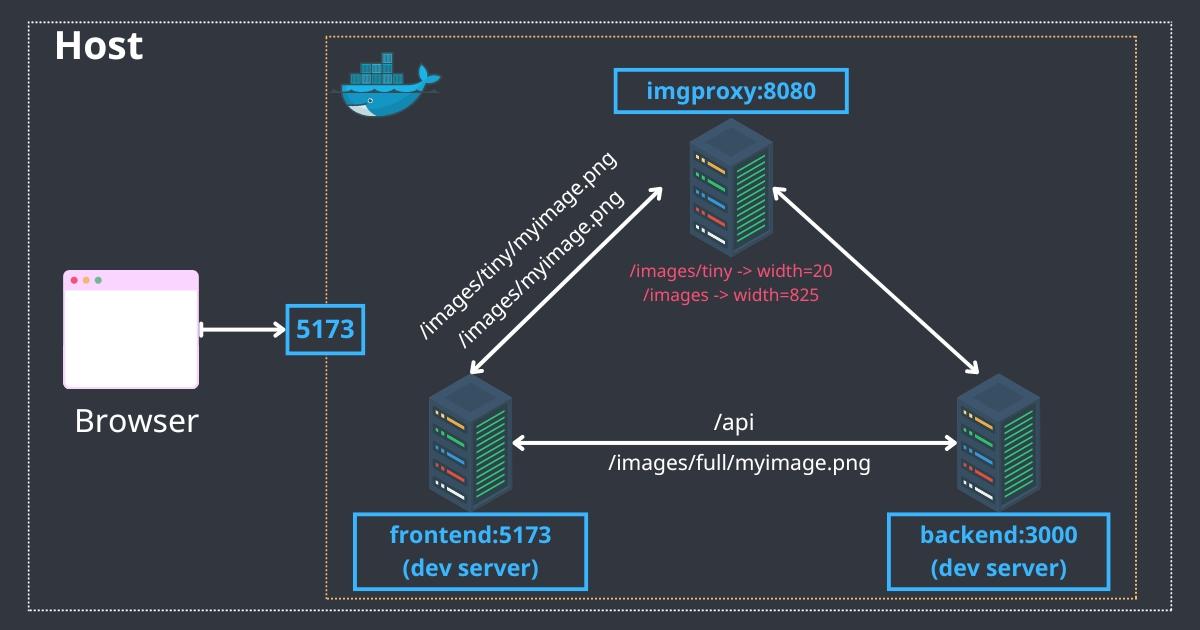
những gì ta có ở createProxyConfig về cơ bản như sau:
từ FE nếu load ảnh /images/tiny/myimage.png sẽ map thành http://imgproxy:8080/insecure/resize:fit:20:0:no:0/plain/http://backend:3000/images/myimage.png
Với http://imgproxy:8080 là server resize ảnh Imgproxy. và http://backend:3000 là Object storage bucket (backend nơi lưu ảnh gốc)
Cái URL kia bản chất là ta gọi vào server resize ảnh, truyền các tham số theo sau:
- width=20, height=0 (auto height). (Xem thêm về tham số ở đây)
- đường dẫn để lấy ảnh gốc về resize là
http://backend:3000/images/myimage.png
con số 20 và 825 là mình debug biết được Viblo họ dùng tham số đó và ở đây ta dùng y hệt nha
Với những tham số kia thì server resize (Imgproxy) sẽ download ảnh gốc về thực hiện resize và trả lại cho Frontend
Vọc sang tới backend (hay ở bài này ta cũng gọi là Object storage bucket), thì nó là một app NodeJS rất đơn giản 😂:
- ảnh gốc lưu ở
public/images, được setup là static assets - 3 API để lưu ảnh, upload ảnh, xoá ảnh thì ở
routes/index.js backendkhông có DB gì cả, vì ta sẽ làm ở mức đơn giản bài này thôi, ảnh được lưu theo tên có gắn timestamp, và mỗi khi call API thì mình list files ảnh ra và trả lại FE thôi
Nếu các bạn để ý ở file
docker-compose.local.ymlthì ta chỉ map port cho frontend, còn lại 2 cái kia sẽ chỉ được gọi bằng cách proxy từ frontend vào
Flow cho toàn bộ kiến trúc của chúng ta trông như sau:
Giờ ta quay ra trình duyệt debug tí network xem nó như nào nhé, cơ mà trước đó thì upload cho mình ít ảnh để test nha.
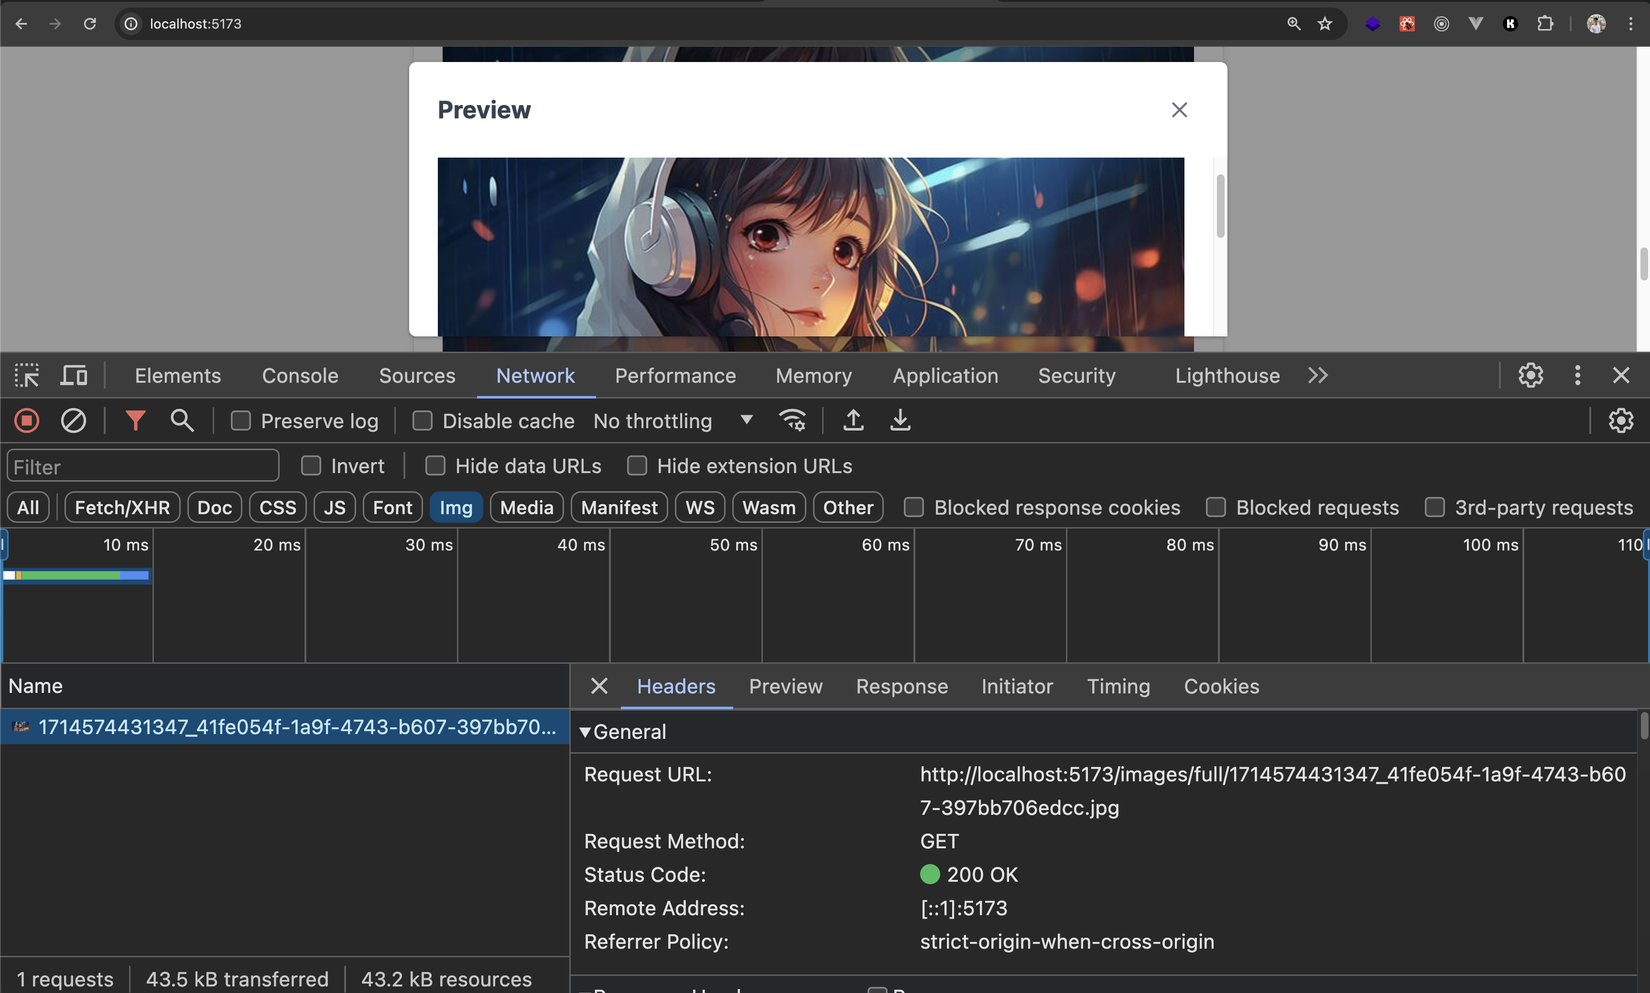
Đầu tiên thì như các bạn thấy là ta sẽ load ảnh mờ /tiny:
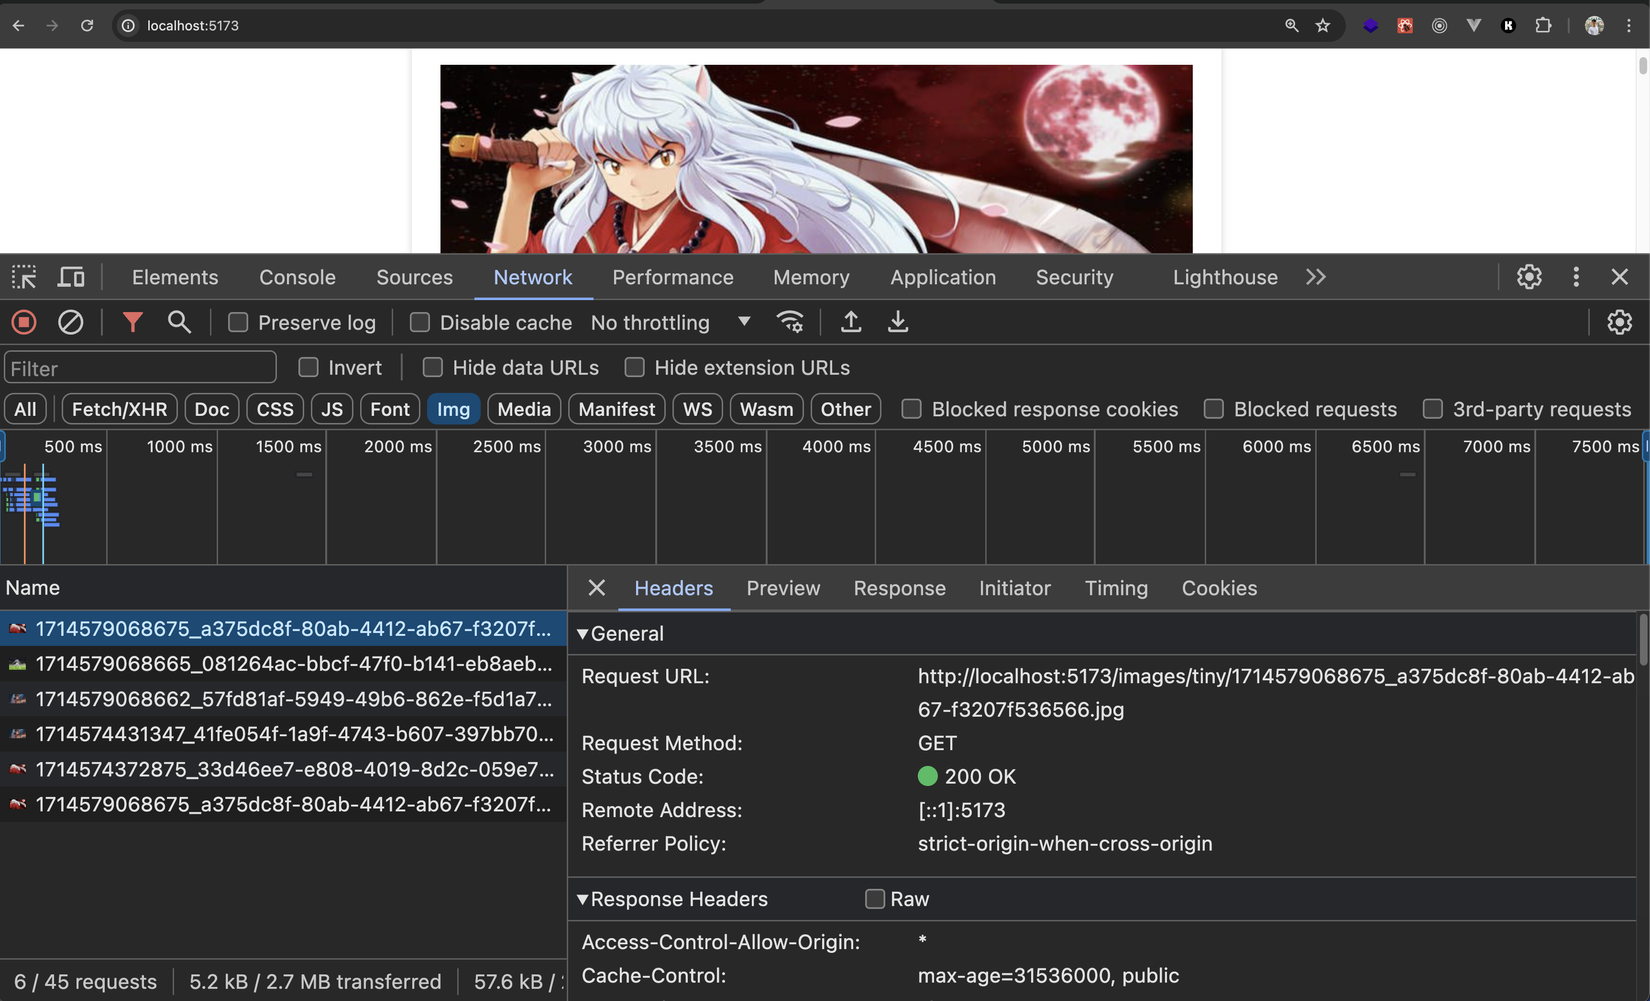
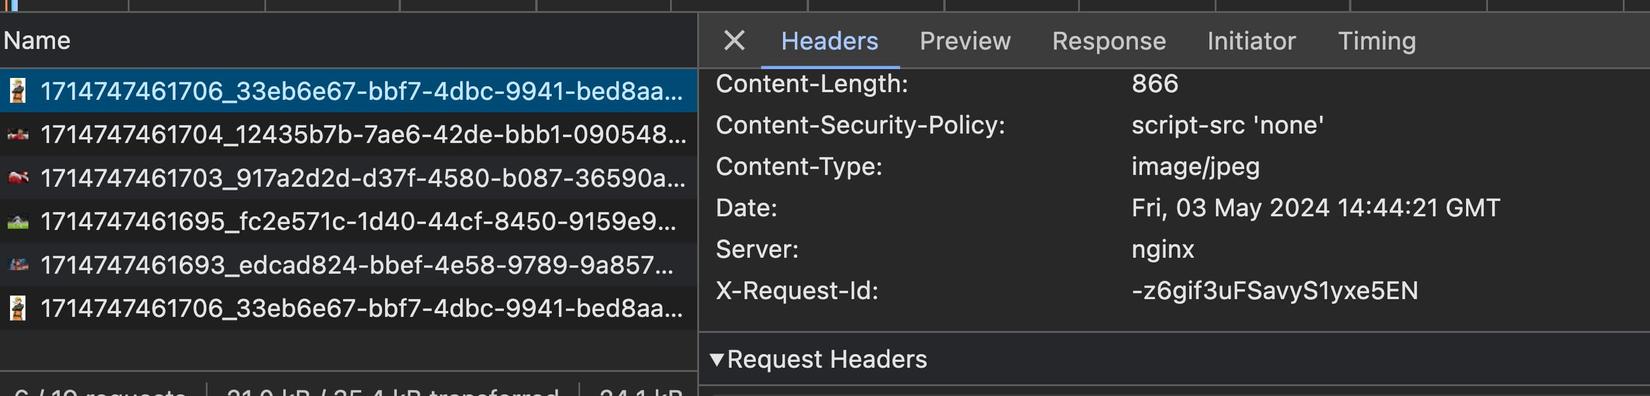
Và như ta đã khai báo proxy là request dạng này thì sẽ đưa tới server resize ảnh, do vậy ta có thể check header trả về từ server là Imgproxy và có X-request-id:
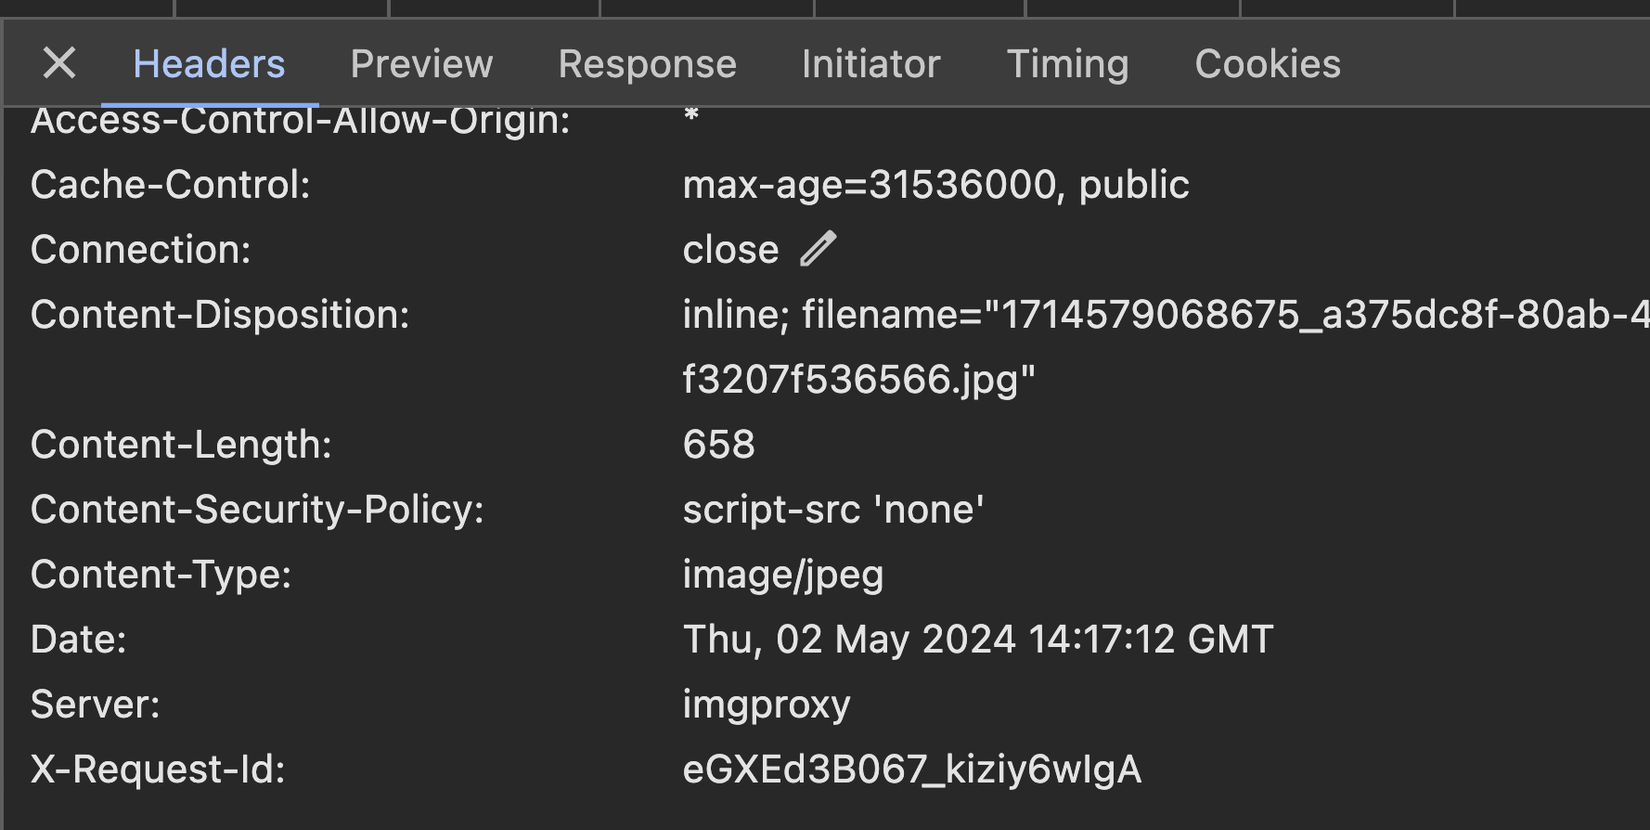
Tương tự khi ta cuộn trang xuống dưới thì sẽ bắt đầu load ảnh chính, ảnh này cũng sẽ đưa tới server resize. Phần này các bạn tự check nhé
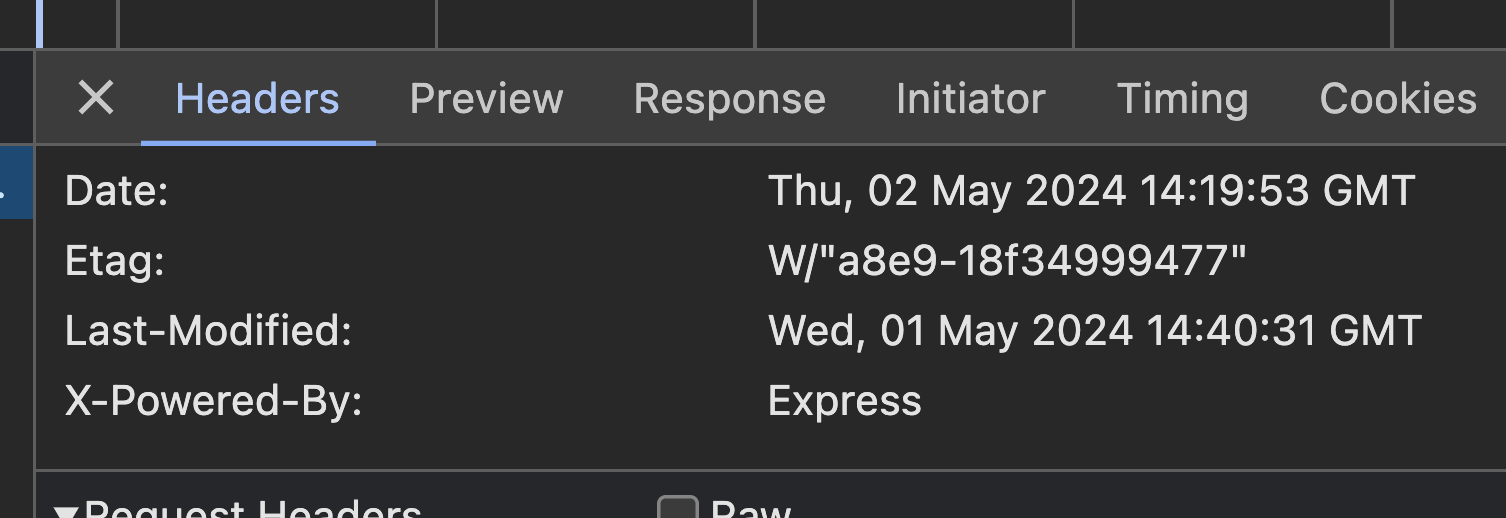
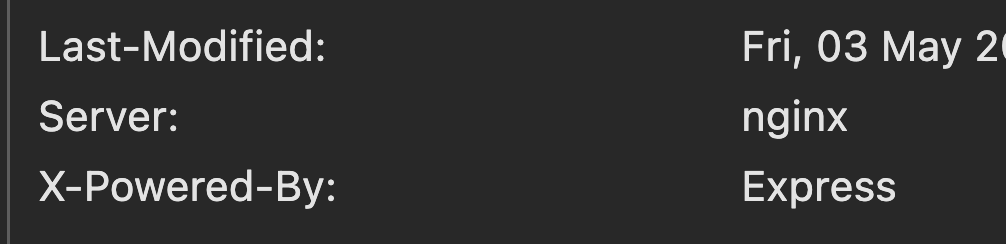
Khi chúng ta bấm vào xem detail ảnh thì request có dạng /full, và cái này sẽ gọi thẳng tới Object storage server - ở đây chính là backend và trả ra ảnh gốc:
Ở phần header ta sẽ thấy nó tới từ Express server:
Như vậy là ta đã xong phần test với development mode rồi nha 😁. Tiếp theo ta sẽ cấu hình cho production, và khi oke thì sẽ build image đẩy lên Dockerhub và deploy trên Kubernetes nhé 💪
Setup cho production
Build image
Về cơ bản ở bài này khi setup cho production thì ý tưởng cũng rất giống như khi ta chạy local, chỉ với frontend sau khi build cho production thì ta chạy với nginx, và nginx cũng làm nhiệm vụ proxy request + caching, tiện cả luôn 😉
Về phần này thì để cho tiện mình đã làm sẵn 2 file Dockerfile cho backend và frontend sẵn sàng cho production rồi. Các bạn có thể mở từng file trong từng folder ra và xem nhé, nội dung cũng không có gì mấy đâu (giá mà các bạn đều xem series học Docker và CICD của mình rồi thì hiểu hết ấy 😉)
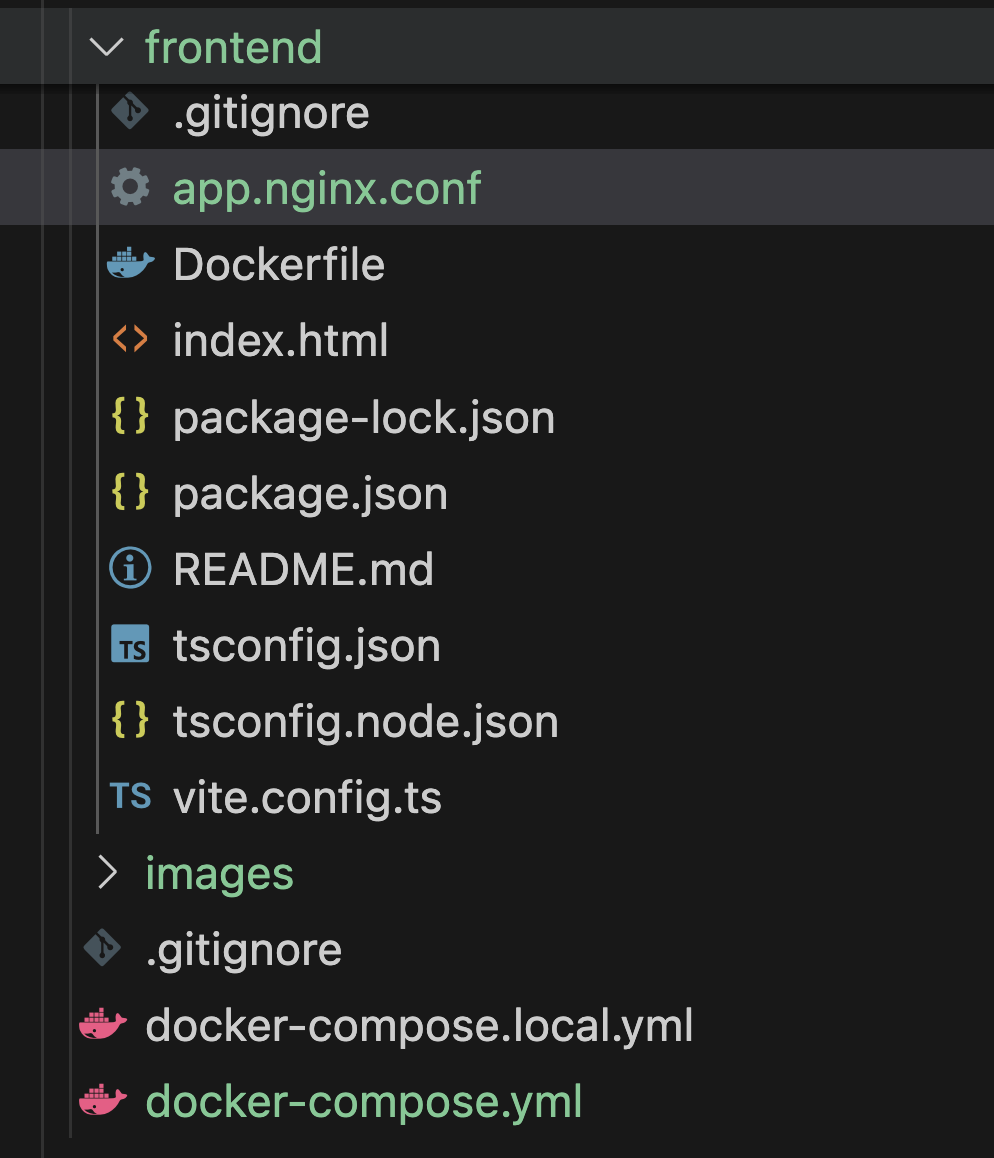
Các bạn chỉ cần tạo cho mình file cấu hình nginx nữa thôi là được nhé. Ở trong folder frontend các bạn tạo cho mình file app.nginx.conf với nội dung như sau:
server {
    listen       80;
    listen  [::]:80;
    server_name  localhost;

    server_tokens off;

    client_max_body_size 1G;

    proxy_intercept_errors on;
    error_page 404 /404.html;


    location / {
        root   /usr/share/nginx/html;
        index  index.html index.htm;
    }

    location /api {
        proxy_pass http://backend:3000;
        proxy_set_header Host $host;
        proxy_set_header x-forwarded-for $remote_addr;
        proxy_set_header X-Forwarded-Proto $scheme;
    }

    location /images/full {
        proxy_pass http://backend:3000/images/;
        proxy_set_header Host $host;
        proxy_set_header x-forwarded-for $remote_addr;
        proxy_set_header X-Forwarded-Proto $scheme;
    }

    location /images/tiny {
        rewrite ^/images/tiny/(.*)$ /insecure/resize:fit:20:0:no:0/plain/http://backend:3000/images/$1 break;

        proxy_pass http://imgproxy:8080;
        proxy_set_header Host $host;
        proxy_set_header x-forwarded-for $remote_addr;
        proxy_set_header X-Forwarded-Proto $scheme;
    }

    location /images {
        rewrite ^/images/(.*)$ /insecure/resize:fit:825:0:no:0/plain/http://backend:3000/images/$1 break;

        proxy_pass http://imgproxy:8080;
        proxy_set_header Host $host;
        proxy_set_header x-forwarded-for $remote_addr;
        proxy_set_header X-Forwarded-Proto $scheme;
    }

    error_page   500 502 503 504  /50x.html;
    location = /50x.html {
        root   /usr/share/nginx/html;
    }
}
Nội dung ở file cấu hình trên thì cũng xêm như những gì ta đã làm ở vite.config.ts khi ở local dev (mình copy y nguyên file mặc định từ image nginx rồi thêm vào). Nhưng ta có thêm một số thứ như sau:
server_tokens off;để ẩn nginx version ở response header đi (giấu càng nhiều thông tin về server càng tốt 😜), vì mặc định nó sẽ trả về thêm nginx version như này:
- Mặc định nginx chỉ cho upload tối đa 1MB, ở đây ta set lên tận 1GB cho nó máu 🤣 (
client_max_body_size 1G;) - Tiếp theo ta "intercept" lỗi trả về khi proxy request với
proxy_intercept_errors on, nếu gặp lỗi là 404 thì show trang 404 mặc định của nginx,error_page 404 /404.html(các bạn có thể thêm những lỗi khác và trang khác nếu muốn)
Oke ngon rồi, giờ ở root folder các bạn tạo cho mình file docker-compose.yml nhé:
services:
  app:
    build:
      context: ./frontend
      dockerfile: Dockerfile
    ports:
      - "8081:80"
    volumes:
      - ./frontend/app.nginx.conf:/etc/nginx/conf.d/default.conf

  backend:
    build:
      context: ./backend
      dockerfile: Dockerfile
    volumes:
      - ./images:/app/public/images

  imgproxy:
    image: darthsim/imgproxy
Ở trên thì nội dung quá rõ ràng rồi đúng không  , các bạn tự thẩm và có thắc mắc gì thì comment cho mình nhé
À và tạo luôn cho mình folder images ở root folder để lát mount volume lưu lại ảnh upload lên nhé. Sau khi tạo các file mới xong thì folder của ta nom sẽ như sau:
Âu cây ngon rồi, start tất cả lên thôi thôi:
docker compose up -d
Sau khi chạy lên thì các bạn truy cập ở địa chỉ http://localhost:8081 và ta lại có kết quả như local, nhưng mọi thứ đã được build ở production mode 😎:
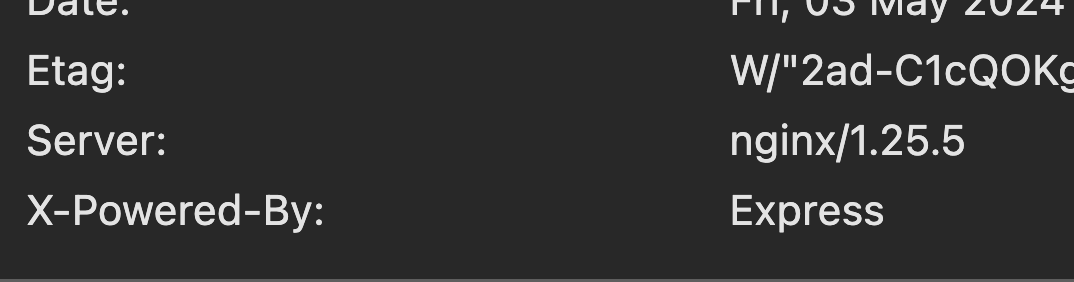
Thử vọc vạch một chút thì nếu các bạn để ý, request image tới server resize (imgproxy) ở response header hiện tại thì cái server đã bị nginx override rồi, nhưng ta vẫn có thể xác định được request đó tới server resize bởi vì nó có trường X-request-Id
Và khi bấm xem detail image thì vẫn sẽ gọi thẳng tới backend, ta có thể check trường X-Powered-By:
Ồ ké, vậy là mọi thứ đã sẵn sàng lên production. Giờ ta tiến hành build image cho backend và frontend nhé:
# chạy ở folder backend
docker build -t my-backend .

# chạy ở folder frontend
docker build -t my-frontend .
Ở bước tiếp theo ta sẽ đẩy image lên Dockerhub nha 🚀🚀
Chú ý với Mac Apple chip: vì image được build bởi Apple Chip thì architecture của nó là ARM64 và sẽ gặp lỗi khi deploy ở trên Linux/K8S,...vì hiện tại thường chúng dùng AMD64, do vậy với các bạn dùng Apple Chip thì ở Dockerfile cho backend và frontend, ở những dòng có FROM thì các bạn phải sửa thành FROM --platform=linux/amd64 nhé. Ví dụ:
FROM node:20-alpine as build-stage
WORKDIR /app
COPY package*.json ./
RUN npm install
COPY . .
RUN npm run build
FROM nginx:1.25-alpine as production-stage
WORKDIR /usr/share/nginx/html
COPY /app/dist .
EXPOSE 80
CMD ["nginx", "-g", "daemon off;"]
Push image lên Dockerhub
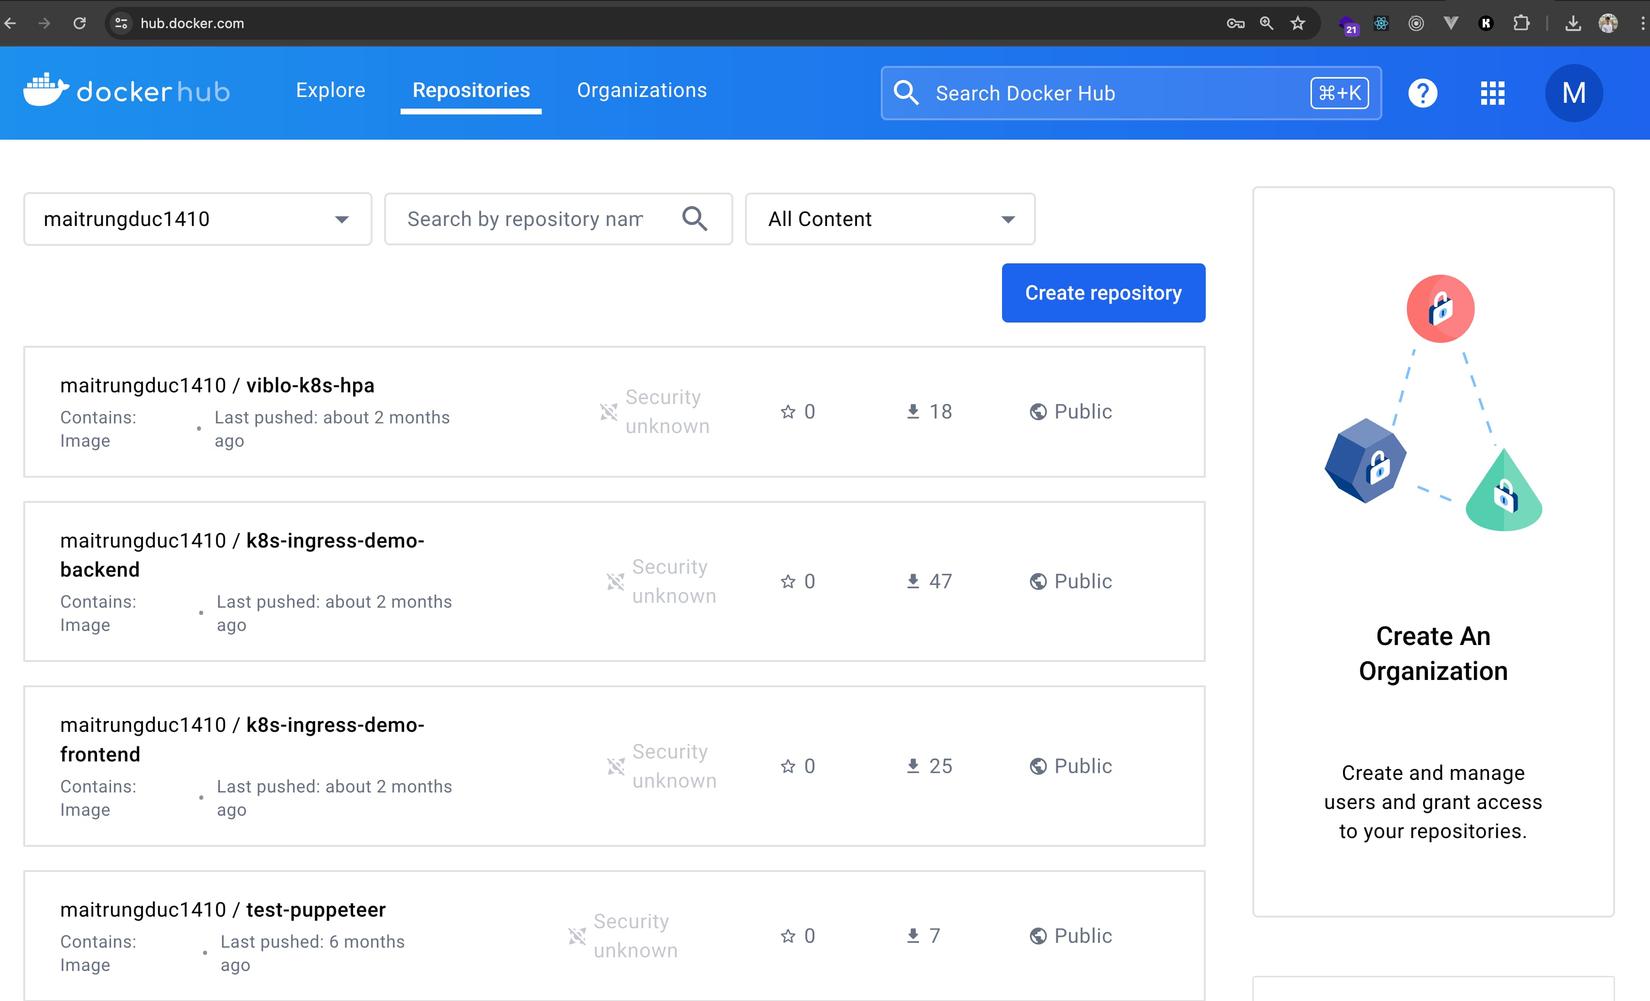
Dockerhub cũng như kiểu Github vậy, Github thì lưu code, Dockerhub thì lưu image. Và để đẩy được image của các bạn lên đây thì điều đầu tiên là các bạn cần phải đăng kí tài khoản nhé. Sau đó đăng nhập vào và sẽ thấy giao diện chính nom như sau:
Ở trên Dockerhub thì họ cũng lưu thành Repository, mỗi repository thường lưu 1 loại image, mỗi image có nhiều tag. Ở bài này ta sẽ tạo 2 Repository, 1 cho backend và 1 cho frontend nhé.
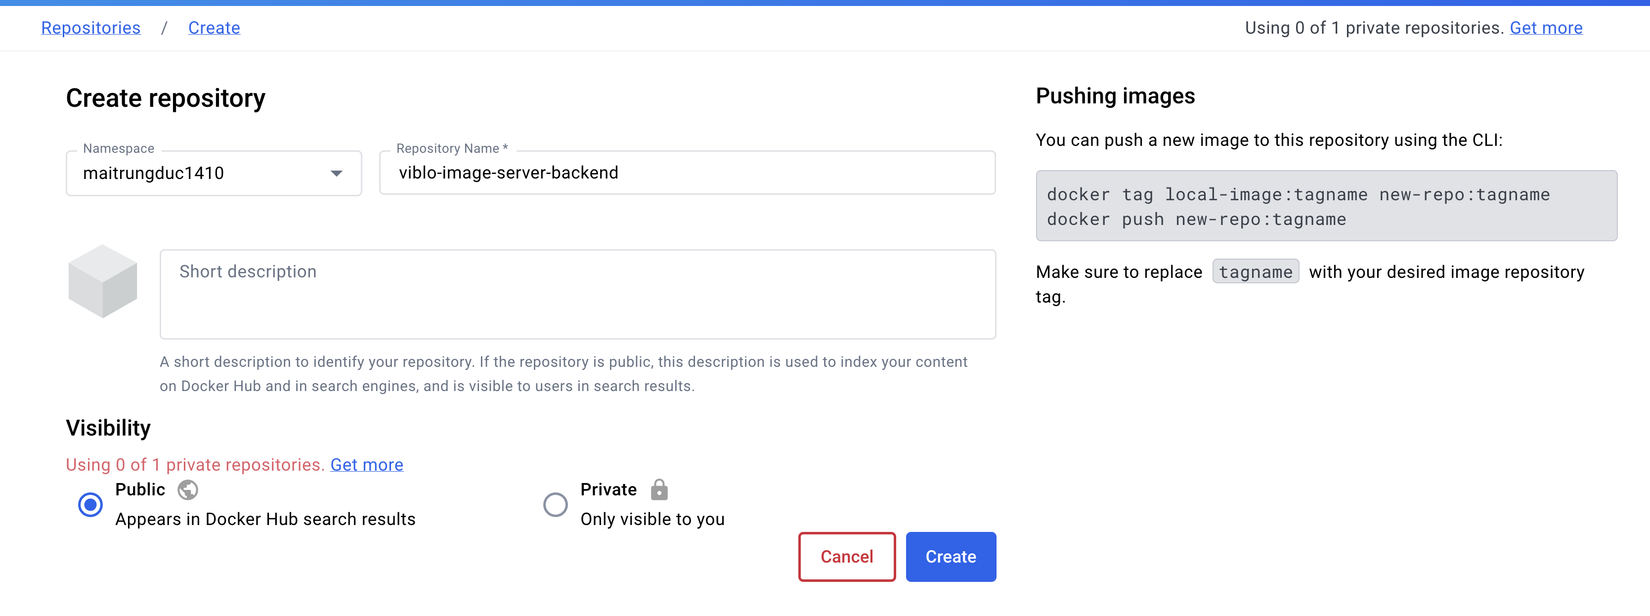
Các bạn bấm Create repository và nhập tên image cho backend trước nha:
Sau đó ta bấm Create, thấy giao diện như sau là oke nhé:
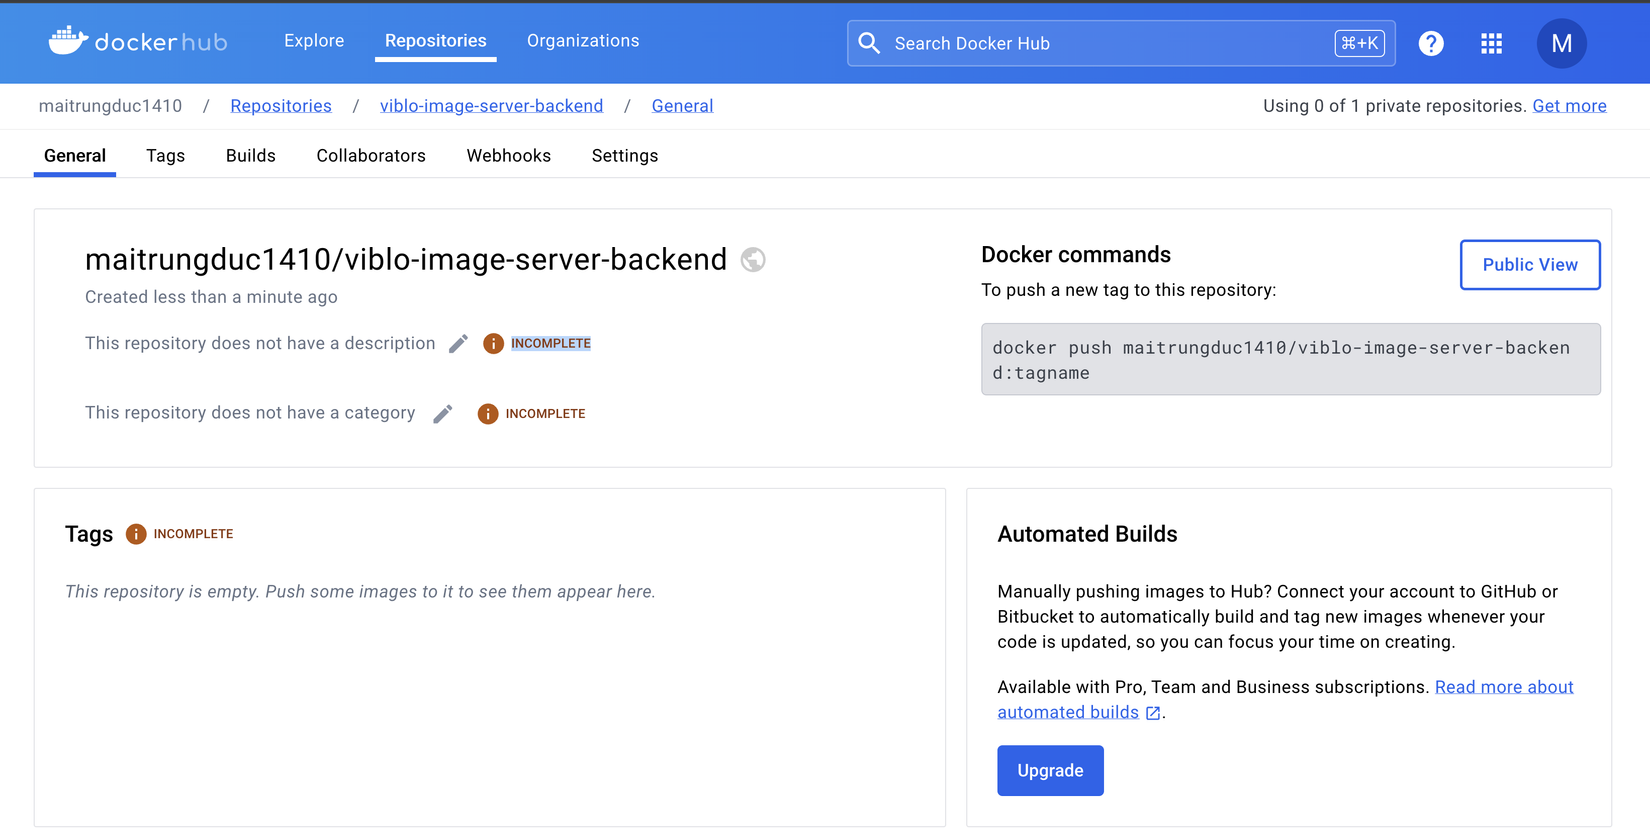
Như các bạn thấy thì xêm xêm như Git repository, ở đây ta cũng có thể viết mô tả cho image (bằng Markdown), set category,...
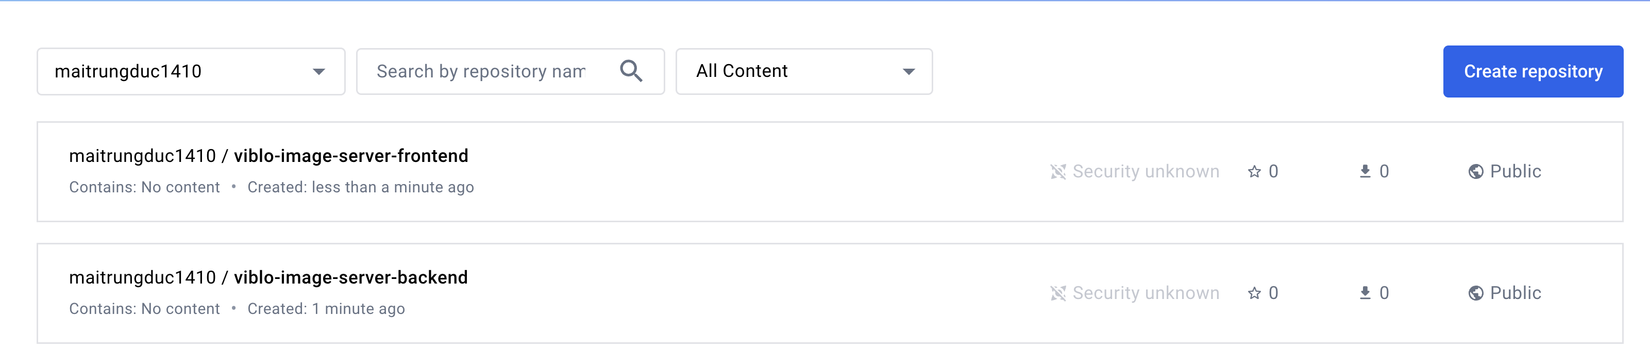
Tiếp theo ta tạo 1 cái repository nữa cho frontend nha, tạo xong thì ta có 2 repository như sau:
Giờ ta quay lại local, và push 2 image mà khi nãy ta build lên nhé, nhưng ta phải tag lại image với tên như ở trên Dockerhub thì mới upload được.
docker tag my-frontend maitrungduc1410/viblo-image-server-frontend

docker tag my-backend maitrungduc1410/viblo-image-server-backend
Các bạn thay username của các bạn vào cho đúng nhé
Ở trên ta không nói tag của image là gì thì mặc định nó là
latest
Giờ ta push image lên Dockerhub thôi:
docker push maitrungduc1410/viblo-image-server-frontend

docker push maitrungduc1410/viblo-image-server-backend
Nếu ta gặp lỗi denied: requested access to the resource is denied thì là ta cần login nhé. Ta chạy command:
docker login
Sau đó ta nhập username + password vào là được (bạn nào muốn bảo mật tốt hơn thì thay vì password thì ta dùng Personal Access Token nhé). Sau khi login thì ta push lại image là được nha
Khi image đã được push lên thành công thì ta quay lại Dockerhub F5 và sẽ thấy image của ta đã ở trên đó 😎😎:
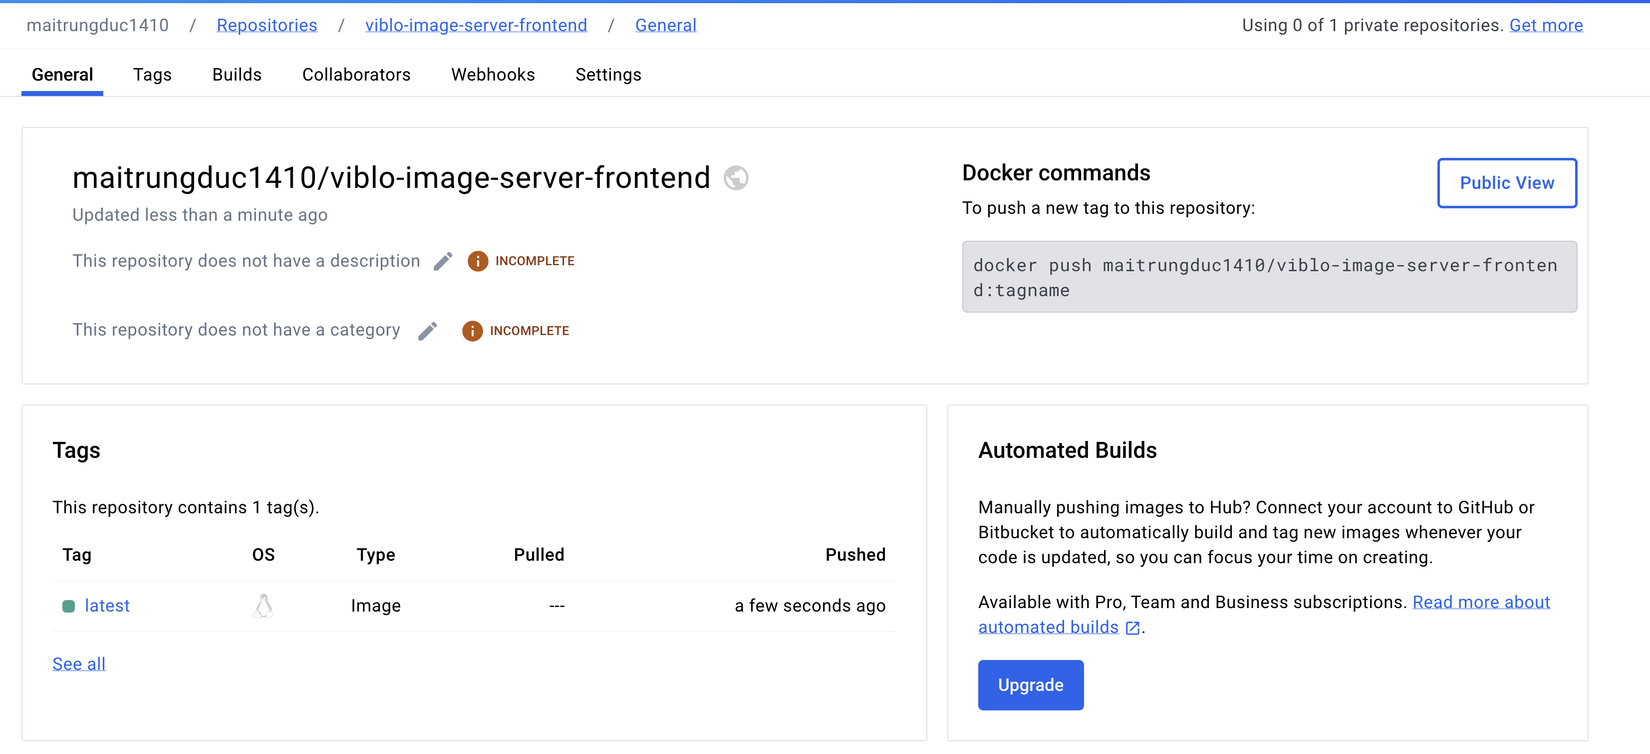
Hover vào chữ OS sẽ show architecture image của ta:
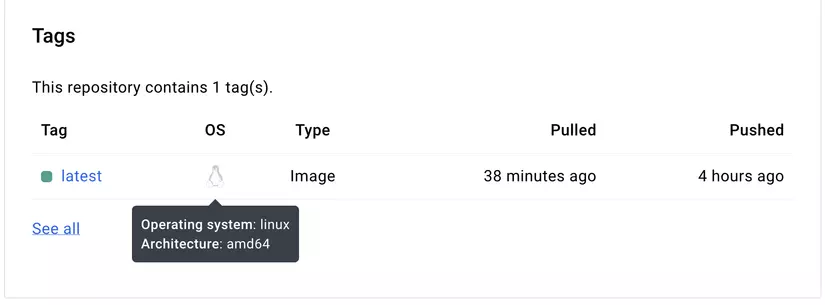
Đến đây là image của ta đã sẵn sàng để deploy lên Kubernetes rồi
Bạn nào muốn chắc cốp test lại thì sửa ở local
docker-compose.yml, dùng image bằng image trên Dockerhub nhé 😉
Deploy lên K8S
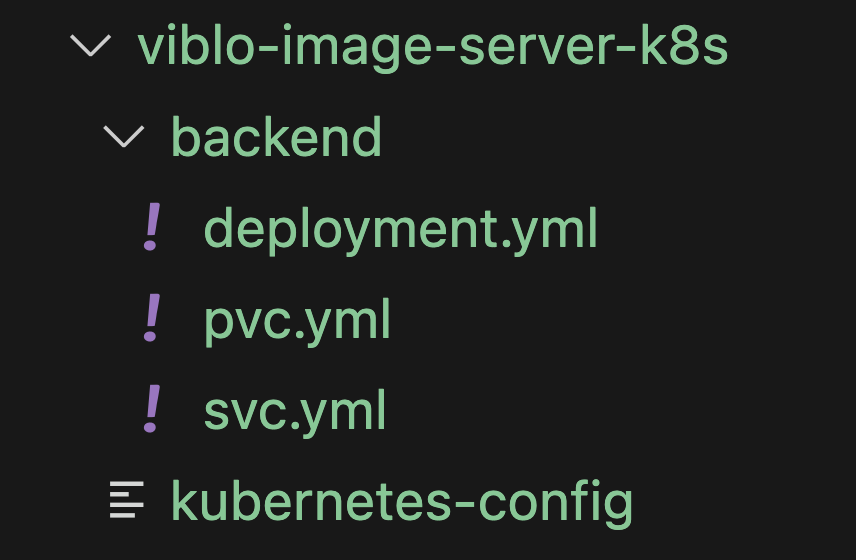
Các bạn tạo cho mình 1 folder bất kì để lưu tất cả manifest cho phần này nhé. Đặt tên là gì cũng được, ở đây mình chọn viblo-image-server-k8s 😁
Trước khi zô viết code thì ta lắc não chút xem ta cần những gì nha:
- Deployment + Service cho 3 cái: frontend, backend (Object storage), và Server resize (Imgproxy)
- Ảnh sẽ được lưu lại với volume -> ta cần 1 PersistentVolumeClaim cho
backend - Chỉ cần frontend được "expose" ra ngoài, 2 service còn lại thì
ClusterIPlà đủ, traffic đi vào frontend và được proxy internal trong cluster. Và ta sẽ lấy domain + HTTPS xịn luôn nên ta sẽ cần có 1 Ingress cho frontend
Âu cây hòm hòm rồi đó, triển thôi 💪💪💪
Lấy Session
Như mọi bài trong series học K8S của mình, ấy là ta sẽ chạy trên cluster của mình nên ta sẽ cần lấy 1 session để làm việc.
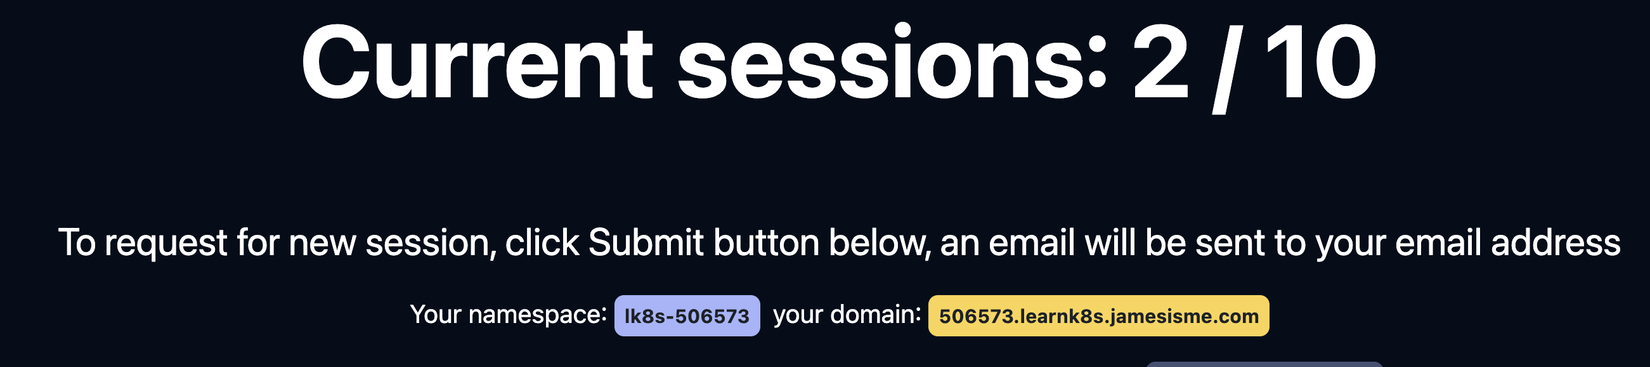
Các bạn vào trang của mình: https://learnk8s.jamesisme.com. Login qua gmail để lấy session nhé, nhớ tick Require domain để lấy domain nhé
Khi lấy được session thành công thì thông tin về namespace và domain sẽ hiện ra như sau:
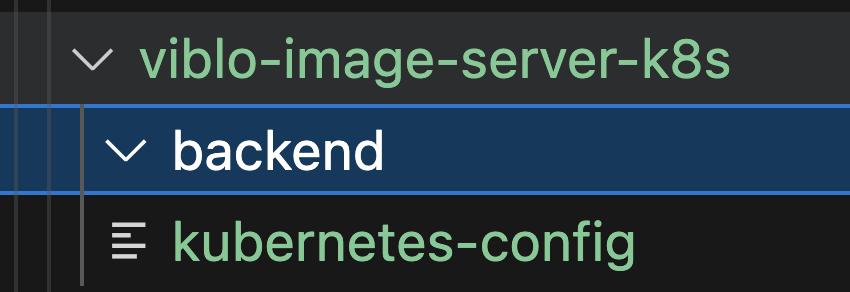
Sau khi lấy được session thì các bạn lưu file kubernetes-config vào folder làm việc hiện tại và ta test thử get pods coi nha:
kubectl get po --kubeconfig=./kubernetes-config

---->> In ra
No resources found in lk8s-506573 namespace.
Oke ngon rồi 🤪🤪
các bạn phải nhớ và dùng domain xuyên suốt toàn bài nhé
Phần chính
Giờ ta vô phần chính nè. Đầu tiên các bạn tạo cho mình folder backend và ta sẽ deploy backend trước nhé:
Đầu tiên ta tạo file pvc.yml để tạo PersistentVolumeClaim (PVC) nhé:
apiVersion: v1
kind: PersistentVolumeClaim
metadata:
  name: backend
spec:
  accessModes:
    - ReadWriteOnce
  resources:
    requests:
      storage: "2Gi"
Ở trên ta tạo 1 PVC với dung lượng 2Gi, tên là backend và accessModes=ReadWriteOnce tức là PVC này chỉ được mount vào 1 node trên cluster, nhiều pod có thể đọc PVC này, miễn là chúng chạy trên 1 node
vì cluster của mình dùng của DigitalOcean và họ chỉ support
ReadWriteOnce. Các cloud khác họ support các loại khác nhưReadWriteManyhayReadOnlyMany
Tiếp theo vẫn ở folder backend ta tạo file deployment.yml:
apiVersion: apps/v1
kind: Deployment
metadata:
  name: backend
  labels:
    app.kubernetes.io/name: viblo-image-server-backend
spec:
  selector:
    matchLabels:
      app: backend
  strategy:
    type: Recreate
  template:
    metadata:
      labels:
        app: backend
    spec:
      volumes:
        - name: images
          persistentVolumeClaim:
            claimName: backend
      containers:
      - name: my-backend
        image: maitrungduc1410/viblo-image-server-backend:latest
        ports:
        - containerPort: 3000
          name: pod-http
        resources:
          requests:
            memory: "128Mi"
            cpu: "64m"
          limits:
            memory: "750Mi"
            cpu: "500m"
        volumeMounts:
          - name: images
            mountPath: /app/public/images
Ở trên ta định nghĩa 1 Deployment tên là backend, ở đó mỗi Pod có 1 container tên là backend. Ta sẽ expose port này ở cổng 3000 (theo IP của pod), đặt tên cổng này là pod-http để tí bên service ta gọi tới trông cho đẹp 😇. Tiếp đó ta có định nghĩa resource requests/limits (RAM/CPU)
Ta cũng khai báo 1 volume tên là images, lấy từ PVC backend (ở pvc.yml), và ta có đoạn volumeMounts để mount cái volume đó vào đường dẫn /app/public/images.
À và chú ý tí là vì PVC của ta là
RWOnên ở Deployment ta setstrategy: type=Recreatetức là khi ta deploy thì nó sẽ kill Pod cũ đi trước khi chạy lại Pod mới. Cái này là cần thiết nếu không thì sau này khi ta redeploy nó sẽ bị lỗi
Tên image thì các bạn phải thay vào cho khớp với image mà khi nãy bạn push lên repository trên Dockerhub của bạn nhé
Tiếp theo ta tạo file svc.yml vẫn ở folder backend:
apiVersion: v1
kind: Service
metadata:
  name: backend
spec:
  type: ClusterIP
  ports:
    - name: svc-http
      protocol: TCP
      port: 80
      targetPort: pod-http
  selector:
    app: backend
Ở trên ta có service dành cho backend, service này có cổng là 80, và traffic sẽ được target vào pod-http mà ta khai báo ở Deployment lúc nãy, ta cũng có selector để select vào pod có labels là backend (cái này phải match với những gì ta khai báo ở Deployment nha)
Sau khi đã tạo đủ các file thì folder làm việc của ta trông sẽ như sau:
Âu cây giờ ta apply tất cả những gì có trong backend nhé:
kubectl apply -f backend --kubeconfig=./kubernetes-config

--->> In ra
deployment.apps/backend created
persistentvolumeclaim/backend created
service/backend created
Sau đó ta get thử thông tin từng cái như nào nhé:
kubectl get po --kubeconfig=./kubernetes-config

--->>>
NAME                      READY   STATUS    RESTARTS   AGE
backend-74cffc7c9-6l9t8   1/1     Running   0          39s

---

kubectl get svc --kubeconfig=./kubernetes-config

--->>>
NAME      TYPE        CLUSTER-IP      EXTERNAL-IP   PORT(S)   AGE
backend   ClusterIP   10.245.47.226   <none>        80/TCP    12m

---

kubectl get pvc --kubeconfig=./kubernetes-config

--->>>
NAME      STATUS   VOLUME                                     CAPACITY   ACCESS MODES   STORAGECLASS       AGE
backend   Bound    pvc-202b6d2d-6bbd-45fd-8be3-70cd2925b6d8   2Gi        RWO            do-block-storage   13m
Ô xờ kê, ngon cả rồi. Tiếp theo ta làm tới Server resize ảnh (Imgproxy) nhé. Ở root project ta tạo folder resize-server và trong đó ta tạo deployment.yml nha:
apiVersion: apps/v1
kind: Deployment
metadata:
  name: imgproxy
  labels:
    app.kubernetes.io/name: viblo-image-server-imgproxy
spec:
  selector:
    matchLabels:
      app: imgproxy
  template:
    metadata:
      labels:
        app: imgproxy
    spec:
      containers:
      - name: my-imgproxy
        image: darthsim/imgproxy:latest
        ports:
        - containerPort: 8080
          name: pod-http
        resources:
          requests:
            memory: "128Mi"
            cpu: "64m"
          limits:
            memory: "500Mi"
            cpu: "200m"
Nội dung thì vẫn tương tự như backend các bạn tự thẩm nhé. Ở trên mình để limits thấp một chút, để tí nữa demo phần scaling cho dễ 😉
Tiếp theo vẫn ở folder resize-server ta tạo file svc.yml:
apiVersion: v1
kind: Service
metadata:
  name: imgproxy
spec:
  type: ClusterIP
  ports:
    - name: svc-http
      protocol: TCP
      port: 80
      targetPort: pod-http
  selector:
    app: imgproxy
Sau đó lại ở root folder project ta apply tất cả cho imgproxy nhé:
kubectl apply -f resize-server --kubeconfig=./kubernetes-config

--->>>
deployment.apps/imgproxy created
service/imgproxy created
Cuối cùng là tới frontend nha, ta tạo folder frontend ở root project
Ta nhớ lại khi ở local, đó là với production thì ta sẽ customize cấu hình nginx một chút để proxy request đi vào backend và imgproxy. Do vậy khi deploy lên K8S ta sẽ tạo Configmap lưu cấu hình đó và mount vào frontend nha.
Các bạn tạo cho mình file configmap.yml trong frontend:
apiVersion: v1
kind: ConfigMap
metadata:
  name: frontend
data:
  app.nginx.config: |
    server {
        listen       80;
        listen  [::]:80;
        server_name  localhost;

        server_tokens off;

        client_max_body_size 1G;

        proxy_intercept_errors on;
        error_page 404 /404.html;


        location / {
            root   /usr/share/nginx/html;
            index  index.html index.htm;
        }

        location /api {
            proxy_pass http://backend:80;
            proxy_set_header Host $host;
            proxy_set_header x-forwarded-for $remote_addr;
            proxy_set_header X-Forwarded-Proto $scheme;
        }

        location /images/full {
            proxy_pass http://backend:80/images/;
            proxy_set_header Host $host;
            proxy_set_header x-forwarded-for $remote_addr;
            proxy_set_header X-Forwarded-Proto $scheme;
        }

        location /images/tiny {
            rewrite ^/images/tiny/(.*)$ /insecure/resize:fit:20:0:no:0/plain/http://backend:80/images/$1 break;

            proxy_pass http://imgproxy:80;
            proxy_set_header Host $host;
            proxy_set_header x-forwarded-for $remote_addr;
            proxy_set_header X-Forwarded-Proto $scheme;
        }

        location /images {
            rewrite ^/images/(.*)$ /insecure/resize:fit:825:0:no:0/plain/http://backend:80/images/$1 break;

            proxy_pass http://imgproxy:80;
            proxy_set_header Host $host;
            proxy_set_header x-forwarded-for $remote_addr;
            proxy_set_header X-Forwarded-Proto $scheme;
        }

        error_page   500 502 503 504  /50x.html;
        location = /50x.html {
            root   /usr/share/nginx/html;
        }
    }
Ở trên các bạn chú ý rằng cho
backendvàimgproxythì ta phải dùng service của chúng nhé, do vậy port đều là80
Tiếp đó ta tạo file deployment.yml:
apiVersion: apps/v1
kind: Deployment
metadata:
  name: frontend
  labels:
    app.kubernetes.io/name: viblo-image-server-frontend
spec:
  selector:
    matchLabels:
      app: frontend
  template:
    metadata:
      labels:
        app: frontend
    spec:
      volumes:
        - name: nginx-config
          configMap:
            name: frontend
            items:
              - key: app.nginx.config
                path: app.nginx.config
      containers:
      - name: my-frontend
        image: maitrungduc1410/viblo-image-server-frontend:latest
        ports:
        - containerPort: 80
          name: pod-http
        resources:
          requests:
            memory: "128Mi"
            cpu: "64m"
          limits:
            memory: "500Mi"
            cpu: "250m"
        volumeMounts:
        - name: nginx-config
          mountPath: "/etc/nginx/conf.d/default.conf"
          subPath: app.nginx.config
          readOnly: true
Ở trên ta mount configmap vào container như bình thường, đổi tên file thành default.conf, ta cũng set readOnly=true ý bảo volume này chỉ đọc chứ không được thay đổi
Và tiếp theo là file svc.yml:
apiVersion: v1
kind: Service
metadata:
  name: frontend
spec:
  type: ClusterIP
  ports:
    - name: svc-http
      protocol: TCP
      port: 80
      targetPort: pod-http
  selector:
    app: frontend
Như mình đã để cập từ đầu bài, đó là ta sẽ chỉ expose frontend ra public, dùng domain cho nó và lấy HTTPS. Và ta sẽ lại làm giống với bài Bảo mật Nginx Ingress với Cert Manager nhé 😎
Vẫn ở folder frontend ta tạo file ingress.yml
apiVersion: networking.k8s.io/v1
kind: Ingress
metadata:
  name: frontend
spec:
  ingressClassName: nginx
  rules:
  - host: 506573.learnk8s.jamesisme.com
    http:
      paths:
      - path: /
        pathType: Prefix
        backend:
          service:
            name: frontend
            port:
              name: svc-http
Ở trên các bạn phải thay domain của các bạn lấy được ở bước lấy session vào cho chính xác nhé
Phùuuu, mệt wa 😪😪
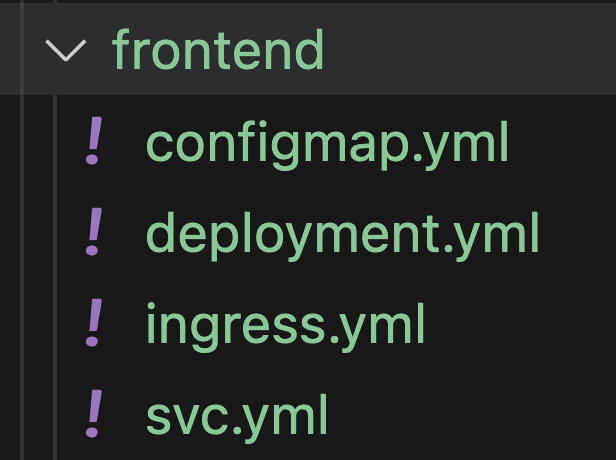
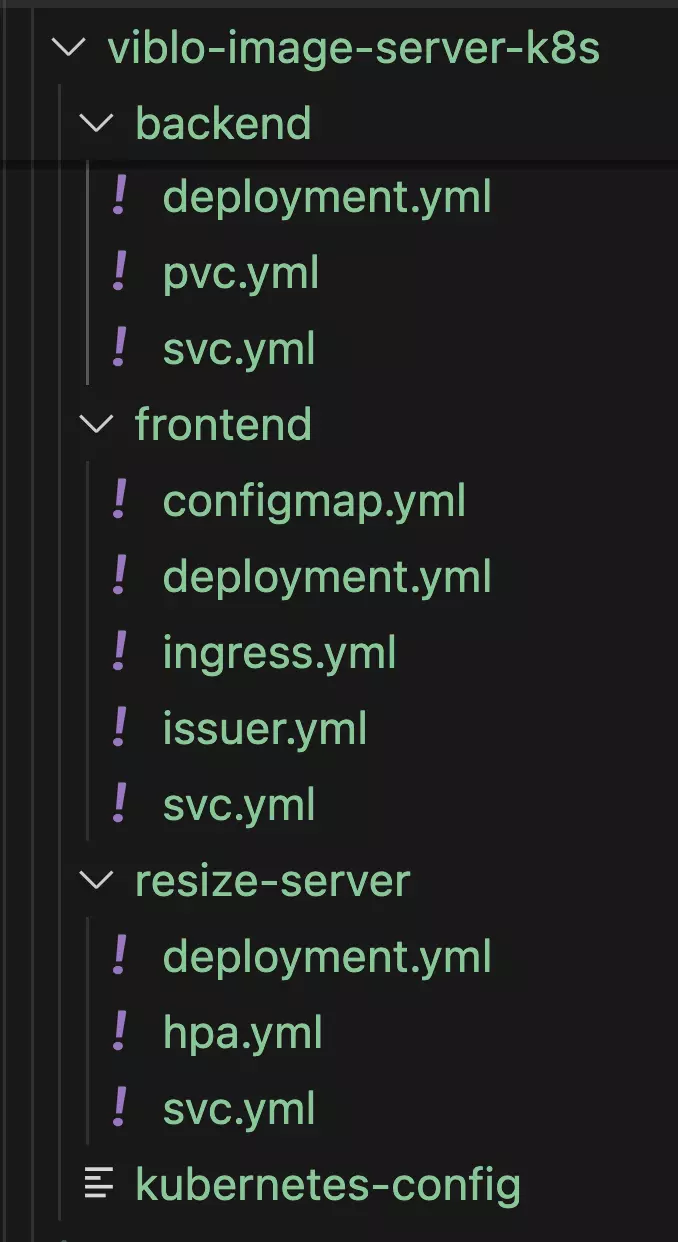
Sau khi tạo xong các file thì folder frontend nom như sau:
Giờ ta apply tất cả mọi thứ trong frontend nha:
kubectl apply -f frontend --kubeconfig=./kubernetes-config

--->>>
configmap/frontend created
deployment.apps/frontend created
ingress.networking.k8s.io/frontend created
service/frontend created
Sau khi tất cả đã lên ta thử get ingress xem nha:
kubectl get ing --kubeconfig=./kubernetes-config

--->>>
NAME       CLASS   HOSTS                           ADDRESS             PORTS   AGE
frontend   nginx   506573.learnk8s.jamesisme.com   k8s.jamesisme.com   80      6m5s
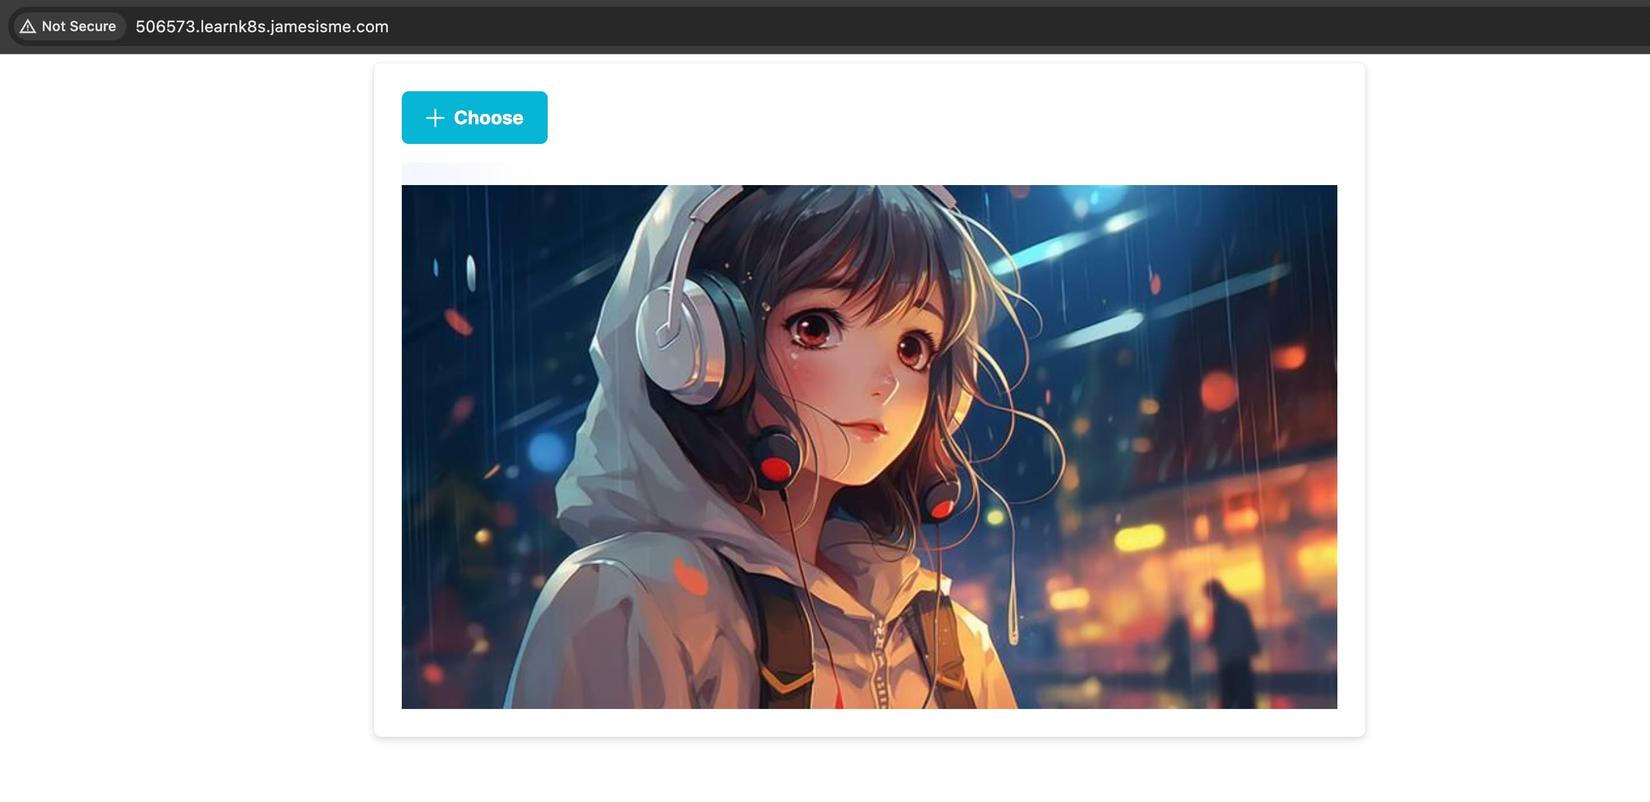
Có vẻ oke rồi đó, giờ ta mở trình duyệt ở địa chỉ 506573.learnk8s.jamesisme.com truy cập nha (thay domain của các bạn vào cho đúng nhé)
Pằng pằng chíu chíu, lên rồi 🥳🥳🥳🥳:
Các bạn thử upload các kiểu để đảm bảo là app chạy ngon nghẻ xem nhé
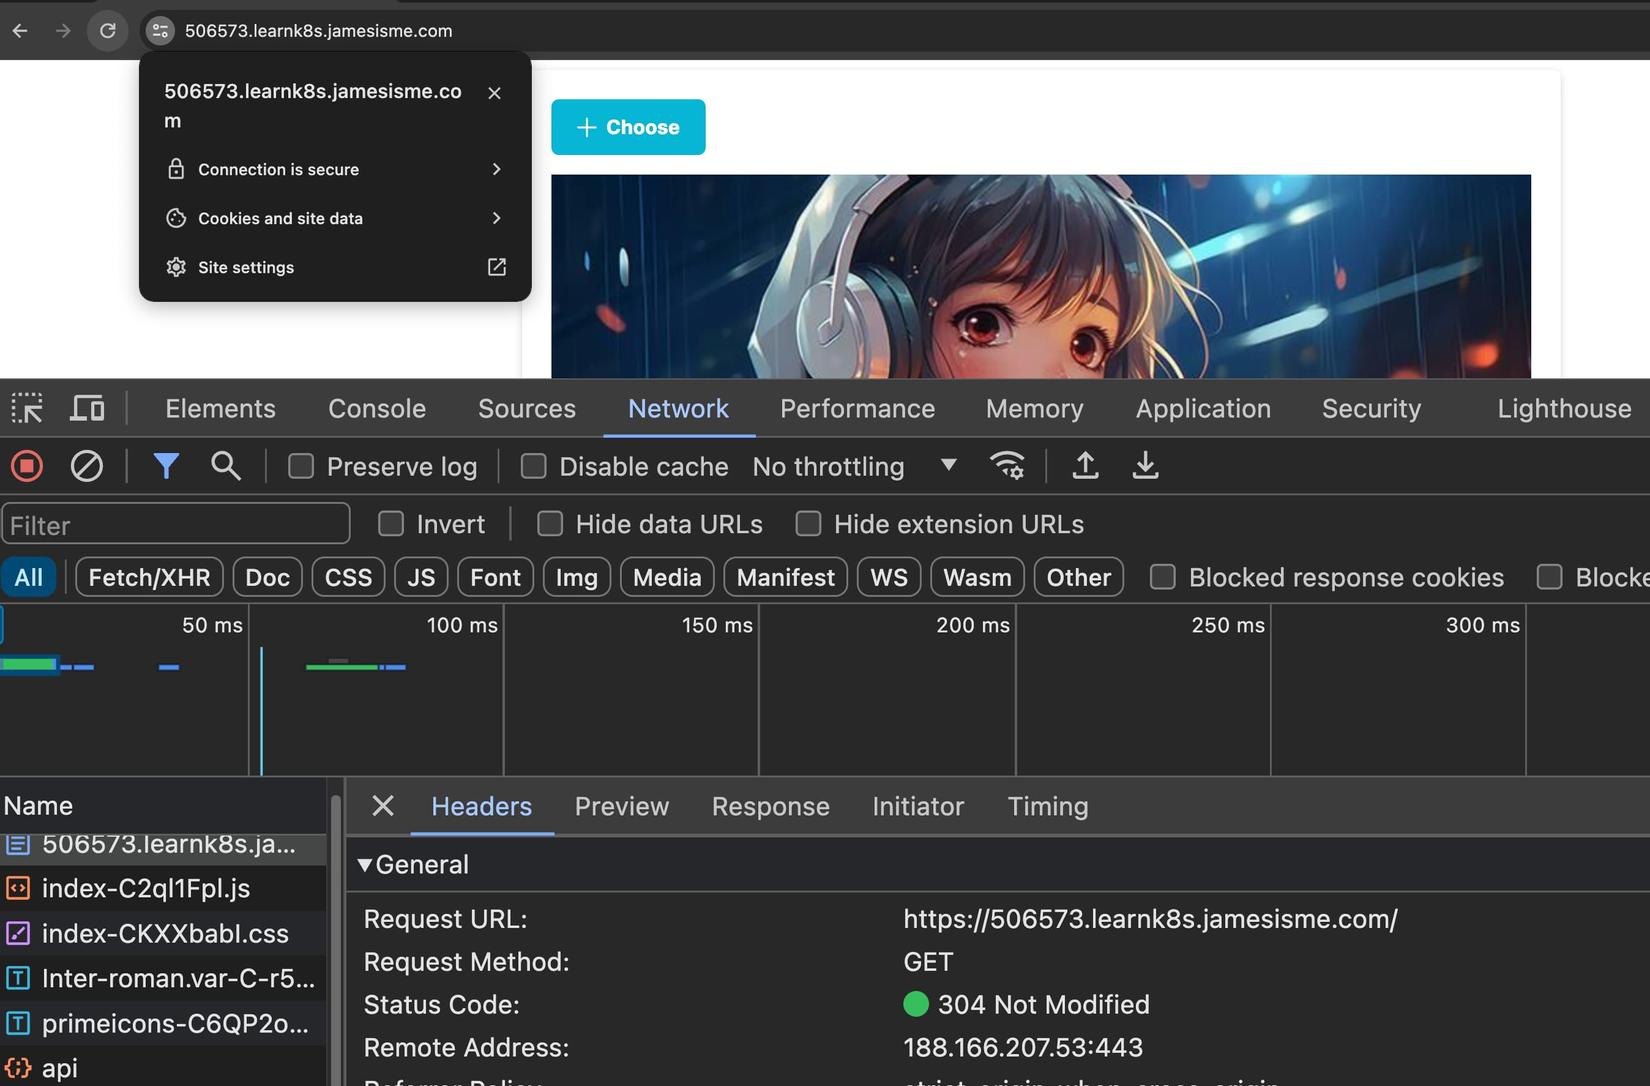
chú ý rằng ở bước này ta mới có HTTP thôi chưa có HTTPS, và nếu bạn mở ở Chrome và nó báo lỗi bảo mật
Your connection is not privatethì là do setup trình duyệt của bạn đang mặc định redirect về HTTPS, các bạn thử mở ở tab ẩn danh và tự tay gõhttp://....vào nhé
Lost+found
Nếu ta để ý ở console, thì thấy rằng có lỗi gì đó:

Check response trả về thì thấy có file lạ tên là lost+found:

Ủa cái gì z trời?????!! 🙄🙄
Ta thử exec vào pod backend xem nhé:
kubectl exec -it backend-d46dd9b75-54nq6 --kubeconfig=./kubernetes-config -- sh
Thay tên pod backend của các bạn vào cho đúng nhé,
get pođể xem tên nó là gì nha
Sau khi vào trong container thì ta vô folder images nha:
cd public/images/
ls -la

Ủa sao lại có folder lost+found ở đây? Volume tạo mới tinh mà???? 🧐🧐
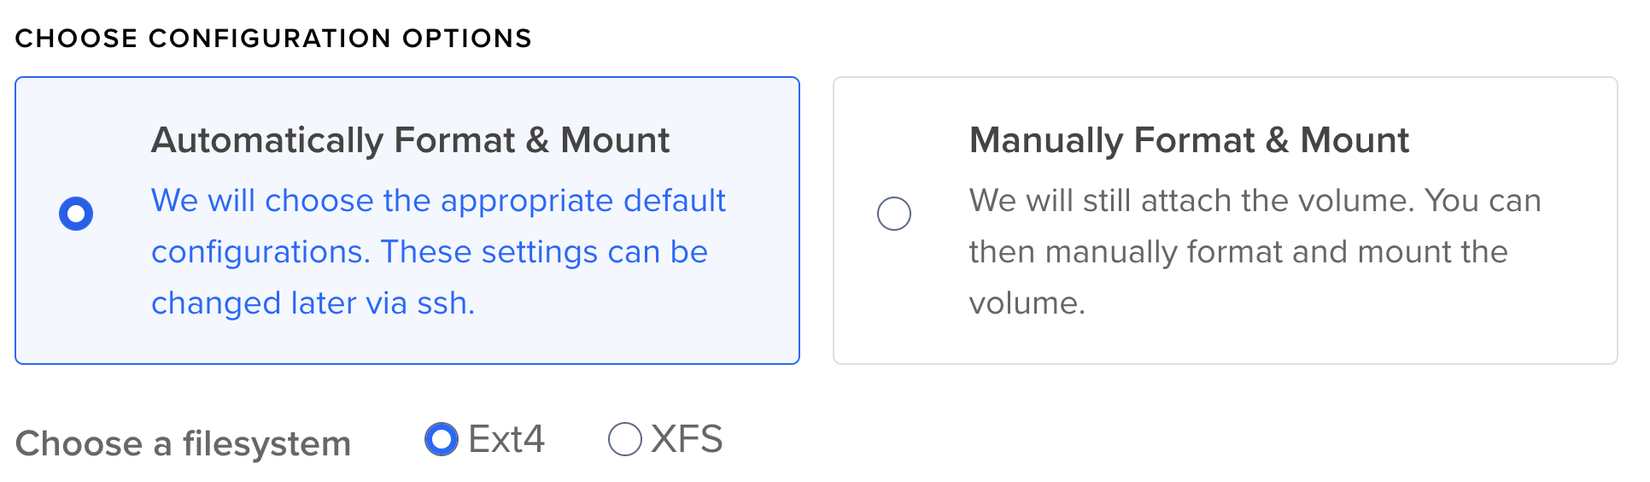
Thì theo giải thích ở đây nó là mặc định của EXT4 filesystem. Vì Cluster của mình trên DigitalOcean và default volume của nó là ext4:
Giờ ta xoá nó đi là được nhé (không sao cả nha 😜):
rm -rf lost+found/
Sau đó quay lại trình duyệt F5 là thấy hết lỗi 😎😎😎
Lấy HTTPS
Tiếp theo ta lấy HTTPS cho frontend nhé. Cách làm thì vẫn như bài nginx ingress của mình. Trong folder frontend ta tạo file issuer.yml:
apiVersion: cert-manager.io/v1
kind: Issuer
metadata:
  name: letsencrypt-prod
spec:
  acme:
    # The ACME server URL
    server: https://acme-v02.api.letsencrypt.org/directory
    # Email address used for ACME registration
    email: test@gmail.com
    # Name of a secret used to store the ACME account private key
    privateKeySecretRef:
      name: letsencrypt-prod
    # Enable the HTTP-01 challenge provider
    solvers:
    - http01:
        ingress:
          class: nginx
Nội dung thì các bạn xem lại bài kia của mình để hiểu rõ hơn nha. Về cơ bản ở trên thì ta khai báo dạng SSL cert mà ta sẽ lấy (LetsEncrypt)
Sau đó ta apply file issuer.yml này nha:
kubectl apply -f frontend/issuer.yml --kubeconfig=./kubernetes-config

--->>>
issuer.cert-manager.io/letsencrypt-prod created
Sau đó ta sửa lại file ingress.yml như sau nhé:
apiVersion: networking.k8s.io/v1
kind: Ingress
metadata:
  name: frontend
  annotations:
    cert-manager.io/issuer: "letsencrypt-prod"
spec:
  ingressClassName: nginx
  tls:
  - hosts:
    - 506573.learnk8s.jamesisme.com
    secretName: frontend-tls
  rules:
  - host: 506573.learnk8s.jamesisme.com
    http:
      paths:
      - path: /
        pathType: Prefix
        backend:
          service:
            name: frontend
            port:
              name: svc-http
Ở trên ta khai báo host mà ta muốn lấy HTTPS cert và một số cấu hình khác nữa, nếu có thể các bạn xem bài nginx ingress của mình nhé
Âu cây, apply lại ingress thôi nào:
kubectl apply -f frontend/ingress.yml --kubeconfig=./kubernetes-config

--->>>
ingress.networking.k8s.io/frontend configured
Sau đó ta get ingress xem nó như nào nhé:
kubectl get ing --kubeconfig=./kubernetes-config

--->>>
NAME                        CLASS    HOSTS                           ADDRESS             PORTS     AGE
cm-acme-http-solver-j56xq   <none>   506573.learnk8s.jamesisme.com   k8s.jamesisme.com   80        12s
frontend                    nginx    506573.learnk8s.jamesisme.com   k8s.jamesisme.com   80, 443   26m
Như trên ta thấy rằng cert-manager đang thực hiện lấy HTTPS, có 1 ingress mới được tạo ra, nếu ta get pod tại thời điểm này cũng sẽ thấy có 1 pod được tạo ra.
Chờ một tẹo và get ingress lại thì sẽ thấy như sau:
kubectl get ing --kubeconfig=./kubernetes-config

--->>>
NAME       CLASS   HOSTS                           ADDRESS             PORTS     AGE
frontend   nginx   506573.learnk8s.jamesisme.com   k8s.jamesisme.com   80, 443   26m
Như vậy là oke rồi nè, ta quay lại trình duyệt F5 là thấy HTTPS nha 😎😎😎
Payload too large
Nếu ta thử upload nhiều ảnh một lúc cho nó nặng nặng chút sẽ thấy lỗi 413 Payload too large:
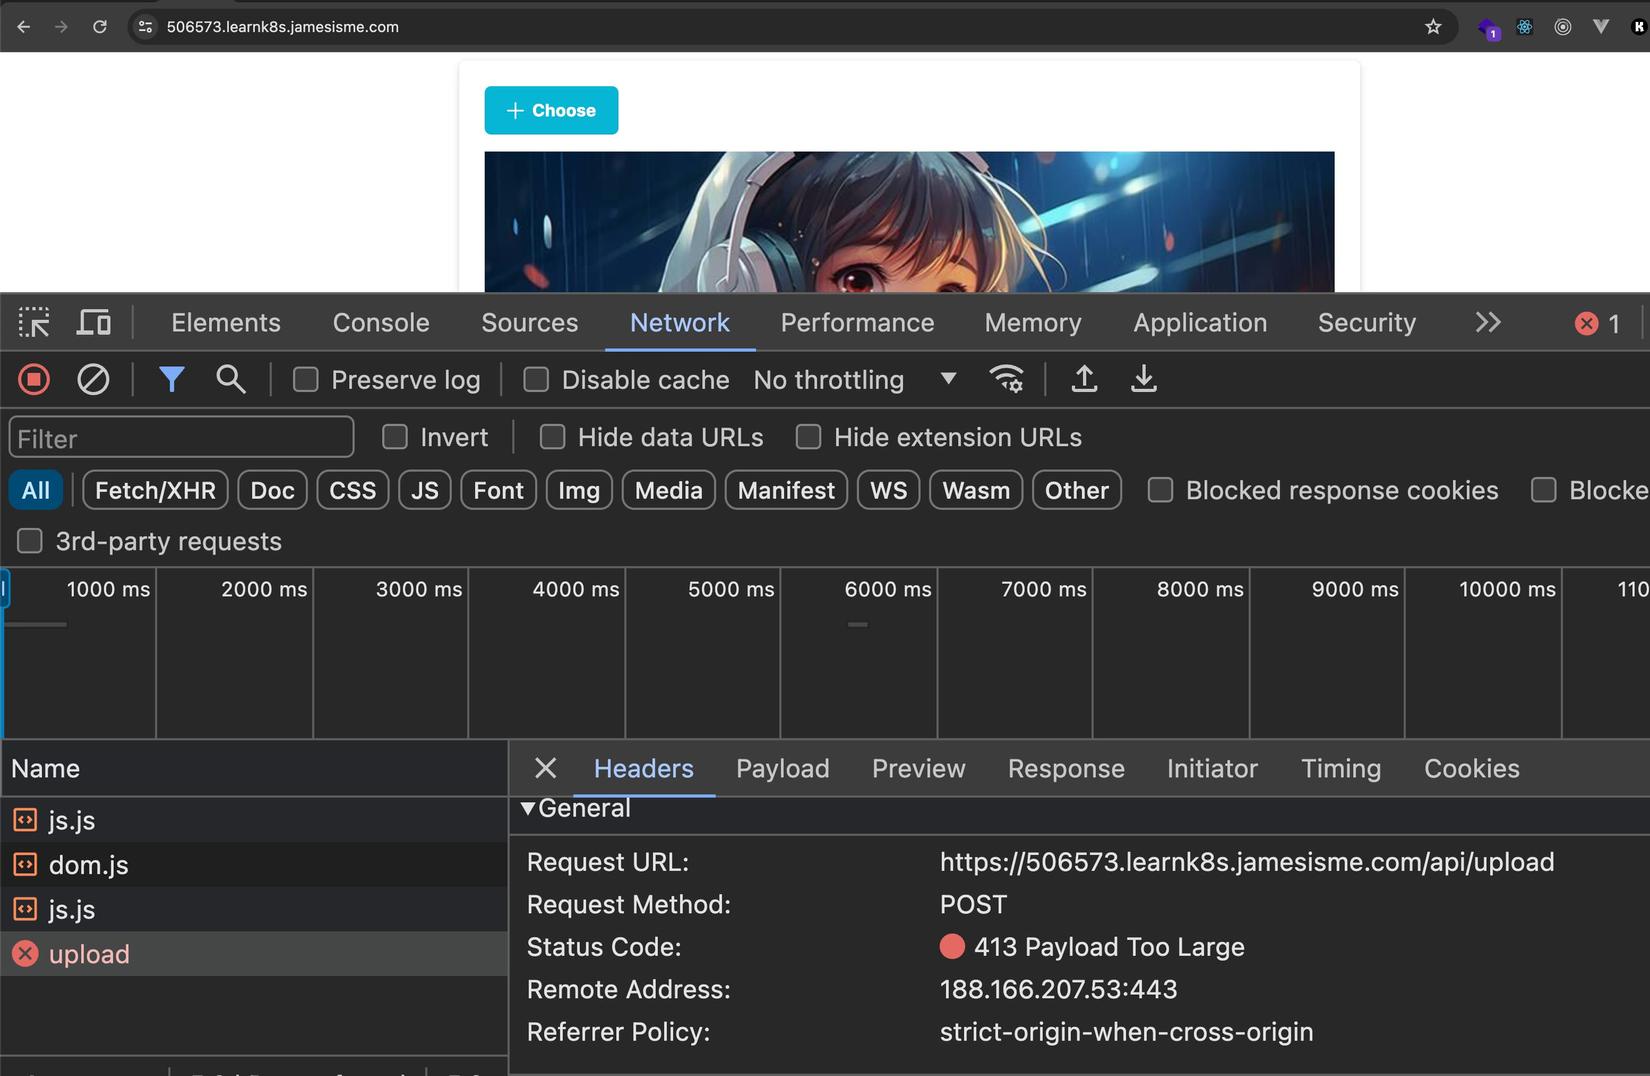
Thì ta chú ý rằng, ta đang ở trên Kubernetes, và đang dùng Nginx Ingress Controller, bản chất nó cũng là nginx thôi. Request đầu tiên khi đi vào cluster nó sẽ vào Nginx Ingress Controller trước khi vào tới frontend của ta, và ngay tại Controller nó đã bị limit rồi. Mặc định limit=1MB, giờ ta update lại ingress.yml để cho nó bằng với những gì mà frontend của ta có, tức là 1GB nhé:
apiVersion: networking.k8s.io/v1
kind: Ingress
metadata:
  name: frontend
  annotations:
    cert-manager.io/issuer: "letsencrypt-prod"
    nginx.ingress.kubernetes.io/proxy-body-size: 1G
spec:
  ingressClassName: nginx
  tls:
  - hosts:
    - 506573.learnk8s.jamesisme.com
    secretName: frontend-tls
  rules:
  - host: 506573.learnk8s.jamesisme.com
    http:
      paths:
      - path: /
        pathType: Prefix
        backend:
          service:
            name: frontend
            port:
              name: svc-http
Sau đó ta apply lại ingress nha:
kubectl apply -f frontend/ingress.yml --kubeconfig=./kubernetes-config

--->>>
ingress.networking.k8s.io/frontend configured
Sau đó ta upload lại nhiều file sẽ thấy oke nhé 😚😚
Tối ưu performance
Auto scaling
Những thao tác xử lý media (media processing) ví dụ như resize image là những thao tác tốn CPU vì nó cần load ảnh lên và thực hiện encode/decode ABCXYZ các kiểu, và nếu traffic mà cao thì những thao tác kia sẽ rất tốn resource (CPU/RAM)
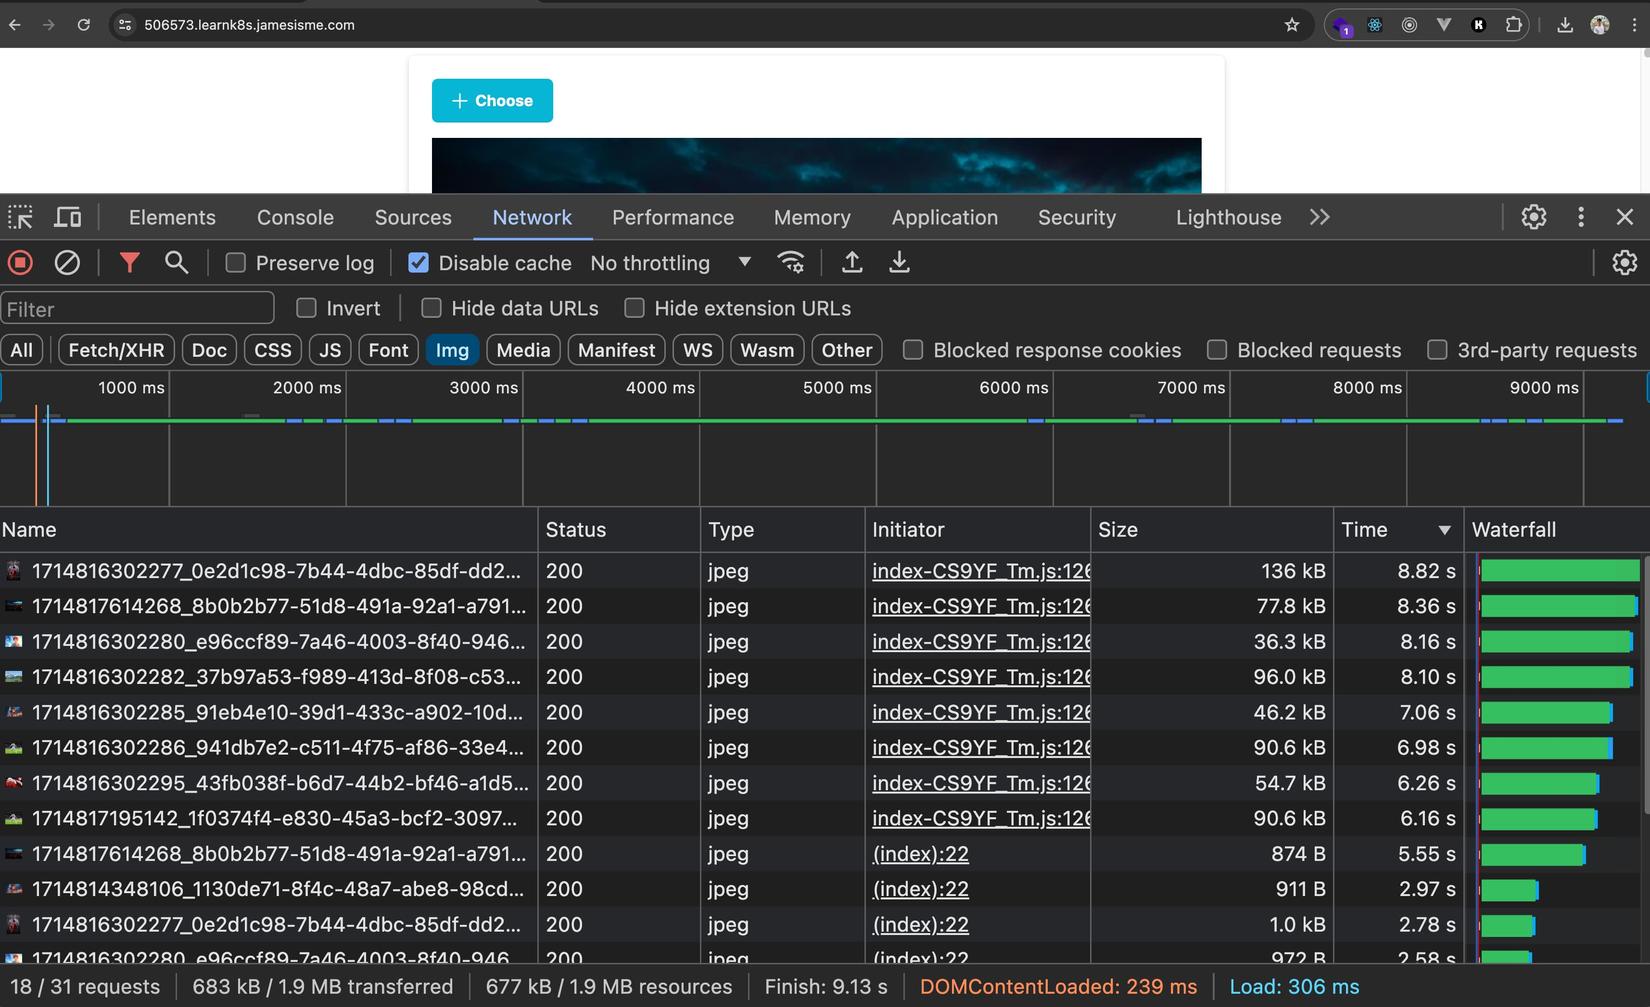
Ta có thể test từ trình duyệt và tick Disable Cache và sẽ thấy với chỉ có tí ảnh như này mà đã hơi chậm rồi 🥲:
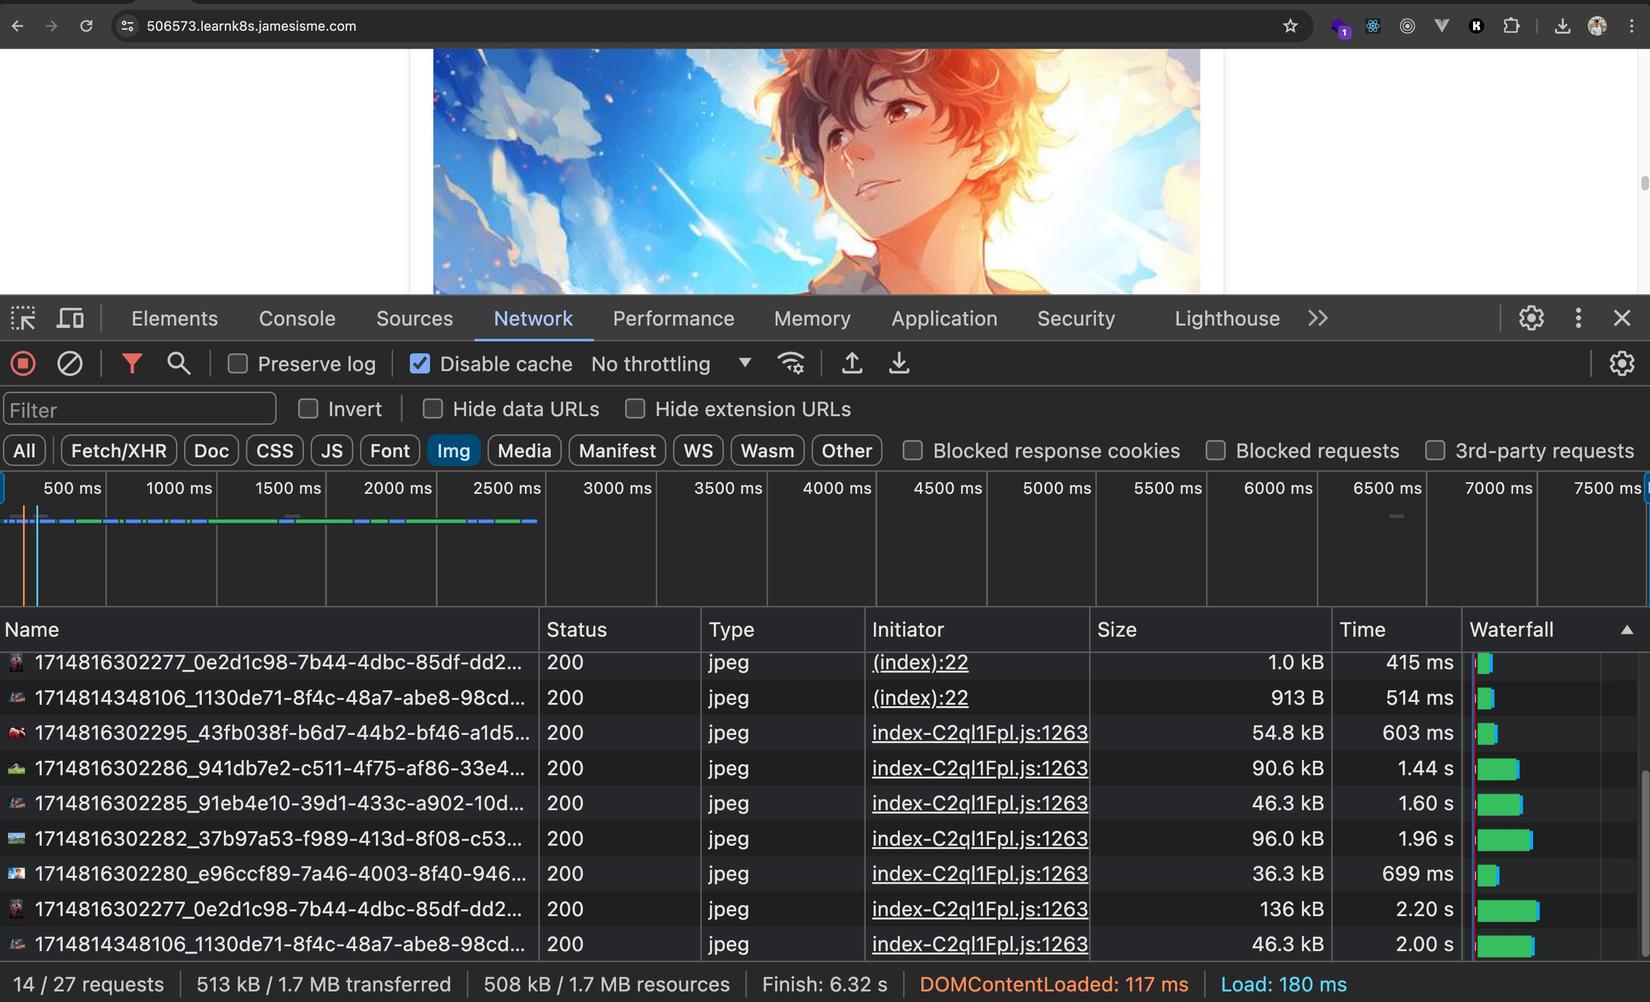
Thật ra do mình cũng đã chủ đích limit CPU của
imgproxythấp một chút để demo cái này cho dễ 😂
Ở trong source code lúc clone về mình cũng để sẵn 1 file image 8k, ta thử upload file này lên và thấy rằng độ lag rất rõ 😂😂:
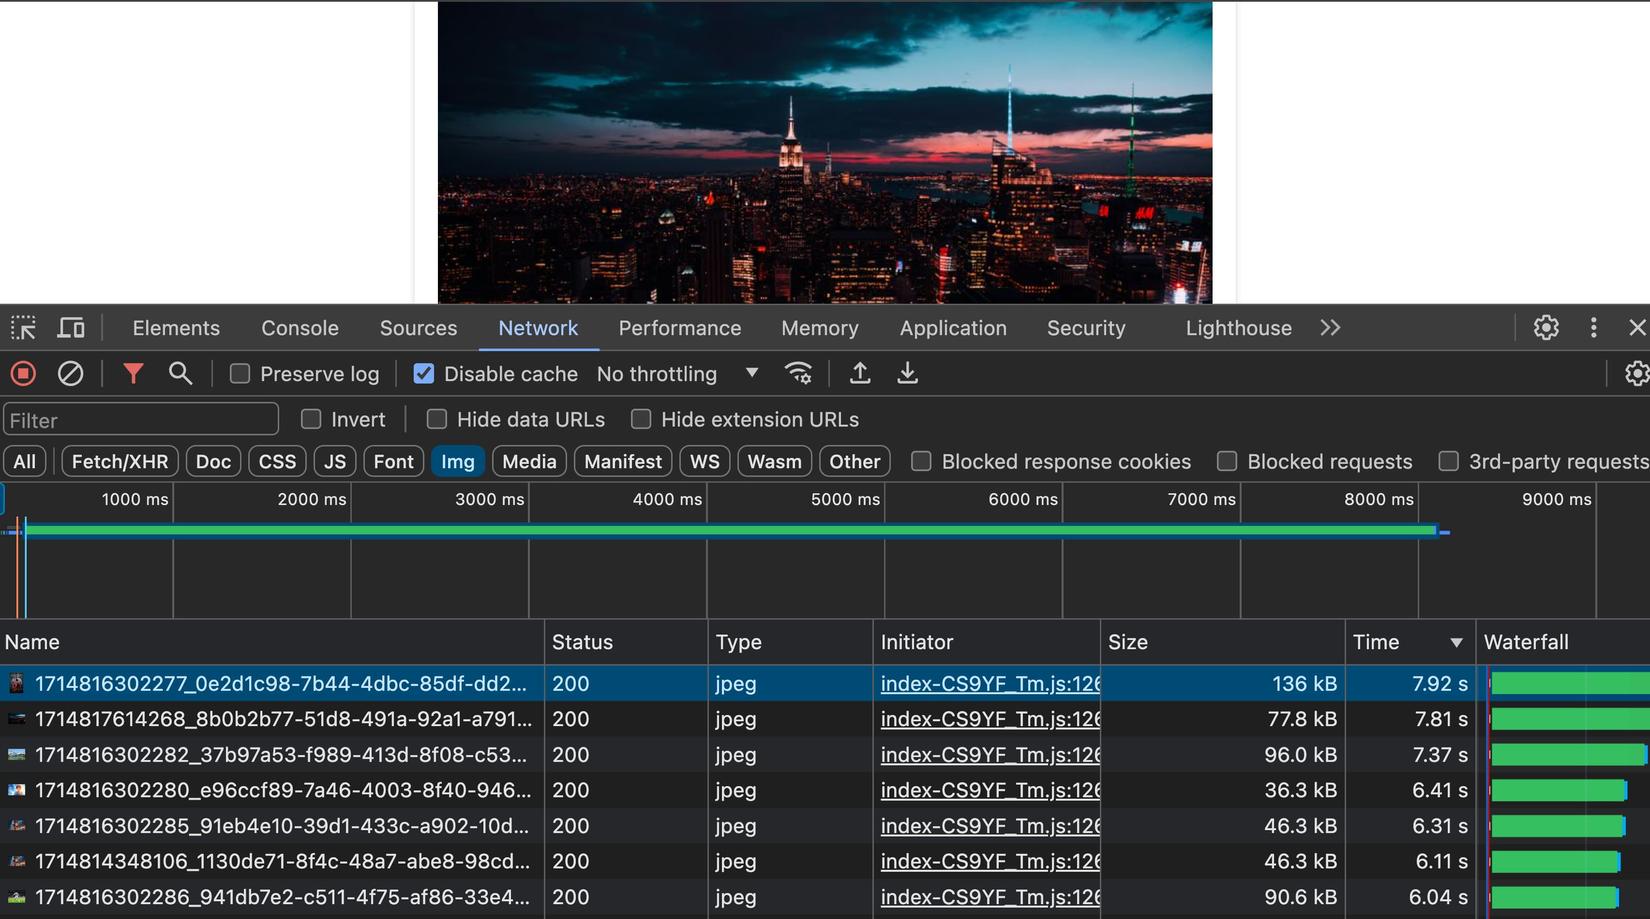
Ta copy lấy địa chỉ của file ảnh 8k kia, như của mình có dạng https://506573.learnk8s.jamesisme.com/images/1714817614268_8b0b2b77-51d8-491a-92a1-a791bd31b543.jpg
Chú ý rằng ta phải lấy URL mà nó chạy vào Server Resize (Imgproxy) ấy nhé (width=825 ấy)
Sau đó ta mở terminal và chạy command sau để fake trafic (thay URL file ảnh 8K các bạn vừa lấy vào nhé):
docker run -it --rm --name load-generator node:20-alpine sh -c "apk add curl && while sleep 0.01; do curl https://506573.learnk8s.jamesisme.com/images/1714817614268_8b0b2b77-51d8-491a-92a1-a791bd31b543.jpg; done"
Trong khi fake traffic được tạo thì ta top pod để lấy lượng resource mà các pod đang dùng xem nhé:
kubectl top po --kubeconfig=./kubernetes-config

--->>>
NAME                        CPU(cores)   MEMORY(bytes)
backend-d46dd9b75-54nq6     10m          47Mi
frontend-7b8bf9f7bb-p2qrc   1m           7Mi
imgproxy-6867c85699-ph6ll   198m         195Mi
Như các bạn thấy, chỉ một tẹo thôi là CPU của imgproxy đã chạm đỉnh:
backend-d46dd9b75-54nq6     11m          29Mi
frontend-7b8bf9f7bb-p2qrc   2m           7Mi
imgproxy-6867c85699-ph6ll   199m         175Mi
Lúc đó ta quay lại trình duyệt F5 cũng thấy ảnh load rất lâu:
Âu cây tới lúc cần setup auto scale cho imgproxy với HorizontalPodAutoscaling rồi đó 🚀🚀🚀. Ta stop fake traffic lại trước khi làm nha (CTRL+C)
Ở folder resize-server ta tạo file hpa.yml:
apiVersion: autoscaling/v2
kind: HorizontalPodAutoscaler
metadata:
  name: imgproxy-hpa
spec:
  scaleTargetRef:
    apiVersion: apps/v1
    kind: Deployment
    name: imgproxy
  minReplicas: 1
  maxReplicas: 5
  metrics:
    - type: Resource
      resource:
        name: cpu
        target:
          type: Utilization
          averageUtilization: 70
Ở trên ta tạo HPA với cấu hình là min=1 pod, max 5 pods, và target mức CPU trung bình <= 70% (tức là khi CPU > 70% thì sẽ bắt đầu scale up)
Ta apply để tạo HPA nha:
kubectl apply -f resize-server/hpa.yml --kubeconfig=./kubernetes-config
Sau đó ta sẽ watch HPA và xem có gì xảy ra khi mà server resize bị quá tải nhé:
kubectl get hpa --kubeconfig=./kubernetes-config --watch

--->>>
NAME           REFERENCE             TARGETS   MINPODS   MAXPODS   REPLICAS   AGE
imgproxy-hpa   Deployment/imgproxy   1%/70%    1         5         1          86s
Ở trên ta thấy mức tiêu thụ CPU hiện tại là 1%/70%
Ta mở terminal mới và bắt đầu fake traffic tiếp nha:
docker run -it --rm --name load-generator node:20-alpine sh -c "apk add curl && while sleep 0.1; do curl https://506573.learnk8s.jamesisme.com/images/1714817614268_8b0b2b77-51d8-491a-92a1-a791bd31b543.jpg; done"
Sau đó ta quan sát terminal watch hpa đang chạy nãy giờ nhé:
NAME           REFERENCE             TARGETS   MINPODS   MAXPODS   REPLICAS   AGE
imgproxy-hpa   Deployment/imgproxy   1%/70%    1         5         1          86s
imgproxy-hpa   Deployment/imgproxy   234%/70%   1         5         1          3m30s
imgproxy-hpa   Deployment/imgproxy   298%/70%   1         5         4          3m45s
imgproxy-hpa   Deployment/imgproxy   175%/70%   1         5         4          4m
imgproxy-hpa   Deployment/imgproxy   41%/70%    1         5         5          4m15s
imgproxy-hpa   Deployment/imgproxy   73%/70%    1         5         5          4m30s
imgproxy-hpa   Deployment/imgproxy   70%/70%    1         5         5          4m45s
imgproxy-hpa   Deployment/imgproxy   65%/70%    1         5         5          5m
imgproxy-hpa   Deployment/imgproxy   54%/70%    1         5         5          5m15s
Trong quá trình fake traffic nếu ta quan sát từ trình duyệt sẽ thấy đoạn đầu khá chậm, chờ tẹo thì thấy ổn định dần
Quan sát terminal phía HPA ta thấy rằng HPA đã scale số pod lên 5 pod và lượng CPU trung bình đã giảm dần đi
Thử get pod cũng sẽ thấy số pod imgproxy cũng đã tự động tăng lên:
kubectl get po --kubeconfig=./kubernetes-config

--->>>
NAME                        READY   STATUS    RESTARTS   AGE
backend-d46dd9b75-54nq6     1/1     Running   0          115m
frontend-7b8bf9f7bb-p2qrc   1/1     Running   0          33m
imgproxy-6867c85699-6zvxf   1/1     Running   0          4m
imgproxy-6867c85699-htkz5   1/1     Running   0          3m30s
imgproxy-6867c85699-htlnx   1/1     Running   0          4m
imgproxy-6867c85699-ms2nl   1/1     Running   0          4m
imgproxy-6867c85699-ph6ll   1/1     Running   0          126m
Giờ ta stop fake traffic đi nhé (CTRL+C), và ta sẽ thấy rằng HPA sẽ dần dần scale down số lượng pod:
imgproxy-hpa   Deployment/imgproxy   68%/70%   1         5         5          8m5s
imgproxy-hpa   Deployment/imgproxy   1%/70%    1         5         5          8m15s
imgproxy-hpa   Deployment/imgproxy   1%/70%    1         5         5          11m
imgproxy-hpa   Deployment/imgproxy   1%/70%    1         5         5          13m
imgproxy-hpa   Deployment/imgproxy   1%/70%    1         5         1          13m
Quá trình scale down mặc định hơi lâu vì HPA thấy "ổn thì mới scale xuống" tránh trường hợp vừa scale xuống thì traffic lại tăng. Cái này ta có thể config được nhé
Cache image
Ở bài này ta cũng sẽ làm theo như bài của Viblo, đó là ta sẽ cache image được resize để những request sau thì ta không cần phải gọi lại vào server resize (imgproxy) nữa. Và điều này cũng hợp lý, vì với 1 ảnh thì lần nào resize thì output cũng tương tự nhau và ta không cần lặp đi lặp lại điều này quá nhiều.
Ta sẽ tận dụng proxy-cache của nginx (ở frontend) luôn nhé.
Ta update lại file frontend/configmap.yml chút nha:
apiVersion: v1
kind: ConfigMap
metadata:
  name: frontend
data:
  nginx.conf: |
    user  nginx;
    worker_processes  auto;

    error_log  /var/log/nginx/error.log notice;
    pid        /var/run/nginx.pid;

    events {
        worker_connections  1024;
    }

    http {
        include       /etc/nginx/mime.types;
        default_type  application/octet-stream;

        log_format  main  '$remote_addr - $remote_user [$time_local] "$request" '
                          '$status $body_bytes_sent "$http_referer" '
                          '"$http_user_agent" "$http_x_forwarded_for"';

        access_log  /var/log/nginx/access.log  main;

        sendfile        on;
        #tcp_nopush     on;

        keepalive_timeout  65;

        #gzip  on;
        proxy_cache_path    /var/cache/nginx keys_zone=image-cache:10m;
        include /etc/nginx/conf.d/*.conf;
    }
  app.nginx.config: |
    server {
        listen       80;
        listen  [::]:80;
        server_name  localhost;

        server_tokens off;

        client_max_body_size 1G;

        proxy_intercept_errors on;
        error_page 404 /404.html;


        location / {
            root   /usr/share/nginx/html;
            index  index.html index.htm;
        }

        location /api {
            proxy_pass http://backend:80;
            proxy_set_header Host $host;
            proxy_set_header x-forwarded-for $remote_addr;
            proxy_set_header X-Forwarded-Proto $scheme;
        }

        location /images/full {
            proxy_pass http://backend:80/images/;
            proxy_set_header Host $host;
            proxy_set_header x-forwarded-for $remote_addr;
            proxy_set_header X-Forwarded-Proto $scheme;
        }

        location /images/tiny {
            rewrite ^/images/tiny/(.*)$ /insecure/resize:fit:20:0:no:0/plain/http://backend:80/images/$1 break;

            proxy_pass http://imgproxy:80;
            proxy_set_header Host $host;
            proxy_set_header x-forwarded-for $remote_addr;
            proxy_set_header X-Forwarded-Proto $scheme;

            proxy_cache             image-cache;
            proxy_cache_key         $uri$http_accept;
            proxy_cache_lock        on;
        }

        location /images {
            rewrite ^/images/(.*)$ /insecure/resize:fit:825:0:no:0/plain/http://backend:80/images/$1 break;

            proxy_pass http://imgproxy:80;
            proxy_set_header Host $host;
            proxy_set_header x-forwarded-for $remote_addr;
            proxy_set_header X-Forwarded-Proto $scheme;

            proxy_cache             image-cache;
            proxy_cache_key         $uri$http_accept;
            proxy_cache_lock        on;
        }

        error_page   500 502 503 504  /50x.html;
        location = /50x.html {
            root   /usr/share/nginx/html;
        }
    }
Ở trên mình đã thêm vào file nginx.conf đây là file cấu hình tổng của nginx, ở đó thì mình chỉ copy content từ file mặc định và thêm vào dòng proxy_cache_path .... Sau đó ở file app.nginx.conf thì với 2 location mà proxy sang Resize Server (imgproxy) thì ta thêm vào proxy_cache ...
Ở trên ta cache ảnh trong
10m=10 phút
oke rồi giờ ta apply configmap nha:
kubectl apply -f frontend/configmap.yml --kubeconfig=./kubernetes-config

--->>>
configmap/frontend configured
Sau đó ta sửa lại file frontend/deployment.yml để mount file cấu hình tổng của nginx kia từ configmap vào container nha:
apiVersion: apps/v1
kind: Deployment
metadata:
  name: frontend
  labels:
    app.kubernetes.io/name: viblo-image-server-frontend
spec:
  selector:
    matchLabels:
      app: frontend
  template:
    metadata:
      labels:
        app: frontend
    spec:
      volumes:
        - name: nginx-config
          configMap:
            name: frontend
            items:
              - key: app.nginx.config
                path: app.nginx.config
        - name: nginx-master-config
          configMap:
            name: frontend
            items:
              - key: nginx.conf
                path: nginx.conf
      containers:
      - name: my-frontend
        image: maitrungduc1410/viblo-image-server-frontend:latest
        ports:
        - containerPort: 80
          name: pod-http
        resources:
          requests:
            memory: "128Mi"
            cpu: "64m"
          limits:
            memory: "500Mi"
            cpu: "250m"
        volumeMounts:
        - name: nginx-config
          mountPath: "/etc/nginx/conf.d/default.conf"
          subPath: app.nginx.config
          readOnly: true
        - name: nginx-master-config
          mountPath: "/etc/nginx/nginx.conf"
          subPath: nginx.conf
          readOnly: true
Ở trên thì vì ta mount configmap ra một đường dẫn khác, nên ta khai báo thêm 1. volumes nữa, nhưng vẫn là chung 1 configmap
Oke rồi ta apply lại deployment của frontend nhé:
kubectl apply -f frontend/deployment.yml --kubeconfig=./kubernetes-config
Sau đó ta quay lại trình duyệt để test nha, các bạn nhớ check vào Disable cache để tắt cache từ trình duyệt để quan sát cho rõ nhé. Ta sẽ thấy là với request đầu tiên thì vẫn chậm, nhưng từ lần thứ 2 trở đi thì nhanh đột biến:
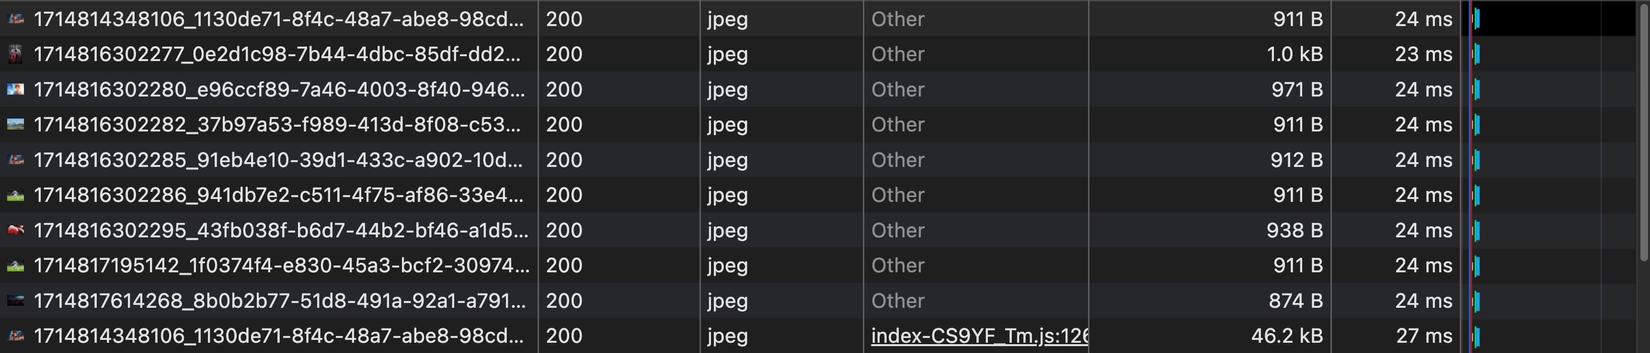
Bình thường nếu không có cache thì nếu ta check logs realtime của imgproxy (thay tên pod của các bạn vào cho đúng nhé):
kubectl logs imgproxy-6867c85699-htlnx -f --kubeconfig=./kubernetes-config
Thì sẽ thấy là mỗi khi imgproxy nhận được request là nó log ra console ngay:
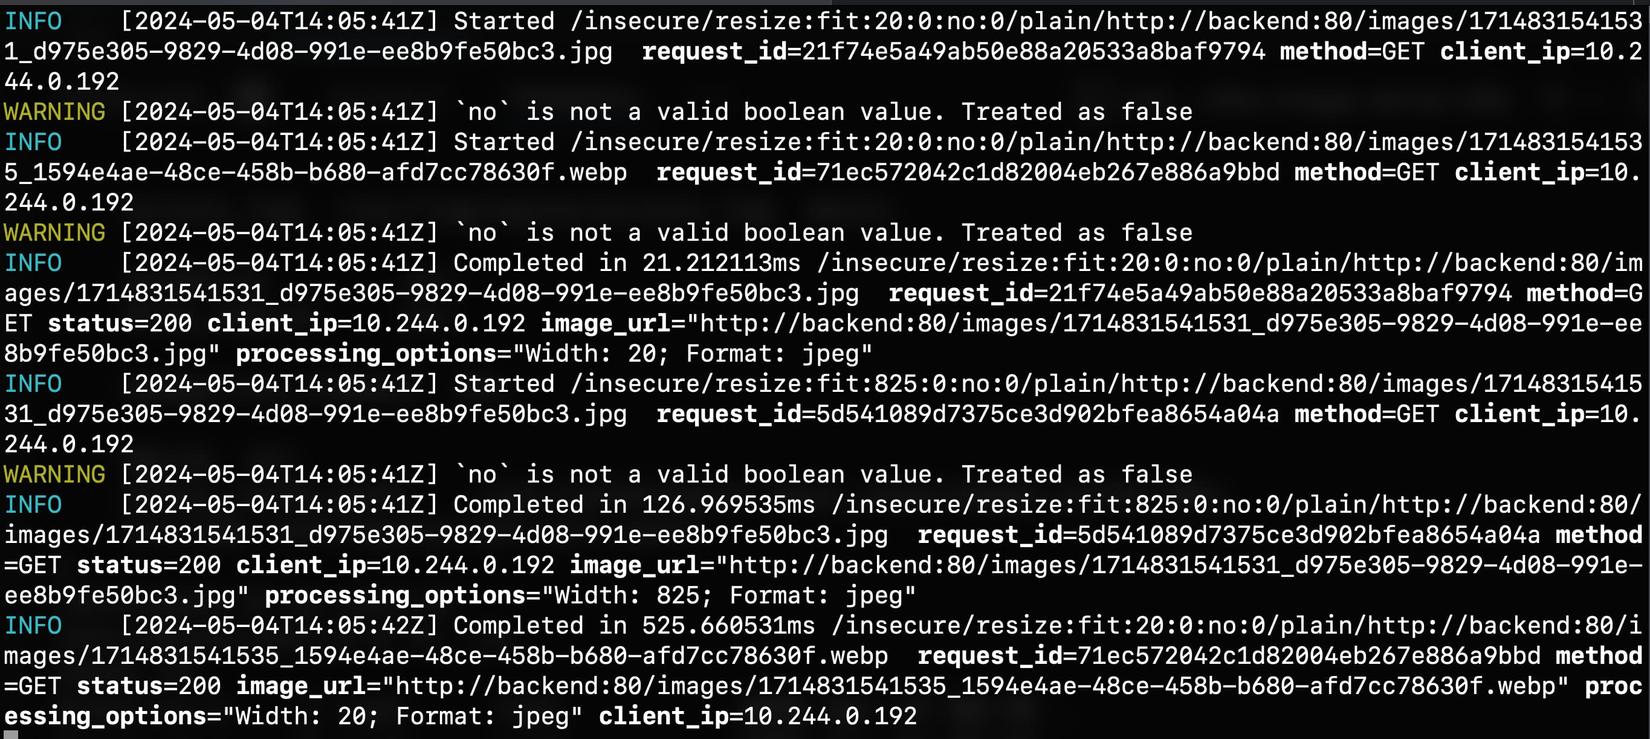
Nhưng kể từ khi có caching phía frontend(nginx) thì request không cần tới nó nữa nên log không còn mấy nữa. Chỉ khi ta upload ảnh mới lên thì nó chạy và in thêm log ra.
Và vì như vậy nên HPA sẽ rất ít khi phải làm việc, quá toẹt vời 🥳🥳🥳🥳🥳
À chú ý là vì ta không có mount volume gì để giữ lại cache cho frontend hết trơn, nên nếu ta redeploy lại frontend thì cache sẽ mất
Chấm hết
Phewwwwwwwwwww 🥶🥶🥶😵😵😵 Viết xong bài này suýt tụt đường huyết 🤣 dài quá trời dài
Nhưng hi vọng qua đây các bạn đã có thể hiểu + triển khai được một ví dụ từ thực tế đó là deploy server để lưu trữ và resize ảnh giống như của Viblo đang làm, từ đó ta hiểu hơn về những gì đang xảy ra xung quanh, những product mà ta dùng hàng ngày nó hoạt động ra sao, chạy như thế nào. Và chính chúng ta cũng có thể làm được điều tương tự 🥰
Đây là tất cả những file manifest ta có khi làm xong bài này 🤩🤩🤩:
Chúc các bạn buổi tối cuối tuần vui vẻ và tràn đầy yêu thương. Hẹn gặp lại các bạn ở những bài sau 👋
All rights reserved
