Deploy Rails with Capistrano, Docker, Nginx, Puma(Part 2)
Bài đăng này đã không được cập nhật trong 3 năm
2. Chuẩn bị Project
a. Init project
Nếu bạn đã có sẵn project rồi thì có thể bỏ qua bước này nhé. Ở bước này mình sẽ tạo nhanh một project nhỏ phục vụ cho việc demo deploy. Và mình sẽ chỉ nêu một số thao tác cần thiết thôi nhé  .
.
-
Khởi tạo project:
rails new test_cap -d mysql -
Các bạn config database và setup db:
# MySQL. Versions 5.5.8 and up are supported. # # Install the MySQL driver # gem install mysql2 # # Ensure the MySQL gem is defined in your Gemfile # gem 'mysql2' # # And be sure to use new-style password hashing: # https://dev.mysql.com/doc/refman/5.7/en/password-hashing.html # default: &default adapter: mysql2 encoding: utf8mb4 pool: <%= ENV.fetch("RAILS_MAX_THREADS") { 5 } %> username: <%= ENV.fetch("DB_USER", "root") %> password: <%= ENV.fetch("DB_PASSWORD", 123456) %> socket: /var/run/mysqld/mysqld.sock development: <<: *default database: cap_viblo_development test: <<: *default database: cap_viblo_test production: <<: *default database: cap_viblo_production username: <%= ENV.fetch("DB_USER") %> password: <%= ENV.fetch("DB_PASSWORD") %> -
Mình dùng scaffold Posts để tạo nhanh một resource Post
rails generate scaffold Post title:string content:text -
Thử bật rails app bằng
rails servervà truy cập vàohttp://localhost:3000/postsxem kết qủa thôi nào
![]()

 Đến đây là chúng ta đã hoàn tất việc setup project rồi
b. Config Capistrano và Puma
-
Cài đặt
capistrano:- Thêm
capistranogem:# Thêm line dưới vào Gemfile gem "capistrano", "~> 3.14", require: false - Để có thể dùng được gem vừa add vào ta chạy lại bundle install ở terminal:
bundle install - Tiến hành khởi tạo
cap:bundle exec cap install
- Thêm
-
Config
capistrano:- Config file
config/deploy.rb:set :application, "test_cap_deploy" # Đặt tên cho việc deploy set :repo_url, "git@github.com:vovanquang12cntt/demo_capistrano.git" # Set repo để lấy code set :branch, :master # Set branch sẽ sử dụng set :rvm_type, :user # Set sử dụng rvm set :pty, true set :keep_releases, 5 # Số lượng phiên bản release tối đa sẽ giữ lại set :linked_files, %w{.env} # Các file sử dụng để liên kết. Các file này được đặt trong thư mục "shared" như nói ở trên set :linked_dirs, %w{log tmp/pids tmp/cache tmp/sockets vendor/bundle public/upload} # Các thư mục sẽ được sử dụng lại sau mỗi lần deploy set :bundle_binstubs, nil set :puma_rackup, -> { File.join(current_path, "config.ru") } set :puma_state, -> { "#{shared_path}/tmp/pids/puma.state" } set :puma_pid, -> { "#{shared_path}/tmp/pids/puma.pid" } set :puma_bind, -> { "unix://#{shared_path}/tmp/sockets/puma.sock" } set :puma_conf, -> { "#{shared_path}/puma.rb" } set :puma_access_log, -> { "#{shared_path}/log/puma_access.log" } set :puma_error_log, -> { "#{shared_path}/log/puma_error.log" } set :puma_role, :app set :puma_env, fetch(:rack_env, fetch(:rails_env, "staging")) set :puma_threads, [0, 8] set :puma_workers, 0 set :puma_worker_timeout, nil set :puma_init_active_record, true set :puma_preload_app, false set :rvm_ruby_string, :local set :ssh_options, { forward_agent: true, auth_methods: %w{publickey} } set :tmp_dir, "/tmp/deploy-#{Time.now.to_f}" - Config file
deploy/production.rb: Ở bài viết này mình sẽ thử deploy lên môi trườngproductionnên mình sẽ config filedeploy/production.rbnày, còn mn deploy ở môi trường khác thì config trên file tương ứng với môi trường cần deploy nhéset :stage, :production set :rails_env, :production set :deploy_to, "~/cap_app" server "172.17.0.2", user: "deploy", roles: %w(web app db) - Config
Capfile:require "capistrano/setup" require "capistrano/deploy" require "capistrano/scm/git" install_plugin Capistrano::SCM::Git require "capistrano/rvm" require "capistrano/bundler" require "capistrano/rails/assets" require "capistrano/rails/migrations" require "capistrano/puma" install_plugin Capistrano::Puma Dir.glob("lib/capistrano/tasks/*.rake").each { |r| import r } - Thêm gem và sau đó
bundle installlại nhé:gem "capistrano3-puma" gem "capistrano-rails", require: false gem "capistrano-bundler", require: false gem "capistrano-rvm" gem "dotenv-rails"
- Config file
-
Config
puma: Thêm đoạn code phía dưới vào fileconfig/puma.rbworkers 2 # Min and Max threads per worker threads 1, 6 app_dir = File.expand_path("../..", __FILE__) shared_dir = "#{app_dir}/shared" # Default to production rails_env = ENV['RAILS_ENV'] || "production" environment rails_env # Set up socket location bind "unix://#{shared_dir}/tmp/sockets/puma.sock" # Logging stdout_redirect "#{shared_dir}/log/puma.stdout.log", "#{shared_dir}/log/puma.stderr.log", true # Set master PID and state locations pidfile "#{shared_dir}/tmp/pids/puma.pid" state_path "#{shared_dir}/tmp/pids/puma.state" activate_control_app
3. Tiến hành deploy
 Đến giây phút quan trọng cho việc deploy và fix đây
-
Deploy lần 1:
-
Thực hiện deploy
cap production deploy -
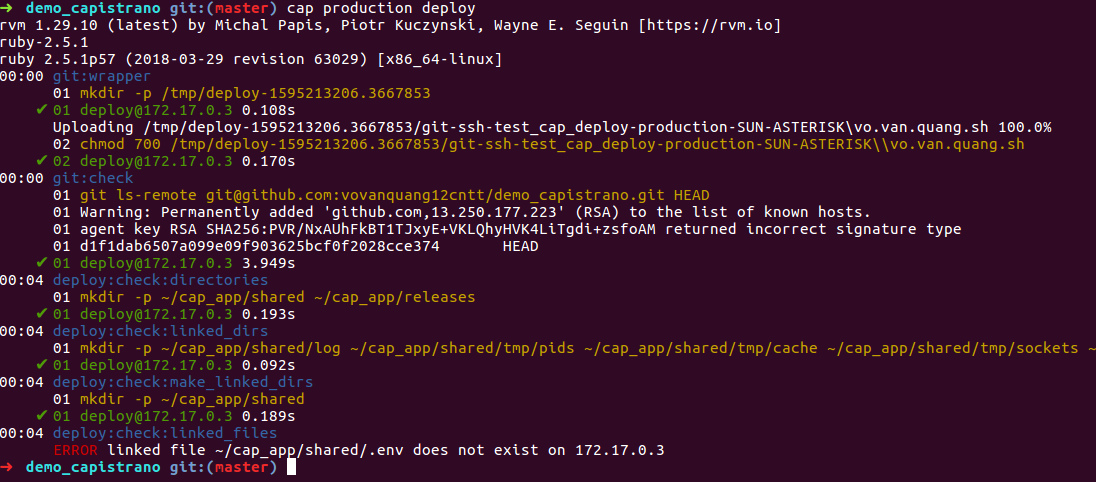
Và lỗi mình nhận được là tn đây:
![]()
-
Lỗi này do trong file
config/deploy.rbmình có config link fileset :linked_files, %w{.env}nên khi deploy code lên server thì ban đầu không có file.env-> để fix lỗi này thì đơn giản mn chỉ cần tạo 1 file.envở thư mục~/cap_app/sharedở trên server là dk nhé.# .env DB_USER=deploy DB_PASSWORD=123456
-
-
Deploy lần 2:
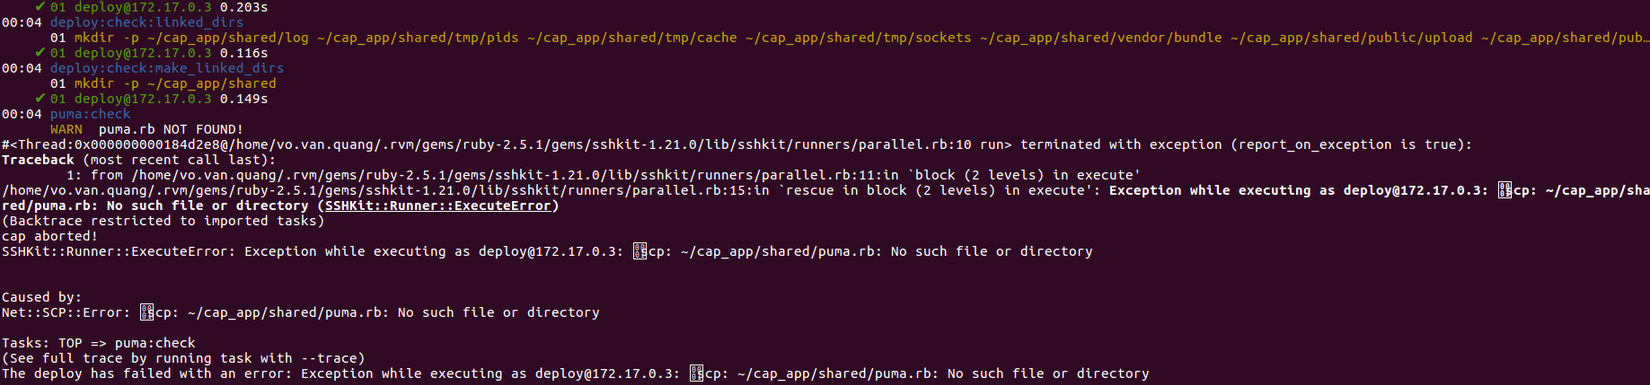
- Và lỗi mình nhận được là tn đây:
![]()
- Lỗi này do thiếu file
puma.rbtrong thư mục~/cap_app/sharedở trên server, cách fix tương tự ở trên, mn add fileconfig/puma.rbở local lên~/cap_app/shared/server nhé
- Và lỗi mình nhận được là tn đây:
-
Deploy lần 3:
-
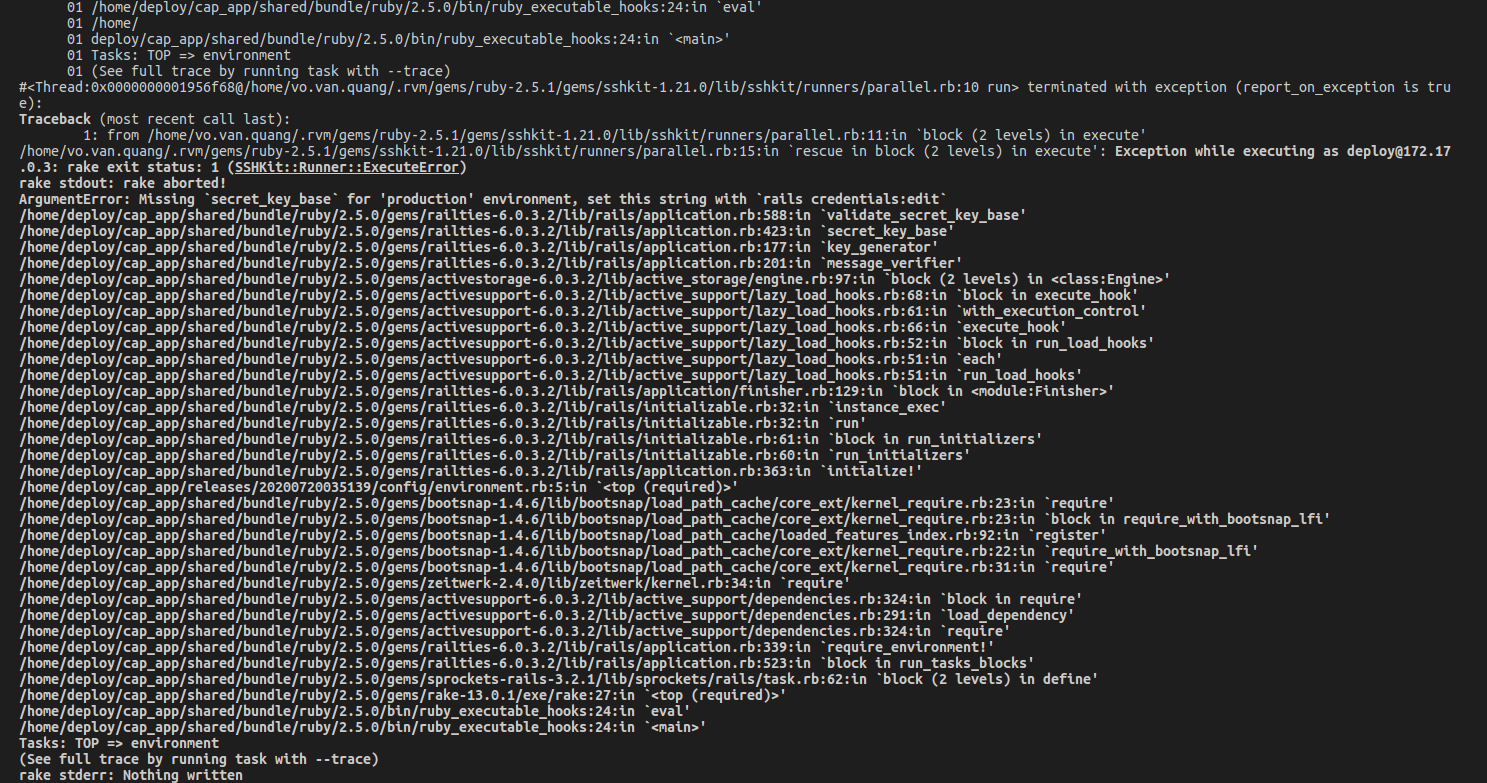
Lỗi tiếp theo đây
:
![]()
-
Theo như log thì lỗi này do thiếu
secret_key_base: Cách fix thì gồm các bước như sau:-
Đầu tiên mọi người tạo mới file
config/secrets.ymlvới nội dung như dưới:production: secret_key_base: <%= ENV["SECRET_KEY_BASE"] %> -
Tiếp đến ở termial folder dự án mn chạy lệnh sau:
EDITOR="mate --wait" bin/rails credentials:edit![]()
-
Tiếp đến mn chạy lênh
rake secretthì sẽ có đoạn text xuât hiện trên terminal -> copy đoạn text này lại -
Mở file
.envở thư mục~/cap_app/sharedtrên server:SECRET_KEY_BASE=text bạn vừa copy ở trên RAILS_MASTER_KEY=copy key ở file config/master.key ... -
Save lại và tiến hành thử deploy lại nhé
-
-
-
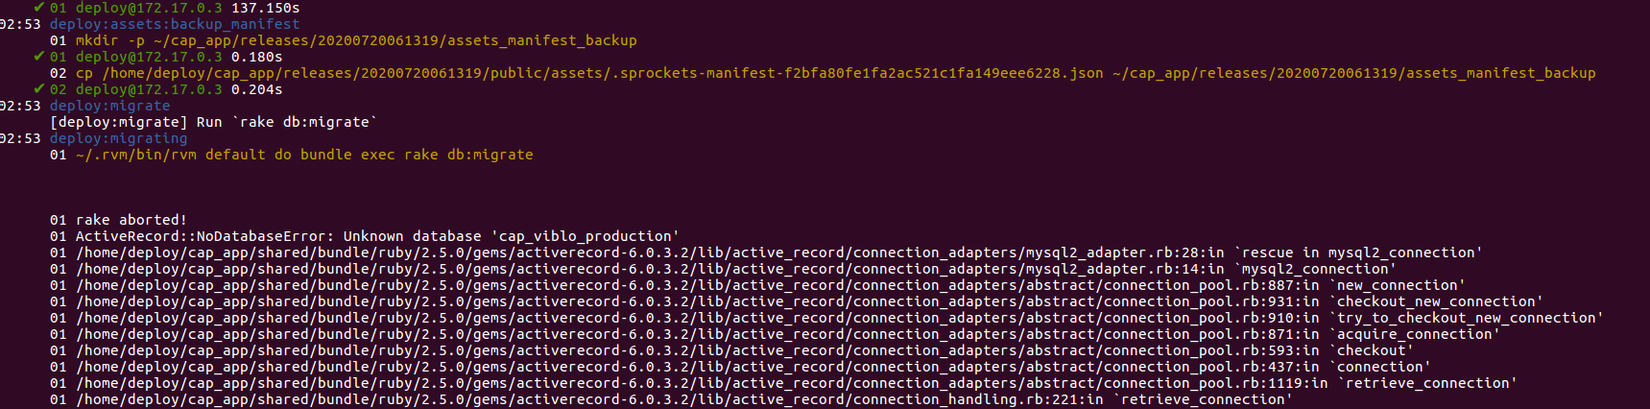
Tiếp tục với deploy lần 4:
-
Vẫn còn lỗi nữa
![]()
-
Lỗi này là do trong
capchưa có lệnhrake db:createnên lần đầu deploy thì database chưa tồn tại. Để fix lỗi này thì có 2 cách:- Cách 1: Tạo rake task để thực thi lệnh
rake db:createtrước lệnhrake db:migrate - Cách 2: Lên server deploy tạo tay một database với tên là
cap_viblo_production
- Cách 1: Tạo rake task để thực thi lệnh
-
-
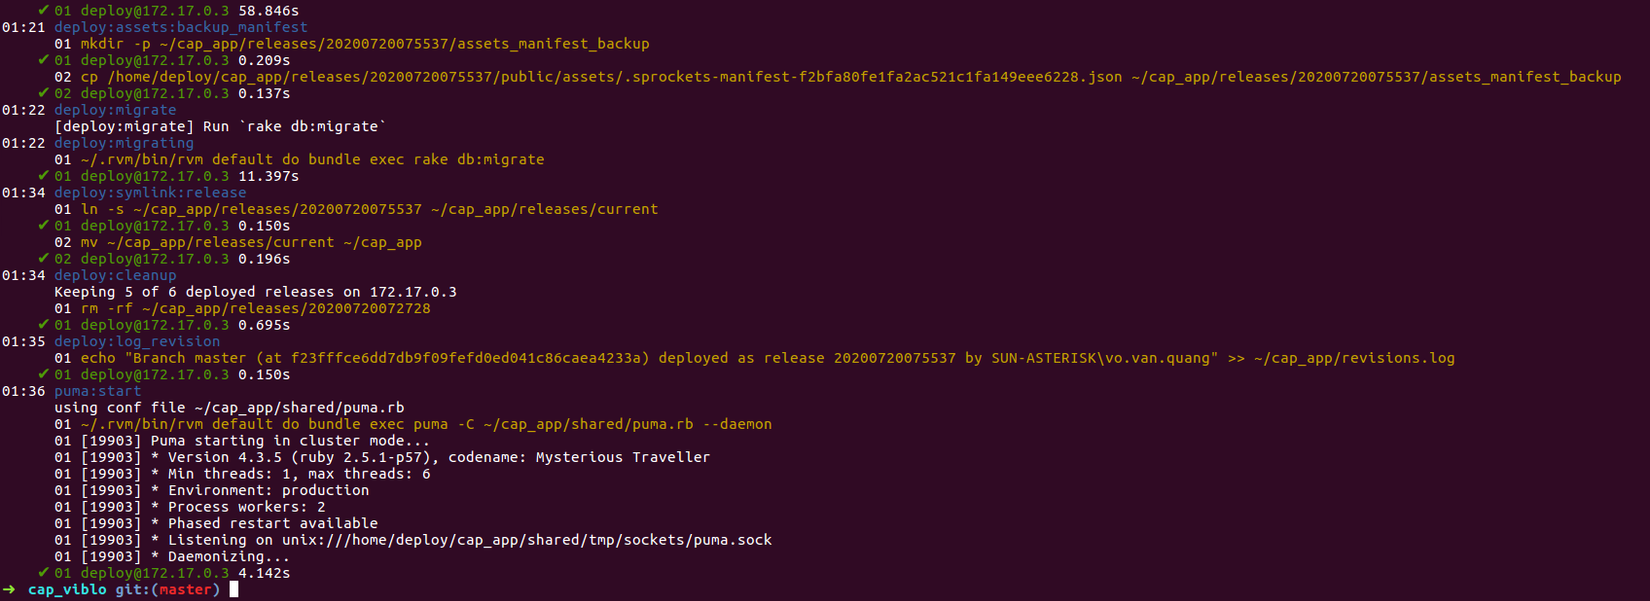
Tiếp lần nữa xem nào:
![]()
-
Thử truy cập vào server xem có bị gì không nào:
http://172.17.0.3/posts![]()

 Cuối cùng cũng deploy thành công rồi, mừng hết lớn luôn ae ơi
4. Một số lưu ý
- Trước khi truy cập vào
http://172.17.0.3/poststhì mn nhớ check lại status củanginx,mysqlxem nó hoạt động không nhé - Có thể mỗi máy sẽ có thêm một số lỗi riêng -> nếu gặp lỗi thì cứ comment vào bài viết để mn cùng support nhé
- Để deploy thành công thì mn phải đọc kĩ tường step mà mình đã define ở cả 2 phần: phần này và phần 1
Bài viết đến đây là hết rồi, chúc mn deploy thành công.
Happy Coding!
All rights reserved
