Connecting to RabbitMQ From Go
Bài đăng này đã không được cập nhật trong 3 năm
Basic Concept
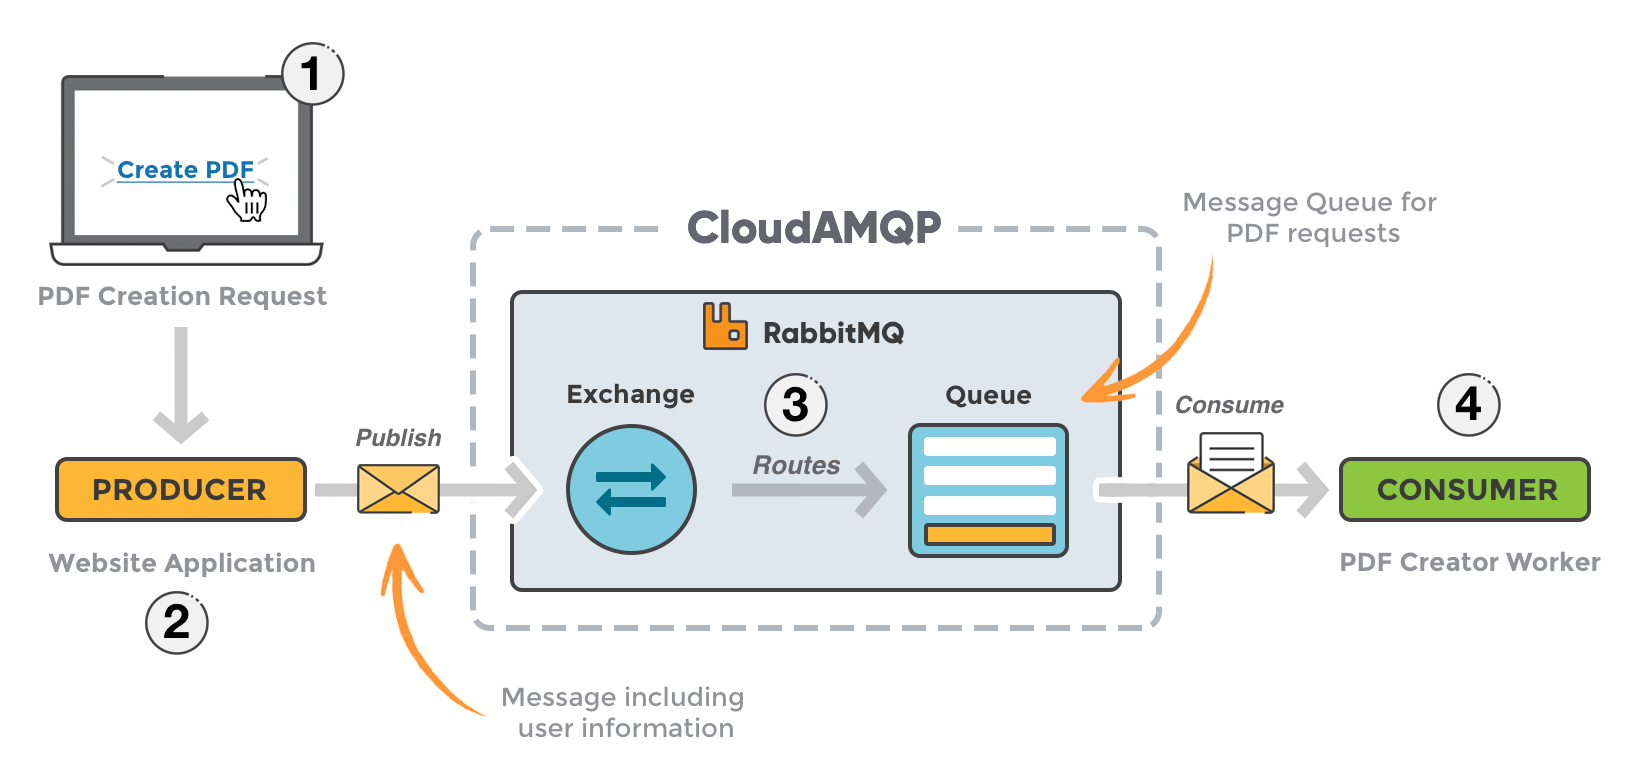
RabbitMQ concept is simple, there are three main participants. Client applications called producers that create messages and deliver them, message borker (the message queue) that receive and dispatch the message and other applications, called consumers, connect to the queue and subscribe to the messages to be processed. Messages are push to exchange, which are then routed to the queue base on routing key.
Connecting to RabbitMQ
Before we get start we need to install RabbitMQ and the easiest way to do that is to use docker image. Execute the following command to get RabbitMQ running.
$ docker run -p 5672:5672 -p 15672:15672 rabbitmq:3-management
Port 5672 is for connecting to the broker and port 15672 is for accessing management interface. The default username/password is guest/guest.
Because RabbitMQ run on AMQP protocol, to connect to RabbitMQ from Go application we need to install go get github.com/streadway/amqp. Then in our go code
import "github.com/streadway/amqp"

func main() {
    conn, err := amqp.Dial("amqp://guest:guest@localhost:5672")
    if err != nil {
        log.Fatal(err)
    }
    defer conn.Close()
}
Consume Message
To start receiving message we need to create an exchange and a queue. We can do it with the following code
// consumer.go
ch, err := conn.Channel()
if err != nil {
    log.Fatal(err)
}
defer ch.Close()

err = ch.ExchangeDeclare(
    "hello_exchange",
    "direct",
    false,
    false,
    false,
    false,
    nil,
)
if err != nil {
    log.Fatal(err)
}

queue, err := ch.QueueDeclare(
    "hello",
    false,
    false,
    false,
    false,
    nil,
)
if err != nil {
    log.Fatal(err)
}

err = ch.QueueBind(
    queue.Name,
    "world",
    "hello_exchange",
    false,
    nil,
)
if err != nil {
    log.Fatal(err)
}
This will create an exchange name hello_exchange, a queue name hello and then bind this queue to the exchange with world as a routing key. So a message send to hello_exchange with a routing key world to get routed to hello queue.
Next to listen for incoming message
msgs, err := ch.Consume(
    queue.Name,
    "", // consumer name
    false,
    false,
    false,
    false,
    nil,
)
if err != nil {
    log.Fatal(err)
}

for msg := range msgs {
    fmt.Println(string(msg.Body))
}
Publish Message
To start publishing message we need to open up connection, create a channel and push message to particular exchange with appropriate routing key. Let see how to do it.
// publisher.go
// Refer to "Connecting to RabbitMQ" on how to open up connection
ch, err := conn.Channel()
if err != nil {
    log.Fatal(err)
}
defer ch.Close()

err = ch.Publish(
    "hello_exchange",
    "world",
    false,
    false,
    amqp.Publishing{
        ContentType: "text/plain",
        []byte("Hello, Norin!"),
    },
)
if err != nil {
    log.Fatal(err)
}
Testing
To test and see if this is working or not, start by open up your favorite terminal and run the following
$ go run consumer.go
This will start up a consumer and waiting for incoming connection. Next open a new terminal tab and run
$ go run publisher.go
Then check your other consumer tab you will see "Hello, Norin!" print out to your terminal.
Conclusion
There are a lot more to RabbitMQ that you can explore, but I hope this little demonstration can serve as a starting point for you.
All rights reserved
